

To test air circuit breakers safely, you need to follow important steps. These steps keep people and equipment safe. Always wear the right safety gear. Make sure the breaker is not connected to power. IEEE studies show that 23% of electrical failures in factories are from circuit breaker problems. This means regular testing is very important for safety. Use the standard tests below to find problems early and keep things working well:
| Test Name | Description |
|---|---|
| Control Wiring Tests | Test the insulation resistance of control wires. This finds if the insulation is getting worse or damaged. |
| Primary Injection Testing | Checks if the trip unit works for long time, short time, instant, and ground fault pickups. |
| Auxiliary Features Testing | Checks trip and pickup lights, zone interlocking, electrical close, shunt trip, and anti-pump features. |
| Reset Trip Logs | Makes sure the breaker is empty and ready to use after testing. |
Finding problems early helps stop expensive downtime and keeps your system safe.
Key Takeaways
- Always wear the right safety gear and turn off power before testing air circuit breakers. This keeps you and others safe.
- Look at the breaker often and clean it to spot problems early. Fixing issues early stops expensive failures.
- Use common tests like insulation resistance, contact resistance, and primary injection to check how the breaker works.
- Set and adjust breaker settings the right way to stop false trips. This helps the breaker protect things well.
- Write down all tests and problems to watch breaker health and follow safety rules.
Safety Precautions
PPE
When you test air circuit breakers, you need to wear PPE. This gear helps keep you safe from burns, shocks, and flying things. The table below lists the main types of PPE and what they protect you from:
| PPE Category | Examples / Description | Protection Provided |
|---|---|---|
| Head Protection | Helmets with electrical performance classes (Class A and B) | Electrical conductors, impact, penetration |
| Leg and Foot Protection | Steel-toed boots, leggings, footguards | Rolling/falling objects, molten metal, slippery surfaces |
| Face and Eye Protection | Safety glasses, goggles, face shields | Chemicals, flying particles, vapors, arc flash hazards |
| Ear Protection | Earplugs, earmuffs | Noise-induced hearing loss |
| Hand and Arm Protection | Insulating gloves and sleeves made of rubber | Electric shock, burns, cuts, chemical absorption |
| Respiratory Protection | Face masks, filtering respirators, powered air-purifying respirators | Toxic fumes, smoke, vapors, dust |
You should also use insulated tools and arc-rated clothes. Face shields help protect you from arc flashes. Always follow lockout/tagout and grounding steps before you start.
Power Isolation
Before testing air circuit breakers, make sure the equipment is safe. Follow these steps to keep power away:
- Do a risk check as NFPA 70E says.
- Make a safe work area with barriers or helpers.
- Fill out an EEWP that lists PPE and risks.
- Lock and tag all power sources.
- Check your voltage tester to see if it works.
- Put on the right PPE and check the arc flash zone.
- Use a voltage tester or multimeter to check for live wires.
- Remember: Equipment is not safe until you know it is off.
⚠️ One time, a crew thought a 4.16 kV system was off, but a last voltage check showed it was still on. Always test before you touch. “It’s not dead until you prove it is dead.”
Workspace Setup
Set up your workspace to keep everyone safe. Here are some steps to follow:
- Get all tools and PPE, like gloves, goggles, and boots.
- Mark any live wires to stop accidents.
- Use voltage testers to make sure wires are off.
- Turn off backup power so nothing surprises you.
- Clean dust and dirt from the breaker panel.
- Plan regular checks to find problems early.
- Test the breaker often to make sure it works.
A clean and neat workspace helps you test air circuit breakers safely. It also keeps your team safe.
Visual Inspection
When you test air circuit breakers, start by looking at them. You can find many problems just by looking closely. This helps you see issues before they get worse or become unsafe.
Physical Damage
First, check the breaker for any damage. Look for cracks or broken parts. If something looks wrong, it could be unsafe. Cracked cases or broken pieces mean you should not use the breaker. If you see damage, replace the breaker right away. Use this table to help you know what to look for and what to do:
| Visual Indicator | Potential Cause | Recommended Action |
|---|---|---|
| Cracked Casings | Age or mechanical stress | Replace compromised breakers |
| Physical Damage | Impact or wear | Inspect and replace as needed |
| Melted Insulation | Overheating | Replace damaged wiring immediately |
🛑 Tip: Do not ignore damage. Even small cracks can cause big trouble.
Connections
Now, check all the electrical connections. Loose or dirty connections can get hot and break. You should look for dirt, rust, or loose wires. Tighten every connection so they do not get hot. Clean the contacts with a soft brush or special cleaner. Make sure all the terminals are tight.
You can use this checklist each time you look:
- Are all the connections tight?
- Is there any dirt or rust?
- Are the contacts clean and shiny?
Corrosion and Overheating
Corrosion and overheating happen a lot in air circuit breakers. Look for color changes, burn marks, or a burning smell. These signs mean the breaker got too hot or wet. Check breakers every month to find these problems early. Use a thermal camera to find hot spots. If you see rust, clean it and make the grounding better. Change any parts that look burned or too hot.
🔥 Note: If you see color changes or smell burning, act fast. These are early signs of trouble.
Cleaning and Lubrication
Cleaning Procedures
It is important to keep air circuit breakers clean. This helps them work well and last longer. Dirt, dust, and water can make them overheat or not connect right. Follow these steps to clean your breaker safely:
- Use a vacuum to take away loose dust and dirt. Pick non-metal tools so you do not scratch anything.
- Be careful with compressed air. Keep the pressure under 30 psi. Wear the right PPE. Use chip guards to stay safe.
- Wipe ceramic parts to get rid of dirt and water. If you see arcing marks, sand them lightly. Do not use emery cloth or wire brushes. They can leave stuff behind that carries electricity.
- For main contacts, use a soft cloth with alcohol or silver cleaner. This keeps them shiny and stops them from getting too hot.
- Do not use liquid cleaners unless the maker says it is okay. If you use a solvent, make sure it does not catch fire. Let the parts dry all the way.
- Look at draw-out and stationary contacts. Clean them if they are dirty. Only use contact lubricant if the maker says you should.
💡 Tip: Always do what the maker says for cleaning. This keeps your breaker safe and stops damage.
Lubrication Points
Lubrication helps moving parts work well and not wear out. You need to know where to put it and what kind to use. Here are the main places:
- Primary and Auxiliary Connections: Put a thin layer of lubricant to stop friction when racking. Do not use too much. Extra grease can bring in dirt.
- Pivot Points and Main Contacts: Most of the time, do not put grease on contacts. Heat and arcing can ruin it. Sometimes, a thin layer helps stop rust. Move the breaker often to spread the grease.
- Operating Mechanism: Check latch faces and rollers. If the grease is sticky or dirty, clean it off and add new grease. This helps the mechanism work well.
🛠️ Note: Always use the type and amount of lubricant the maker says. Too much or the wrong kind can cause trouble.
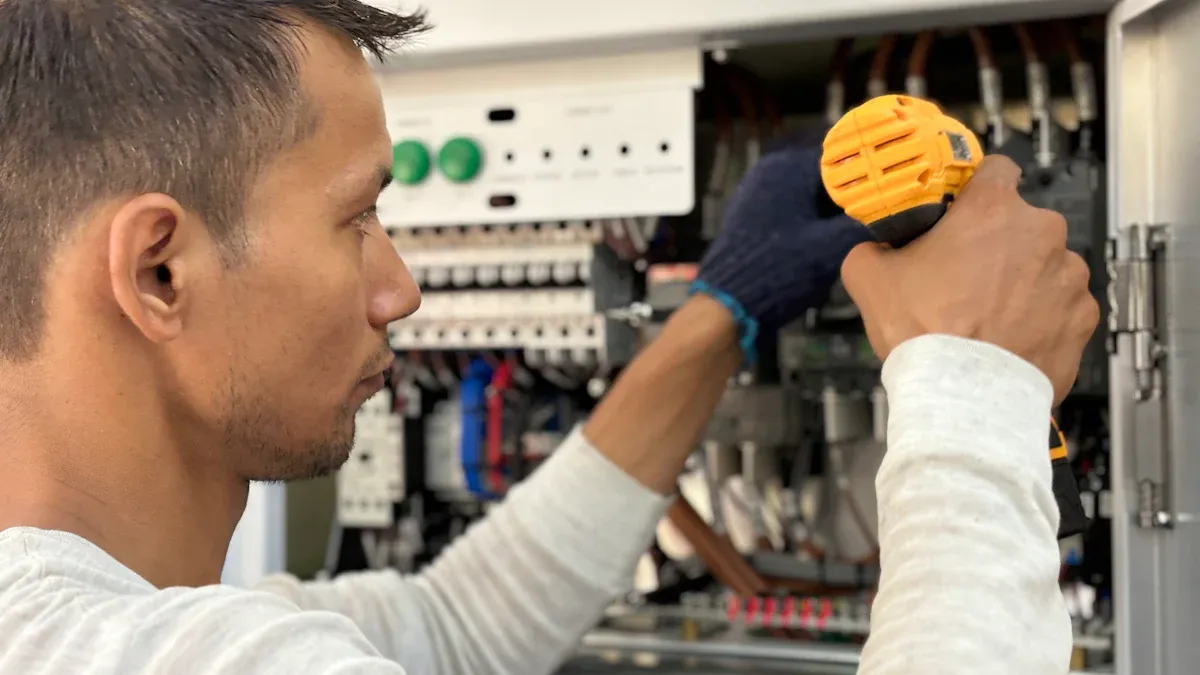
Functional Testing
Functional testing helps you make sure your air circuit breaker works as it should. You can find problems early and keep your system safe. Follow these steps to check the main functions.
Manual Operation
Start by operating the breaker by hand. Use the handle or lever to open and close the breaker. Listen for smooth movement and check for any sticking or grinding. You should feel a firm click when the breaker moves into each position. If you notice any resistance or odd sounds, stop and inspect the mechanism. Manual operation checks the basic mechanical parts and helps you spot wear or damage.
🛠️ Tip: Always move the breaker slowly and carefully. Fast or rough movements can hide small problems.
Trip Simulation
You need to test the trip unit to make sure it reacts to faults. Use secondary current injection to send a test current into the trip unit. This method checks if the trip unit sends a signal to open the breaker. Remove the breaker from the bus before you start. You can use different test modes:
- No-trip mode: Checks the trip unit without opening the breaker. You can use this while the system is live.
- Trip mode: Causes the breaker to open. Only use this when the breaker is disconnected.
- Self-test mode: Runs built-in checks inside the trip unit. This is quick but does not test the sensors or wiring.
Primary injection testing sends high current through the whole breaker. This test checks the sensors, wiring, and trip unit together. Use this for new breakers or critical systems. Always follow the manufacturer’s instructions. The breaker should trip at the set points and within the right time. If it fails, remove it from service and replace the trip unit.
Test Button Use
You should use the test button on your air circuit breaker often. Pressing the test button checks if the breaker trips when needed. For homes, test once or twice a year. In factories or offices, test every six months or every quarter. For hospitals or data centers, test every month or even every week. The test button helps you find problems like failure to trip, high contact resistance, or damage from heat and moisture. Regular testing keeps your breaker ready and safe.
🔍 Note: Combine test button checks with visual inspections. This helps you find wear, corrosion, or other hidden issues.
You can use these steps to test air circuit breakers and keep your electrical system safe and reliable.
Electrical Testing to Test Air Circuit Breakers
Electrical testing is a key part of making sure your air circuit breakers work safely and reliably. You need to use special test devices to check for problems like weak insulation, high resistance, or slow tripping. Always test each pole, phase-to-phase, and phase-to-ground. This helps you find hidden issues and keep your system safe.
Insulation Resistance
Start by checking the insulation resistance. This test helps you find out if the insulation inside your breaker is strong enough to stop electricity from leaking. Use a megohmmeter to apply a high voltage between the breaker’s terminals and ground. You should test:
- Each pole to ground
- Phase-to-phase
- With the breaker both open and closed
Phase-to-ground testing means you apply voltage to one phase and ground the others. This checks the insulation between each phase and the earth. Phase-to-phase testing means you apply voltage between two phases while grounding the third. This checks the insulation between the conductors. You need both tests because each one finds different problems. NFPA 70E says you must do both to make sure your breaker is safe.
If you see low insulation resistance, you may have moisture, dirt, or damaged insulation. Clean the breaker and test again. If the reading is still low, replace the breaker.
⚡ Tip: Always record your insulation resistance values. Compare them with past results to spot trends.
Contact Resistance
Next, check the contact resistance. This test shows if the breaker’s contacts are clean and tight. High resistance can cause overheating and even fires. Use a digital low resistance ohmmeter (DLRO) for this test. Inject a test current, usually 10A or 100A, through the breaker and measure the resistance.
You want the contact resistance to be below 40 micro-ohms. The resistance values for each pole should not differ by more than 50% from the lowest value. If you see a big difference, clean the contacts and test again. Always check the manufacturer’s guide for the exact limits.
Here is a quick checklist for contact resistance testing:
- Use a DLRO tester, like a Megger DLRO.
- Test each pole separately.
- Compare the results for all poles.
- If one pole is much higher, inspect and clean the contacts.
🛠️ Note: High contact resistance means you need to clean or replace the contacts. Always fix this before you put the breaker back in service.
Primary Injection
Primary injection testing is the most important way to test air circuit breakers. You use a special test set to send a high current through the breaker’s main contacts. This simulates a real fault, like an overload or short circuit. You can see if the breaker trips at the right current and within the right time.
Follow these steps for primary injection testing:
- Remove the breaker from service and make sure it is safe.
- Connect the primary injection test set to the breaker.
- Set the test current to match the breaker’s rating or higher to simulate a fault.
- Start the test and watch for the breaker to trip.
- Record the trip current and time.
Test each pole to make sure all parts work. Use test sets like Megger SPI500 or SPI4000 for large breakers. You may need a strong power supply and enough space for the heavy equipment. This test checks the sensors, trip unit, and tripping mechanism all at once.
🚨 Always follow safety rules and manufacturer instructions during primary injection testing. This test uses high current and can be dangerous if not done right.
Timing Tests
Timing tests help you see how fast your breaker opens and closes. You want the breaker to trip within the time set by the manufacturer. If it trips too slowly, the arc lasts longer and the contacts wear out faster. If it trips too quickly, it may not handle the fault current safely.
Here is a table to help you understand timing test results:
| Timing Aspect | Acceptable Result / Requirement | Impact on Breaker Performance and Network Stability |
|---|---|---|
| TRIP Time | About 2 cycles (33.34 ms for 60 Hz) | Ensures fast interruption; slow trips cause longer arcs and more wear. Fast trips can risk failure to interrupt. |
| Longer TRIP Time | Not acceptable beyond tolerance | Causes slow operation, longer arcs, and risk of faults. |
| Shorter TRIP Time | Should not be less than reference value | May cause the breaker to fail to interrupt properly. |
| Contact Discrepancy Between Poles | Max allowed is 1/6th of a cycle (8.33 ms at 60 Hz) | Prevents voltage spikes and network instability. |
You should use a timing test set to measure how long it takes for the breaker to open and close. Test each pole and compare the results. If you see a big difference between poles, check for mechanical problems.
⏱️ Tip: Always test air circuit breakers for timing after any repairs or adjustments. This keeps your system safe and stable.
By following these steps, you can test air circuit breakers safely and effectively. You will find problems early and keep your electrical system running smoothly.
Settings and Compliance
Current and Time Delay
You have to set the current and time delay on your air circuit breaker. These settings should match your equipment. They help stop false trips and keep things safe. The table below shows how to adjust each setting:
| Setting Type | Purpose | Typical Setting Range / Example |
|---|---|---|
| Long-Time Setting (Ir) | Protects against prolonged overcurrent | 20% to 100% of rated current (In); e.g., 0.8 x In for 800A trip |
| Long-Time Delay | Allows temporary inrush currents without tripping | Adjustable from 2.2 to 27 seconds at 6 x Ir |
| Short-Time Pickup (Isd) | Protects against short circuits near breaker | 1.5 to 10 times Ir |
| Short-Time Delay (tsd) | Delay before short-time trip activates | Fixed: 0.05 to 0.5 seconds; or I2T ramp: 0.18 to 0.45 seconds |
| Instantaneous Trip (Ii) | Immediate trip for very high fault currents | 2x to 10x In |
| Ground Fault Pickup (Ig) | Detects ground faults | Lower than short-time or instantaneous; adjustable per needs |
For example, if you use Square D breakers in chillers, set the long-time current to match the chiller’s top current. Set the instantaneous trip higher than the motor’s starting current. This stops the breaker from tripping when it should not. Change the ground fault setting to protect against faults up to 1200A. Always check what your equipment needs before testing air circuit breakers.
⚡ Tip: The right settings stop false trips and keep your system working well.
Trip Unit Calibration
You need to calibrate the trip unit so the breaker trips at the right time and current. Use these tools to do it right:
- Primary injection test set
- Insulation resistance tester
- Digital multimeter
- Time-current characteristic analyzer
- Contact resistance tester
- Thermal imaging camera
- Portable trip unit tester
- Hipot tester
To calibrate, send a set current through the breaker and watch what happens. For ABB SACE breakers, use a tool like the ABB TS3 Trip Unit Test Set. This tool lets you pretend there is a fault and see if the trip unit works. Change the settings if the breaker does not trip at the right value. Always follow the maker’s instructions.
🛠️ Note: Calibrating often keeps your protection system working as it should.
Standards Verification
You must make sure your air circuit breakers follow international standards. This step keeps things safe and follows the law. The main standards are:
| Standard | Application Area | Voltage Range | User Type | Update Frequency |
|---|---|---|---|---|
| IEC 60947-2 | Industrial low-voltage CBs | Up to 1000 V AC/DC | Skilled persons | Updated as needed |
| IEC 60898-1 | Residential and similar | Up to 230/400 V AC | Ordinary persons | Updated as needed |
IEC 60947-2 covers how low-voltage circuit breakers are made and tested. If your breaker is certified, it passed tough safety and quality checks. Some jobs, like aviation, use SAE AS5692A for arc fault circuit breakers. This standard gets checked every five years.
✅ Always make sure your breaker has the right certification before you install or test air circuit breakers.
Documentation
Recording Results
You should write down everything when you test air circuit breakers. Good records help you see if your equipment is healthy. They also help you find problems early. When you write your results, include these things:
- Write down coil current and coil resistance. This helps you know if the coil is working right.
- Record control voltage and any voltage drops. These can show if the cables have too much resistance.
- Note when the armature starts and stops. This shows if something is making it hard to move.
- Write down motor current and voltage. This checks if the supply cable and motor are okay.
- Record how long the spring charge motor takes to start and stop. This helps you find out if there is too much friction.
- Measure static resistance for all three phases. If one number is high, test again and compare.
- Write down Dynamic Resistance Measurement (DRM) results. These help you see if the contacts are wearing out.
- Record test conditions, like test current, breaker type, and test method.
- Write down first trip operation results. These can show hidden problems, like sticky bearings.
- Compare your results with the manufacturer’s reference values.
📝 Tip: Always use the same way to write your records. This makes it easy to look at results from different times.
Reporting Issues
If you find a problem during testing, write it down clearly. Follow these steps:
- Write down any issues, like breakers that will not reset, keep tripping, or look damaged.
- Record all test numbers, like trip voltage, contact resistance, and coil resistance.
- Note anything strange, like slow tripping or parts that look worn out.
- Write what you did to fix the problem, like repairs or new parts.
- After testing, make sure you reset the breaker and put all covers back on.
Keeping track of these problems helps you plan repairs and stop future failures. If you find a hard problem, ask an expert for help.
Compliance Records
You need to keep records to follow safety rules and industry standards. The National Electrical Code (NEC) says you must follow the maker’s instructions. You also need to keep manuals and spec sheets. Label each breaker so you know what it does. Write down all test results, like insulation resistance, contact resistance, and primary injection tests. Inspectors may want to see these records during checks.
- Keep all papers and labels in a safe place.
- Update your records after every test or repair.
- Use these records to show you follow the rules and keep things safe.
✅ Good records protect your building and help you pass inspections.
When you test air circuit breakers the right way, you keep your team and equipment safe. Testing often helps stop surprise problems. It also makes your system safer and keeps it working well. Always use safety rules. Check the maker’s instructions and what experts suggest, because they might not be the same. Write down what you do and train your team often. Change your plan when needed to make sure your air circuit breakers keep working for a long time.
Remember, testing often means fewer problems and a safer place to work.
FAQ
How often should you test air circuit breakers?
You should test air circuit breakers at least once a year. If you work in a critical facility, test them every six months. Regular testing helps you find problems early and keeps your system safe.
What tools do you need to test air circuit breakers?
You need a megohmmeter, digital low resistance ohmmeter, primary injection test set, multimeter, and insulated tools. Always use the right PPE. These tools help you check insulation, contact resistance, and trip settings.
Can you test air circuit breakers while they are live?
No, you should never test air circuit breakers while they are live. Always isolate power and follow lockout/tagout steps. This keeps you safe from electric shock and arc flash.
What should you do if a breaker fails a test?
If a breaker fails a test, remove it from service right away. Clean or repair the breaker if possible. Replace it if you cannot fix the problem. Always record the issue and your actions.
Why is documentation important after testing?
Documentation helps you track the health of your breakers. You can spot trends and plan maintenance. Good records also show you follow safety rules and help you pass inspections.
The following information may be of interest to you
How to Test Molded Case Circuit Breakers in 3 Easy Steps
What You Need to Know About How Molded Case Circuit Breakers Work
Application and advantages of air circuit breakers

