
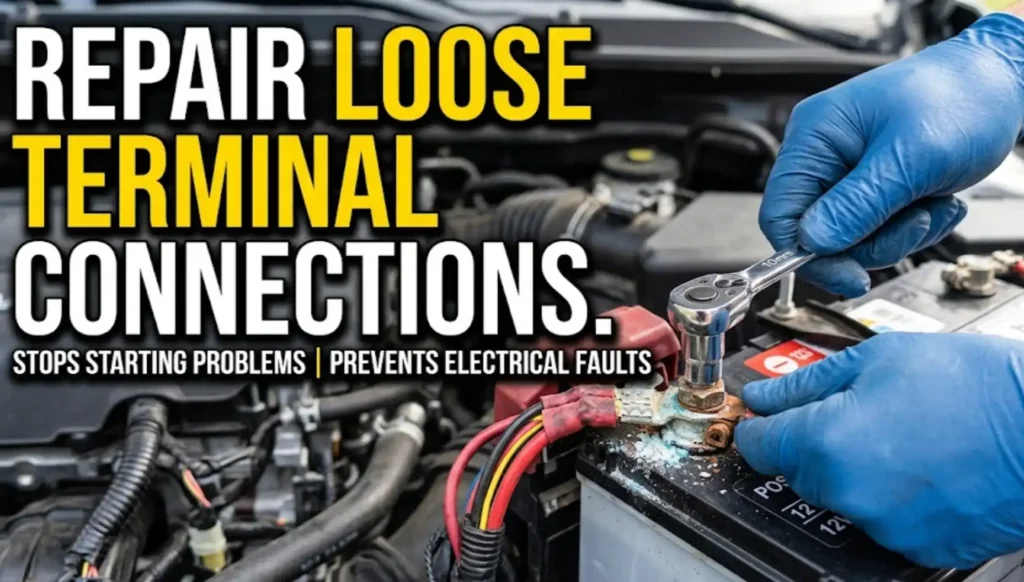
Loose electrical connections are responsible for roughly 25,800 home electrical fires per year in the United States, according to the U.S. Fire Administration — and terminal blocks rank among the most overlooked culprits. A loose terminal block connection fix typically involves de-energizing the circuit, inspecting the conductor and block for damage, applying the correct torque to the fastener, and — when stranded wire is involved — installing a proper ferrule to prevent strand separation. This guide walks you through every step safely, so you can resolve the issue once and stop chasing the same intermittent fault.
What a Loose Terminal Block Connection Looks Like and Why It’s Dangerous
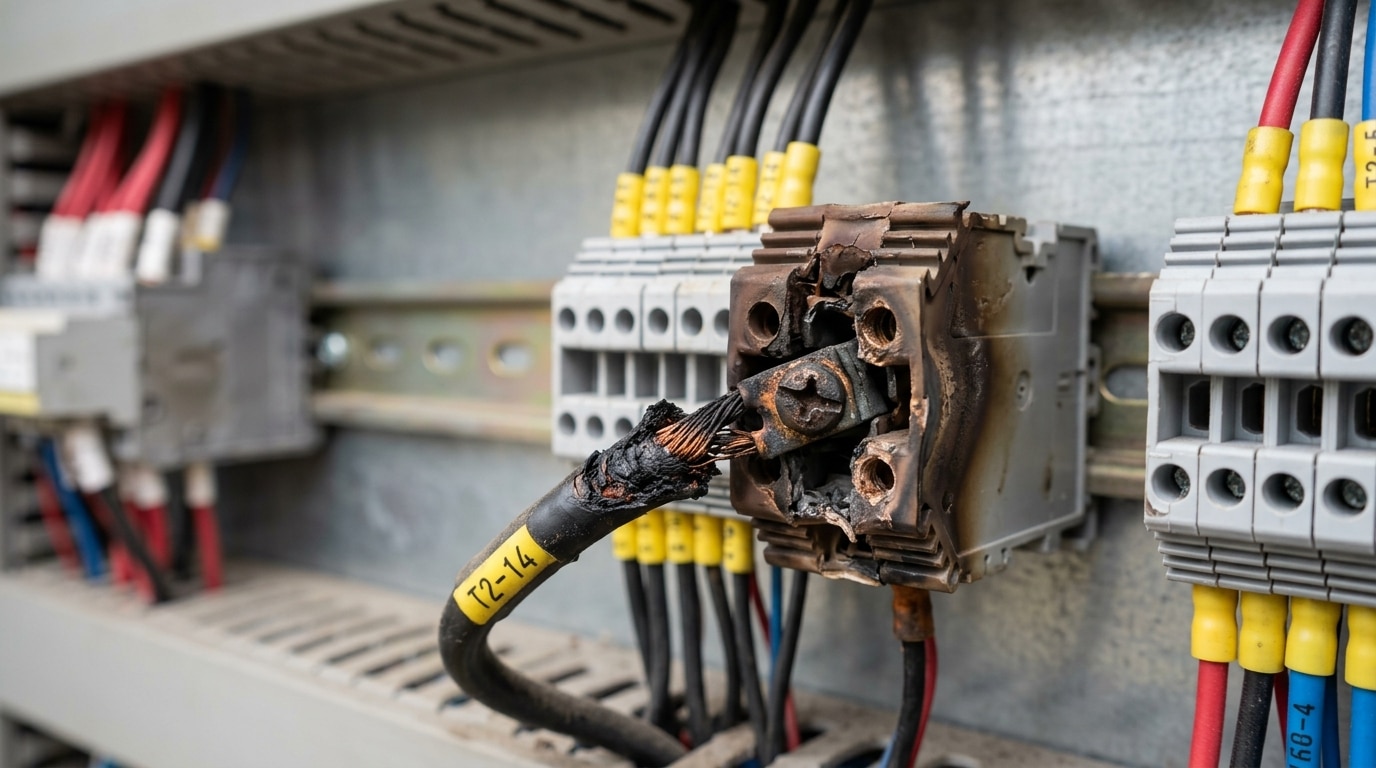
A loose terminal block connection is any point where the conductor isn’t making firm, full-contact pressure against the terminal’s clamping surface. The wire may still carry current — intermittently. That’s exactly what makes it so hazardous: the circuit doesn’t fail cleanly, so the problem hides in plain sight until something burns.
Warning Signs You Can Spot Before Failure
- Intermittent faults — loads drop out randomly, then resume without intervention
- Discoloration or heat marks — brown or black staining on the terminal housing, a telltale sign of sustained arcing
- Burning or acrid smell — overheated insulation off-gasses long before visible flame appears
- Flickering downstream loads — lights pulse or motor contactors chatter under stable supply voltage
- Excessive heat at the connection point — easily confirmed with an infrared thermometer reading 20 °C or more above adjacent terminals
Why does this demand an urgent loose terminal block connection fix? Because a high-resistance joint generates heat proportional to I²R. According to the NFPA’s electrical fire data, electrical distribution and lighting equipment — including faulty terminations — account for roughly 34,000 home structure fires per year in the United States. A single loose screw terminal carrying 15 A can reach ignition temperature of surrounding materials within minutes under fault conditions.
Pro tip: During routine panel inspections, use a thermal imaging camera rather than relying on touch. A connection can be dangerously hot internally while the outer housing feels only warm — a condition called a “glowing contact” that’s invisible without IR.
Ignoring the problem doesn’t just risk fire. Repeated micro-arcing degrades the conductor tip, oxidizes the terminal’s contact surface, and accelerates wear on downstream relays and contactors — turning a five-minute fix into a full panel retrofit.
Common Causes Behind Loose Terminal Block Connections
Thermal cycling is the single most underestimated culprit. Every time a circuit energizes under load, the conductor and terminal expand; when it cools, they contract. Over hundreds of cycles, the clamping force gradually relaxes — a phenomenon engineers call stress relaxation. One NFPA analysis found that loose connections contributed to roughly 13% of electrical distribution fires, with thermal cycling identified as a leading precursor.
Mechanical vibration compounds the problem fast. Equipment mounted on motors, compressors, or HVAC units transmits constant micro-movement into terminal blocks. Even vibrations below 5 Hz can back out a screw terminal over months.
Wire-Side Mistakes That Guarantee Failure
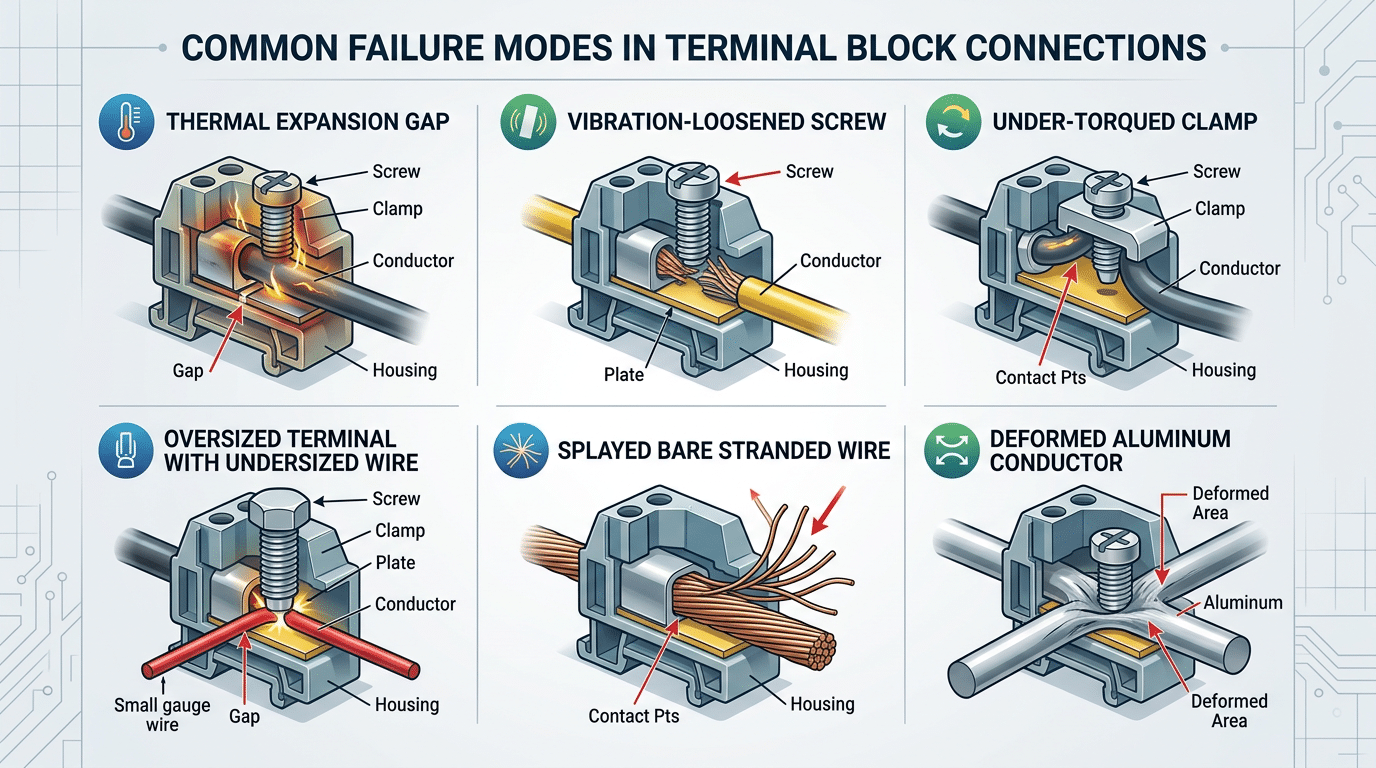
- Improper initial torque: Under-torqued screws feel snug but aren’t. Over-torqued screws deform the conductor, creating a smaller contact area that loosens faster.
- Wire gauge mismatch: Inserting 18 AWG wire into a terminal rated for 12–14 AWG leaves the clamp gripping mostly air.
- Bare stranded wire without ferrules: Individual strands splay under the screw, then slowly cold-flow out from beneath it — the classic “bird-caging” issue.
- Aluminum conductor creep: Aluminum deforms under sustained pressure far more than copper, which is why AL/CU-rated terminals and anti-oxidant compound are non-negotiable for aluminum wiring.
Before jumping to a loose terminal block connection fix, diagnose which of these root causes applies. Retightening without addressing the underlying mechanism — say, adding ferrules to stranded conductors or switching to spring-cage terminals in high-vibration environments — means you’ll be back at the same panel within months.
Safety First — De-Energize, Lock Out, and Verify Before You Touch Anything
Electrical arc flash incidents caused 2,220 nonfatal workplace injuries in the U.S. in 2021 alone, according to the Bureau of Labor Statistics. A loose terminal block connection fix is never worth your life — kill the power first, every single time.
The Three-Step Verification Sequence
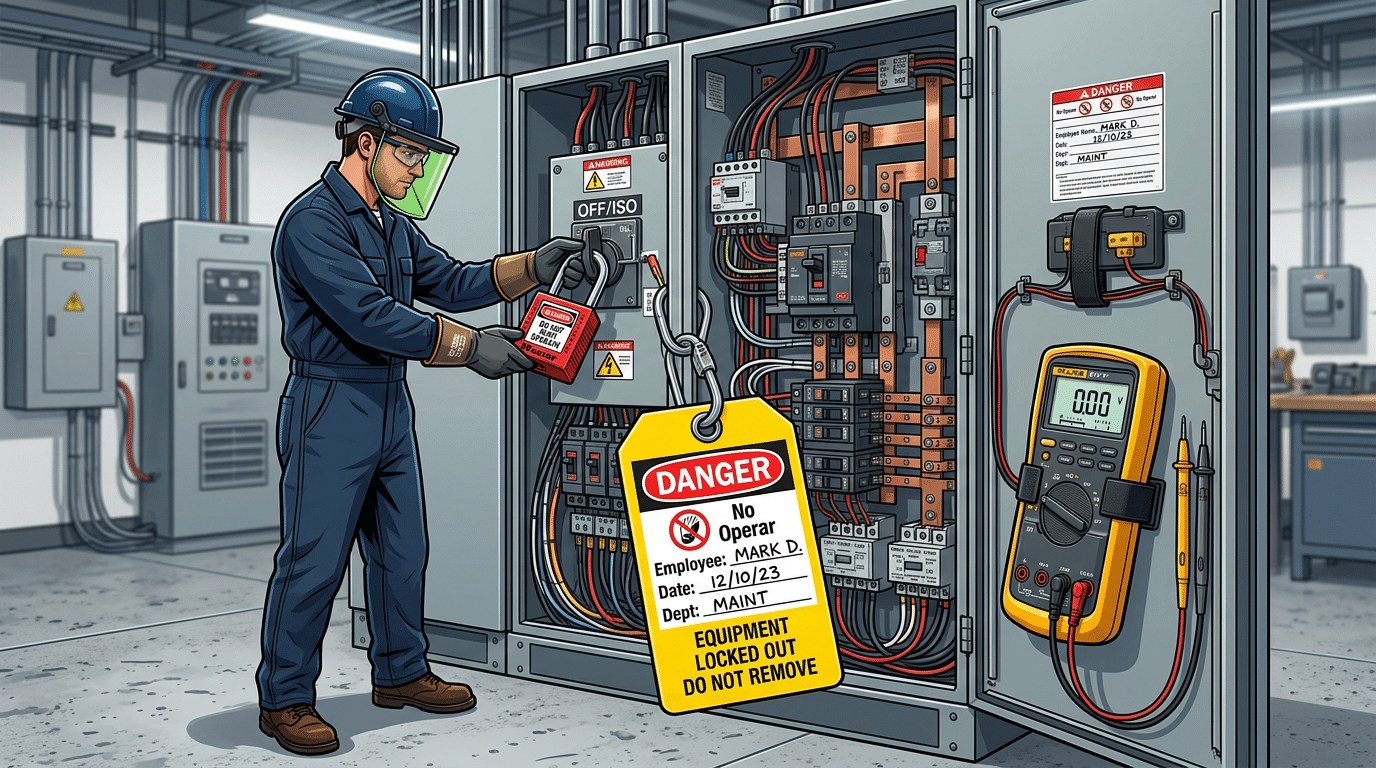
- De-energize the circuit at the upstream breaker or disconnect switch — not just the local isolator. Confirm you’ve opened the correct source by matching panel schedules to circuit numbers.
- Apply lockout/tagout (LOTO). Place your personal padlock on the disconnect and attach a dated tag with your name. LOTO isn’t optional; it’s mandated under OSHA standard 29 CFR 1910.147.
- Verify zero energy with a proven voltage tester. “Proven” means you test a known live source before and after checking the de-energized circuit — this confirms your meter actually works. Non-contact testers alone aren’t reliable enough; use a Cat III or Cat IV rated multimeter.
PPE and Arc Flash Awareness
Wear voltage-rated gloves and safety glasses at minimum. If the panel has an arc flash label indicating an incident energy above 1.2 cal/cm², you need arc-rated clothing matching that hazard level. Skip the cotton t-shirt — it melts into skin.
Pro tip: Stored energy in capacitors or UPS systems can keep terminals live even after the breaker is off. Always verify at the terminal itself, not just at the panel.
Only after completing every step above should you begin any loose terminal block connection fix. Rushing past safety is how routine maintenance becomes a fatality investigation.
Step-by-Step Guide to Fixing a Loose Terminal Block Connection
Power is confirmed dead and locked out. Good. Now grab a flashlight and inspect the conductor end closely. You’re looking for three things: discoloration from heat damage, frayed or nicked strands, and any green oxidation or black carbon deposits on the contact surfaces. If more than 25% of strands on a stranded conductor are broken or missing, cut back and start fresh — partial contact is what caused the problem.
Clean the Contact Surfaces
Use a brass brush or electrical contact cleaner to remove oxidation from both the wire and the terminal’s clamping area. Carbon buildup acts as a resistor, and even a thin film can increase contact resistance by over 50%, generating enough heat to loosen the connection again within weeks. Never use steel wool — metallic debris left behind creates new short-circuit paths.
Trim, Strip, and Reinsert
Cut the conductor back to clean, bright copper. Strip to the manufacturer’s recommended length — typically 8–10 mm for most DIN-rail terminal blocks. Too short and the clamp grips insulation instead of copper. Too long and bare conductor sits exposed outside the housing, violating NEC workspace clearance requirements.
Screw-Type vs. Spring-Cage: The Actual Fix
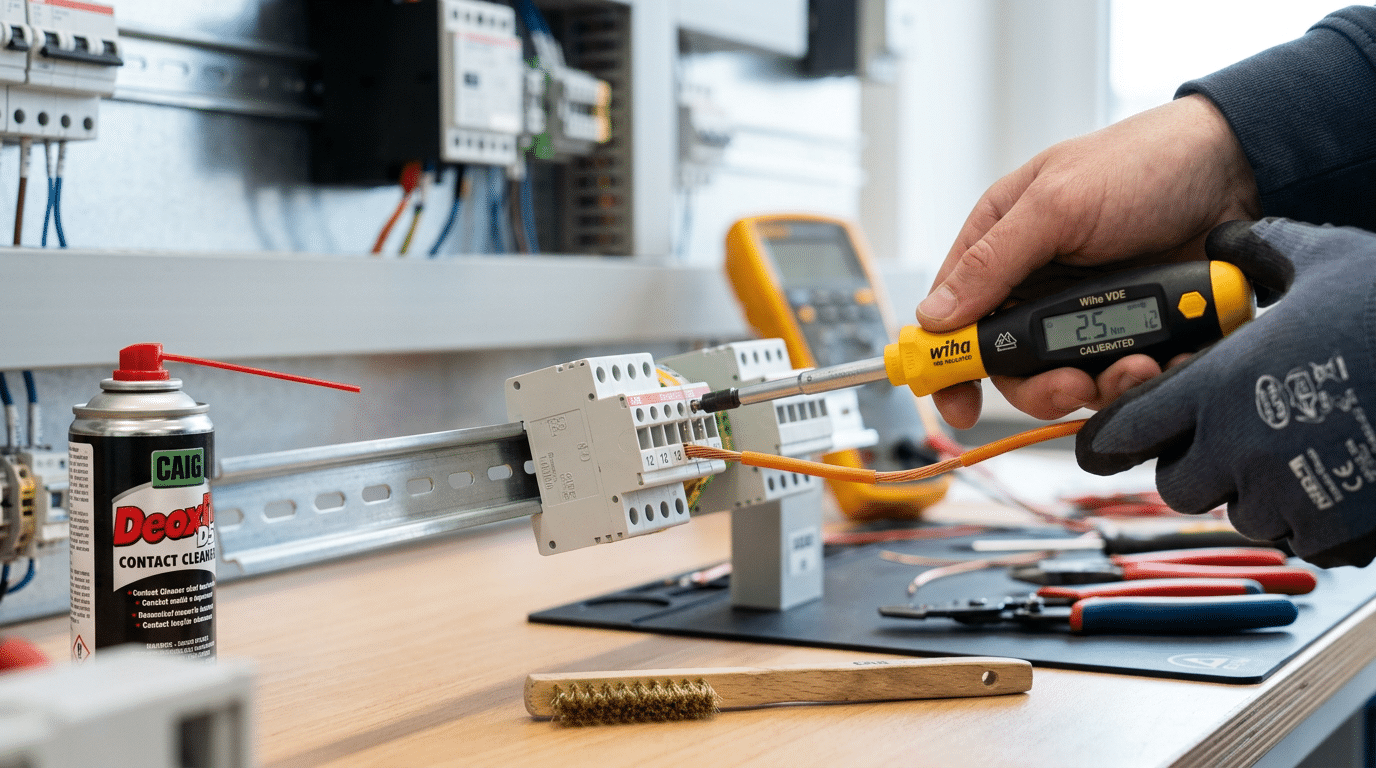
- Screw-type terminals: Insert the conductor fully, then tighten to the torque value stamped on the block (commonly 0.5–0.8 Nm for 18–14 AWG). Give the wire a firm tug test afterward — it should not budge.
- Spring-cage (push-in) terminals: Press the release lever with a flat-blade screwdriver, insert the stripped wire until it bottoms out, then release. The spring should grip the conductor with no play. If it doesn’t, the spring is fatigued — replace the block entirely.
This completes the loose terminal block connection fix for most standard applications. Re-energize only after verifying every connection in the same terminal strip, because vibration from your work may have disturbed adjacent contacts.
Why Wire Ferrules Prevent Loose Connections on Stranded Wire
Bare stranded conductors are the root cause of most repeat failures. When you clamp a multi-strand wire directly into a screw or spring terminal, individual strands splay outward under pressure. Some escape the contact zone entirely. Over weeks of thermal cycling, the remaining strands compress and deform — a phenomenon called cold flow — and clamping force drops dramatically. That’s exactly how a loose terminal block connection develops even after a proper retorque.
Bootlace ferrules solve this completely. A ferrule is a thin metal sleeve (typically tin-plated copper) crimped over the stripped conductor end, consolidating every strand into a single solid contact point. The terminal clamp now grips a rigid cylinder instead of a bundle of individual wires, maintaining consistent pressure indefinitely.
Sizing and Crimping — Get It Right
- Match the ferrule to the wire gauge exactly. A 1.5 mm² ferrule on a 1.0 mm² conductor creates a loose crimp that defeats the purpose.
- Use a self-adjusting ratchet crimper (like the Knipex 97 53 04 or Weidmüller PZ 6 Roto). These tools won’t release until the crimp reaches the correct compression — eliminating guesswork.
- Strip length should match the ferrule barrel length precisely; exposed copper beyond the barrel invites corrosion.
Are ferrules always required? Not technically — UL and NEC don’t mandate them. But DIN 46228 standardizes their use, and most European panel builders consider them mandatory for stranded wire. According to Weidmüller’s application data, ferrule-terminated connections retain over 90% of initial clamping force after 1,000 thermal cycles, compared to roughly 60% for bare stranded wire. If you’re applying a loose terminal block connection fix on stranded conductors, adding ferrules is the single best long-term prevention step you can take.
Proper Torque Specifications and Why Guessing Leads to Repeat Failures
Hand-tight is not a torque specification. According to a NEMA study on connection reliability, approximately 30% of electrical connection failures trace back to improper tightening — either too loose or too tight. If you’re attempting a loose terminal block connection fix without a torque tool, you’re essentially gambling on the outcome.
Under-torque leaves micro-gaps between the conductor and the clamp plate, inviting thermal cycling to work the wire free over weeks. Over-torque is worse in some ways — it cold-flows copper conductors, cracks terminal housings, and strips screw threads, creating damage you won’t notice until the connection fails catastrophically.
Where to Find the Right Specs
Every reputable terminal block manufacturer — Wago, Phoenix Contact, Weidmüller — prints torque values on the datasheet or directly on the housing. No datasheet? Check the UL listing or the UL product iQ database. Never assume one block’s spec applies to another.
General Torque Ranges by Wire Gauge
| Wire Gauge (AWG) | Typical Torque Range |
|---|---|
| 22–16 AWG | 0.4–0.5 Nm |
| 14–12 AWG | 0.5–0.8 Nm |
| 10–8 AWG | 1.2–2.0 Nm |
| 6–4 AWG | 2.5–4.0 Nm |
Use a calibrated torque screwdriver — not a standard driver with “feel.” Tools from Wiha or Wera with preset Nm settings cost under $50 and eliminate guesswork entirely. For any lasting loose terminal block connection fix, precise torque is non-negotiable.
When to Replace the Terminal Block Instead of Retightening
Not every loose terminal block connection fix ends with a torque wrench. Sometimes the block itself is the problem, and retightening a damaged component just resets the countdown to the next failure — or worse, a fire.
Red Flags That Demand Replacement
- Melted or discolored housing: Nylon (PA66) and polycarbonate housings are rated to around 105–130 °C. If the plastic is warped, bubbled, or charred, sustained overheating has degraded its dielectric strength — the material’s ability to resist electrical breakdown. No amount of retorquing restores that insulation integrity.
- Pitted or corroded contact plates: Copper-alloy clamping surfaces that show pitting have already experienced micro-arcing. The uneven surface reduces contact area by up to 60%, according to ABB’s terminal block technical documentation, making a reliable connection impossible.
- Cracked insulators or broken screw threads: Stripped threads can’t hold torque. Period.
- Repeated loosening after proper torque: If the same terminal loosens within two maintenance cycles despite correct ferrule use and torque specs, the spring mechanism or clamp plate is fatigued.
Choosing a Quality Replacement
Match three ratings exactly: voltage (V), current (A), and wire gauge range (AWG or mm²). A 600 V, 30 A block isn’t interchangeable with a 300 V, 20 A unit even if they physically fit the same DIN rail. Look for UL 1059 or IEC 60947-7-1 certification stamps — these confirm the block passed standardized temperature-rise and mechanical-endurance testing.
Pro tip: When replacing one block in a row, inspect its neighbors. Heat damage rarely stays isolated — thermal migration can weaken adjacent blocks that still look fine on the surface.
Frequently Asked Questions About Loose Terminal Block Connections
How often should terminal blocks be retorqued?
Most manufacturers recommend retorquing 6–12 months after initial installation, then annually during scheduled maintenance. High-vibration environments — think motor control centers or mobile equipment — demand checks every 3–6 months. The NFPA 70B standard for electrical equipment maintenance provides detailed guidance on inspection intervals.
Can I use electrical tape instead of actually fixing the terminal?
No. Tape does nothing to restore conductor contact pressure. It masks the problem while resistance heating continues underneath. A proper loose terminal block connection fix means restoring mechanical integrity — retorquing, adding ferrules, or replacing the block entirely.
What causes a terminal block to melt?
Sustained high-resistance connections generate localized heat that can exceed 200 °C, softening thermoplastic housings (typically rated to 105–130 °C). Overloaded circuits accelerate this dramatically.
Should I fix it myself or call an electrician?
If the circuit operates above 50 V or carries more than 20 A, hire a licensed electrician — especially in commercial or industrial settings where arc flash risk is real. Low-voltage control circuits (24 V DC) are more forgiving for experienced DIYers who follow lockout/tagout procedures.
How do I know if my terminal block is rated for my wire size?
Every block is stamped or documented with an AWG or mm² range. Inserting 10 AWG wire into a block rated for 18–14 AWG will crack the housing or prevent proper clamping. Always cross-reference the manufacturer’s datasheet — never guess.
See also
How to Safely Attach Wiring Terminals to Terminal Blocks in 2025
How to Install Wiring Terminals and Terminal Blocks Step by Step
How to Maintain Molded Case Circuit Breakers Effectively
Step by Step Guide to Install a Molded Case Circuit Breaker
How to Properly Install B-Class Residual Current Devices Step-by-Step

Discover more from SENTOP Electrical Co., Ltd
Subscribe to get the latest posts sent to your email.
