

Wiring a 220V circuit breaker takes more than just the right tools. You need to plan every step and use strict safety rules. Mistakes with electricity can cause real harm. Did you know thousands of fires start each year from electrical problems? Take a look at these numbers:
| Statistic Category | Data |
|---|---|
| Home fires (U.S., 2015-2019) | 46,700 |
| Civilian deaths annually | 390 |
| Civilian injuries annually | 1,330 |
| Property damage annually | $1.5 billion |
You should always check wire colors, know how double-pole breakers work, and understand the difference between three-wire and four-wire systems. If you feel unsure, talk to a licensed electrician. Safe wiring protects your home and your life.
Key Takeaways
- Always turn off the main power and verify it is off before starting any wiring work to avoid electric shock.
- Use the right breaker and wire size for your appliance to prevent overheating and fire hazards.
- Wear proper safety gear like insulated gloves and goggles to protect yourself during the wiring process.
- Connect hot, neutral, and ground wires correctly and securely, following local codes and labeling everything clearly.
- Test your new circuit carefully after installation and call a licensed electrician if you feel unsure at any point.
Preparation
Tools and Materials
Before you start wiring a 220V circuit breaker, gather all your tools and materials. Having everything ready makes the job smoother and safer. Here’s a handy checklist you can follow:
- Review the job requirements and make a list of what you need.
- Collect tools like a screwdriver, wire stripper, voltage tester, and pliers.
- Pick up the right circuit breaker, electrical box, and cable.
- Keep extra wire, wire nuts, and electrical tape on hand for quick fixes.
- Check that you have a voltage tester to confirm power is off.
- Prepare safety gear like gloves and goggles.
- Label your wires and breaker slots for easy identification.
- Keep a notepad or phone handy to document your work with photos if needed.
Tip: Always inspect your tools for damage before you begin. Replace anything that looks worn out or unsafe.
Breaker and Wire Sizing
Choosing the right breaker and wire size is key for safety and code compliance. If you pick the wrong size, you risk overheating and fire. Here’s a quick guide to help you:
| Load Type | Breaker Size (125% of Load) | Wire Size (Copper) |
|---|---|---|
| Water Heater | 20A | #12 AWG |
| Electric Dryer | 30A | #10 AWG |
| Lighting Circuit | 15A | #14 AWG |
Always match your breaker voltage to your system. For a 220V circuit breaker, use a 240V-rated breaker. If your appliance draws 2800 watts at 240V, divide 2800 by 240 to get 11.66 amps. Multiply by 1.25 for safety, and round up to the next standard breaker size. When in doubt, check local codes or ask a professional.
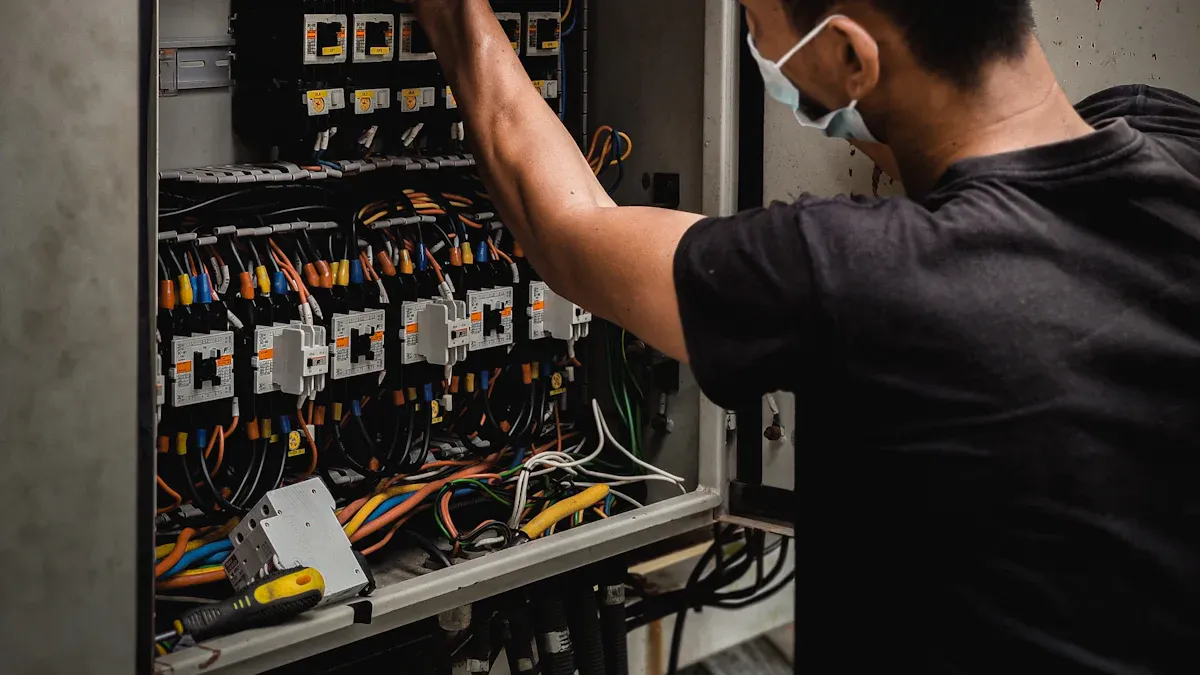
Safety Gear
You should never skip safety gear. Electrical work can be dangerous, but the right equipment keeps you safe. Use rubber insulating gloves that match the voltage class of your project. Look for gloves and tools with clear labels showing their voltage rating. Always wear safety goggles and nonconductive shoes. Check your gear for cracks or damage before each use. Many countries require regular testing of safety gear to make sure it still works. Following these steps helps you avoid shocks and injuries.
Power Off & Planning
Turn Off Main Power
Before you touch any wires, you need to shut off the main power. This step keeps you safe from electric shock. Here’s how you do it:
- Tell everyone at home or on the job that you will turn off the power. No one should use electrical devices while you work.
- Find your main breaker panel. Look for the big switch at the top—this is the main breaker.
- Flip the main breaker to the “off” position. This cuts power to the whole house.
- Use a lockout/tagout device if you have one. This keeps the breaker off and warns others not to turn it back on.
- Release any stored energy in the system. Some devices can hold a charge even after you turn off the power.
Tip: Always follow safety rules like those in OSHA’s lockout/tagout procedures. These steps help prevent accidents and keep everyone safe.
Verify Power is Off
Never trust that the power is off—always check! You want to be 100% sure before you start wiring.
- Use a non-contact voltage tester to check for live wires. Hold it near the wires you plan to work on.
- Try a digital multimeter for a more exact reading. Touch the probes to the wires and look for a zero reading.
- Test your tools on a known live circuit first. This makes sure your tester works.
- Wear your safety gloves and goggles during this step.
You can also do extra checks like insulation resistance or earth continuity tests. These tests help confirm that the circuit is truly dead and safe to work on.
Circuit Layout
Now, plan your circuit layout. Good planning makes your job easier and safer.
- Draw a simple diagram of your circuit. Mark where the breaker, outlets, and appliances will go.
- Choose the right wire size for your load. For example, use 12 AWG wire for a 20-amp circuit or 10 AWG for a 30-amp circuit.
- Decide if you need a three-wire or four-wire setup. Think about future needs—running 10/3 wire with ground can help if you upgrade later.
- Make sure you have a good ground connection. Use piggy-tail ground wires in metal boxes and follow NEC guidelines.
- Place your double-pole breaker in two adjacent slots in the panel.
Note: You can find more tips in wiring books or trusted online guides. Careful planning now saves time and prevents mistakes later.
Install Box & Cable
Mount Electrical Box
You want your electrical box to stay secure and safe for years. Start by picking a box made from non-combustible materials, like metal or sturdy plastic. Make sure the box matches the environment—use corrosion-resistant boxes if you’re working outdoors or in damp places. Always mount the box flush with the finished wall surface. The National Electrical Code (NEC) says you can’t set it back more than 1/4 inch. Use strong supports, like framing or clamps, so the box doesn’t wiggle or move. Leave at least six inches of free wire inside the box. This extra length makes wiring connections much easier. Don’t forget to ground metal boxes using a continuous, unspliced wire.
Tip: Secure the box cover tightly. This keeps fingers and tools away from live wires.
Run 220V Cable
Now, it’s time to run your cable. Choose the right size and type for your 220V circuit breaker. Secure the cable within 12 inches of the box using cable clamps or staples. If you use a nonmetallic box, support the cable within 8 inches. For vertical runs, add a strap every 4 feet 6 inches. If your cable passes through a hole in a stud and sits less than 1 1/4 inch from the edge, protect it with a steel plate. This stops nails or screws from hitting the wire. You can use different wiring methods, like the joining box system or looping system, to route your cables neatly and safely.
- Always keep cables neat and avoid sharp bends.
- Make sure your cable routing matches your circuit plan.
Use of Fish Tape
Fish tape makes pulling wires through walls and conduit much easier. Here’s how you use it:
- Feed the fish tape through the conduit until it reaches the other end.
- Attach your wire to the end of the tape.
- Pull the tape back, bringing the wire along with it.
Fish tape comes in different materials. Steel works well for empty conduits, while fiberglass or nylon is safer near live wires. Nonconductive tapes help prevent shocks. Some fish tapes even have ergonomic handles or battery power to make long pulls easier. If you run into a tricky bend or a conduit with existing wires, try using two fish tapes from opposite ends and connect them in the middle.
| Fish Tape Material | Best Use Case | Safety Note |
|---|---|---|
| Steel | New, empty conduit | Avoid near live wires |
| Fiberglass/Nylon | Near existing or live wires | Nonconductive, reduces shock risk |
Note: Always choose the right fish tape for your job. This keeps you safe and saves time.
Wire 220V Circuit Breaker
Connect Hot Wires
You need to connect two hot wires to your 220V circuit breaker. These wires are usually black and red. Each one carries 120 volts, but together they give you the 220 volts needed for big appliances.
- Strip about 1/2 inch of insulation from the ends of both hot wires. Make sure the copper is clean and not damaged.
- Insert the black wire into one terminal on the double-pole breaker. Tighten the screw until the wire feels snug. Do the same with the red wire on the other terminal.
- If you use a white wire as a hot wire (sometimes called a repurposed wire), wrap black or red electrical tape around both ends. This marks it as a hot wire, so no one gets confused later.
- Always check that the wires are secure. Loose wires can cause overheating or even fires.
Tip: Never rush this step. Double-check each connection before moving on.
If you have a three-wire system, you will use two hots and a ground. In a four-wire system, you will use two hots, a neutral, and a ground. Always follow your local code for which system to use.
Ground and Neutral
Ground and neutral wires keep your system safe. The ground wire is usually bare copper or green. The neutral wire is white.
- Attach the ground wire to the ground bus bar in your panel. This bar connects to the metal case and the earth outside your house.
- Connect the neutral wire to the neutral bus bar. In the main panel, the neutral and ground bars may be bonded together. In subpanels, they must stay separate. This follows the National Electric Code and helps prevent shock hazards.
- If you have a three-wire setup, you may not have a neutral. For a four-wire setup, always connect the neutral.
- Never connect the ground and neutral together in a subpanel. This can cause dangerous currents and make breakers fail to trip.
Note: The ground wire only carries current during a fault. The neutral wire carries current during normal use. Keeping them separate is important for safety.
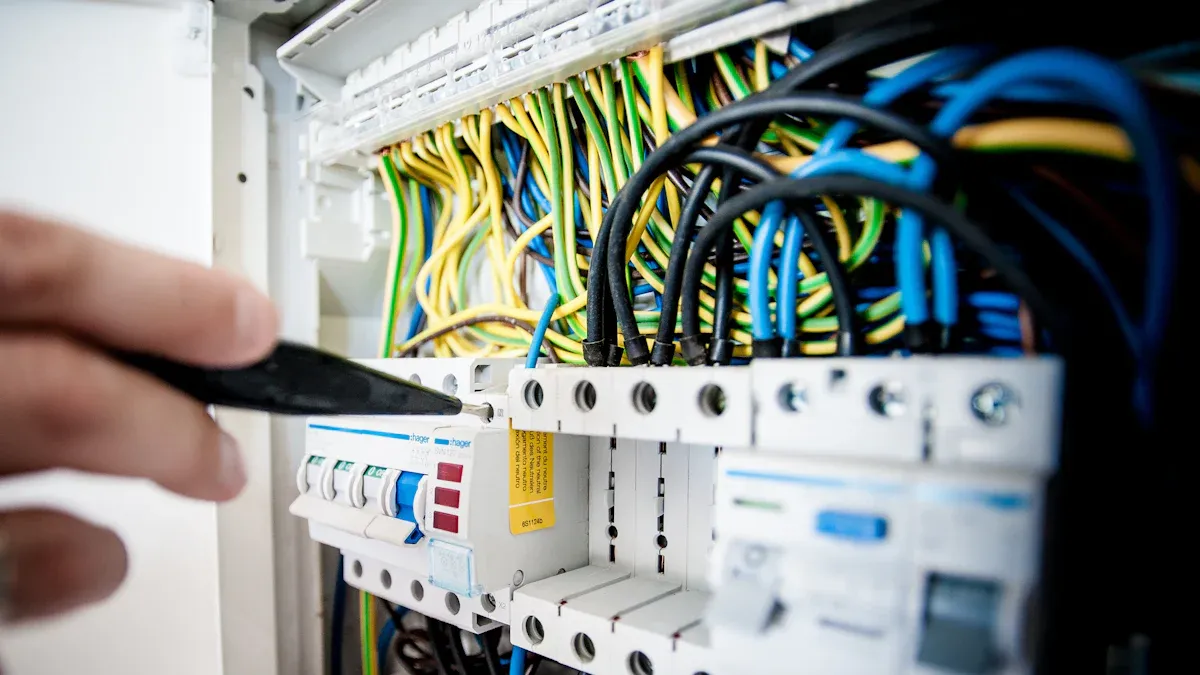
Snap in Breaker
Now you are ready to install the 220V circuit breaker into your panel.
- Find two open slots in your breaker panel. These must be next to each other, so the breaker connects to both hot bus bars.
- Line up the breaker with the slots. Push down firmly until you hear or feel it snap into place. It should not wiggle or feel loose.
- Tug gently on the breaker to make sure it is secure. If it moves, try again.
- Check all terminal screws one last time. Make sure every wire is tight and in the right spot.
- Replace the panel cover, making sure no wires get pinched.
Always label your new breaker. Write down what it controls, like “Dryer” or “Workshop Outlet.” This helps everyone know what each breaker does.
Before you finish, review these safety checks:
- Inspect all wires for damage or fraying.
- Confirm that all wires are routed neatly and protected from sharp edges.
- Make sure the ground wire is attached to the ground bar.
- Verify that the neutral wire is on the neutral bar (if used).
- Double-check that all terminal screws are tight.
- Confirm that the breaker is snapped in and seated properly.
- Label the breaker for easy identification.
If you feel unsure at any point, stop and call a licensed electrician. Safety always comes first when working with a 220V circuit breaker.
Test & Finish
Label Breaker
You should always label your breakers before you finish the job. Use strong, high-quality labels that will not fade or peel over time. Write clearly so anyone can read it later. Mark each breaker with the name of the room or appliance it controls. For example, you might write “Dryer” or “Kitchen Range.” Color coding helps too—use red for 240V circuits and black for 120V. Keep a simple map of your panel nearby. This makes it easy to find the right breaker in an emergency. Good labeling follows the National Electrical Code and helps everyone stay safe.
Tip: Update your labels if you change anything in your panel. This keeps your records accurate and helps with future repairs.
Replace Panel Cover
After you finish wiring, you need to put the panel cover back on. Always check that all wires are inside the panel and nothing is sticking out. Line up the cover with the screw holes and tighten the screws by hand. Do not use power tools, as they can strip the screws or damage the panel. Make sure the cover sits flat and does not pinch any wires. A secure cover keeps dust and fingers away from live parts. Before closing the panel, double-check that all breakers are labeled and all connections are tight.
Here’s a quick checklist for replacing the panel cover:
- Check that all wires are inside the panel.
- Make sure all breakers are labeled.
- Align the cover and hand-tighten the screws.
- Confirm the cover is flat and secure.
Restore Power & Test
Now you are ready to turn the power back on. Stand to the side of the panel and flip the main breaker to “on.” Watch and listen for any signs of trouble, like sparks or buzzing. Use a non-contact voltage tester or a multimeter to check that your new circuit is live. Test the outlet or appliance to make sure it works. You should also run a few safety tests:
- Insulation resistance test checks for hidden faults.
- Continuity test makes sure all wires connect properly.
- Trip test confirms the breaker shuts off when needed.
- Ground fault test checks your ground protection.
- Load test makes sure the breaker trips at the right current.
- Voltage test checks the supply at the breaker.
- Visual inspection looks for loose wires or damage.
These steps help you catch problems before they become dangerous.
Troubleshooting
If something does not work, do not panic. Start by turning off the power again. Check your labels and wiring against your plan. Look for loose wires, missing labels, or tripped breakers. Use your voltage tester to check for power at each step. If you see sparks, smell burning, or feel unsure, stop and call a licensed electrician. Always follow safety rules and local codes. Keeping your work area clean and your records up to date makes future troubleshooting much easier.
You just learned how to wire a 220V circuit breaker step by step. Always follow each step for safety and to meet code. Double-check every connection and test your work before you use the circuit. If you feel unsure or run into trouble, call a licensed electrician. Remember, your safety comes first every time you work with electricity.
⚡ Stay safe, take your time, and never skip a step!
FAQ
What size wire do I need for a 220V circuit?
You need to match the wire size to your breaker. For a 20-amp breaker, use 12 AWG copper wire. For a 30-amp breaker, use 10 AWG. Always check your local code.
Can I install a 220V breaker myself?
You can do it if you feel confident and follow safety steps. If you feel unsure or get stuck, call a licensed electrician. Safety comes first.
Why do I need two hot wires for 220V?
A 220V circuit uses two hot wires. Each wire carries 120 volts from opposite sides of your panel. Together, they give you the 220 volts your appliance needs.
What happens if I mix up the ground and neutral wires?
Mixing up ground and neutral can cause shocks or make breakers fail. Always connect the ground to the ground bar and the neutral to the neutral bar. Double-check before you finish.
How do I know if my breaker is installed correctly?
Check that the breaker snaps in tight and the wires feel secure. Test the circuit with a voltage tester. If everything works and nothing feels loose, you did it right!
The following information may be of interest to you
Why Your Circuit Breaker Trips on Hot Summer Days
Dual power automatic transfer switch
Why a bad circuit breaker can cause low voltage

Discover more from SENTOP Electrical Co., Ltd
Subscribe to get the latest posts sent to your email.
