
Replacing a circuit breaker may seem scary, but it’s doable if you know how to replace a circuit breaker safely. Safety is most important, so follow clear steps and use good tools. Before starting, make sure you understand how to replace a circuit breaker without harm. If you’re unsure about anything, call an expert for help. It’s always safer to ask than to guess with circuit breakers.
Key Takeaways
-
Always shut off the main power before working on a circuit breaker. This stops shocks and keeps you safe.
-
Wear safety gear like insulated gloves and rubber shoes to stay safe from electricity.
-
Use a voltage tester to check if the power is off before touching wires or connections.
-
Learn the signs of a bad circuit breaker, like it tripping often or smelling burnt, to know when to replace it.
-
If you’re unsure about any step or face problems, call a licensed electrician for help.
Safety Precautions for Circuit Breaker Replacement
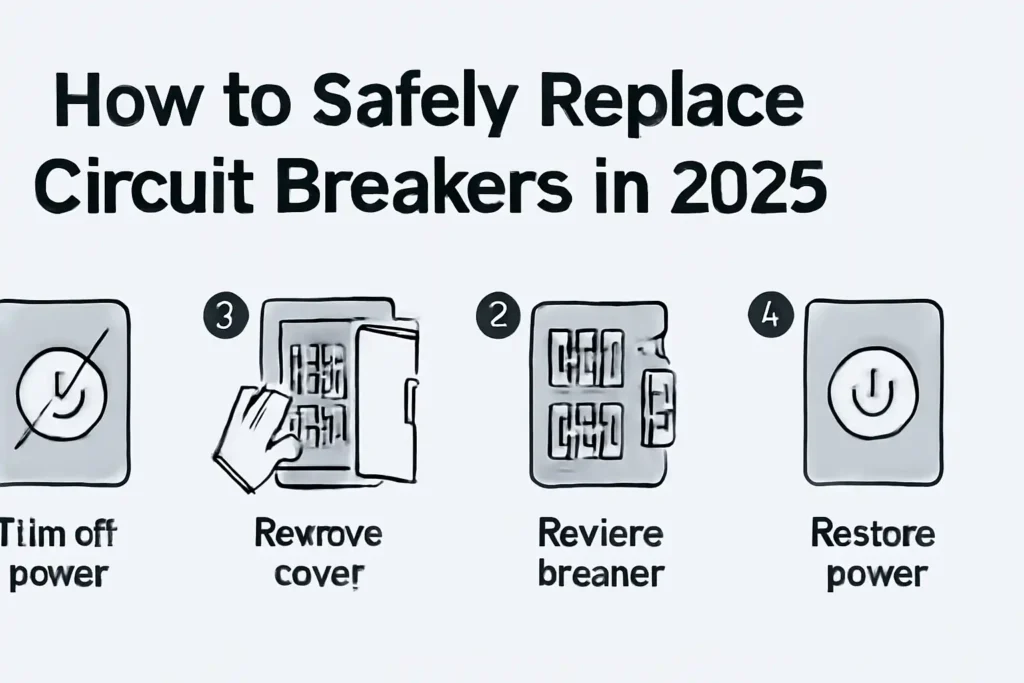
Replacing a circuit breaker safely means following important safety steps. These steps keep you safe from electrical dangers and help things go smoothly. Let’s look at the key actions you should take.
Turn Off the Main Power
The first step is to turn off the power. Find the main breaker in your panel and switch it off. This stops electricity in your home, making it safe to replace the circuit breaker.
Tip: Tell everyone in your home before turning off the power. This avoids confusion or accidents while you work on the system.
After turning off the main breaker, check that lights and appliances don’t work. This ensures the power is completely off and prevents accidental shocks.
Use Safety Gear and Tools
Wearing safety gear is very important. Put on rubber-soled shoes to lower the chance of shocks. Use tools with insulation made for electrical work to stay safe.
Here’s a simple list of what you’ll need:
-
Rubber-soled shoes: Stops electricity from traveling through your body.
-
Insulated tools: Keeps you safe from touching live wires.
-
Arc-rated clothing: Protects you from electrical sparks or arcs.
-
Fire extinguisher: Helps you handle emergencies quickly.
Reports show over 1,300 deaths from electricity happened between 2011 and 2022. Following these steps reduces risks and keeps you protected.
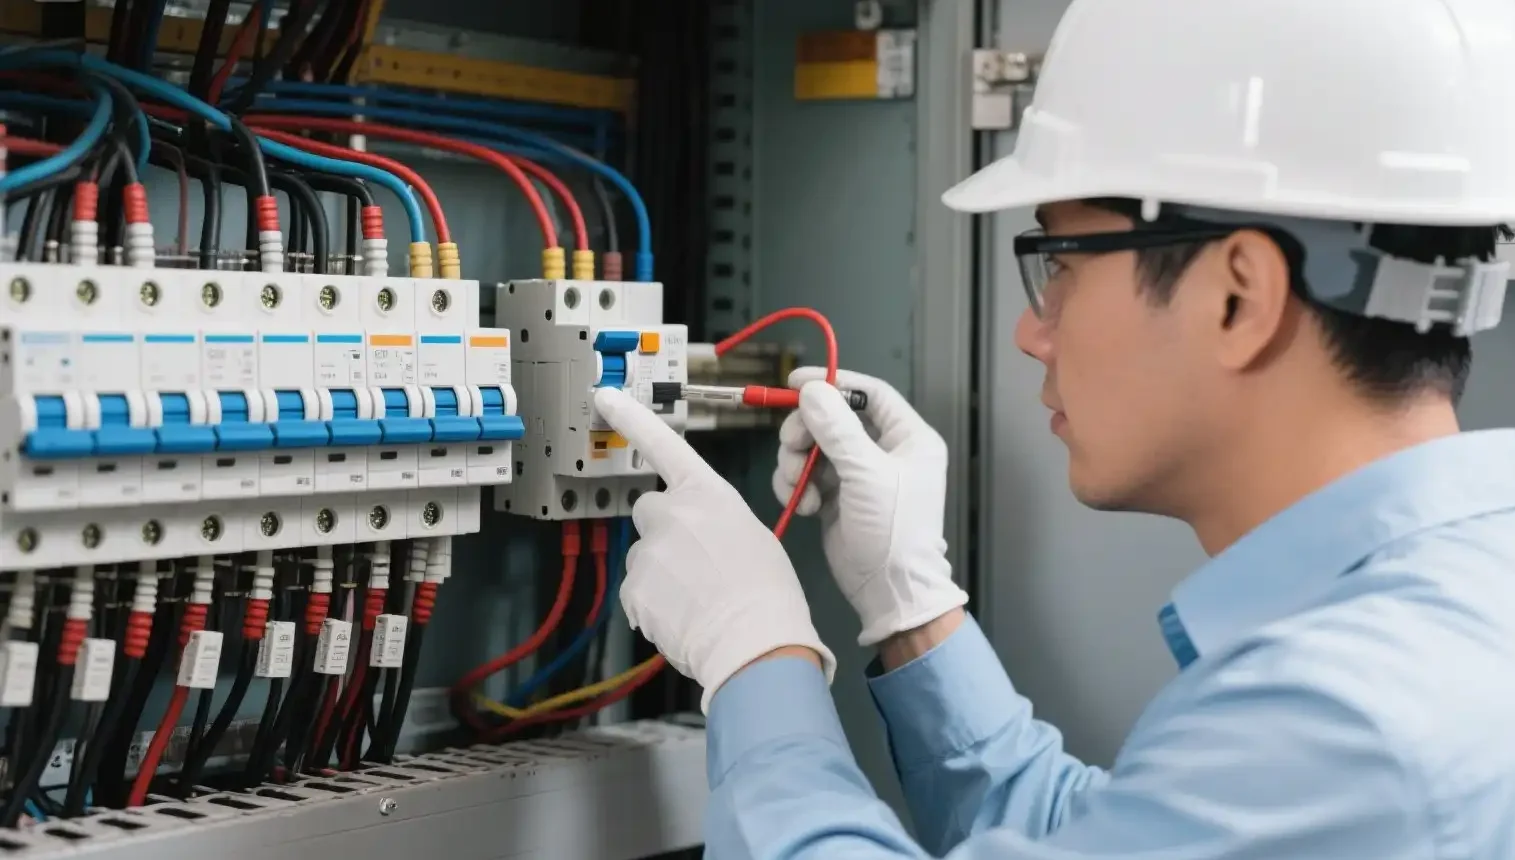
Verify the Power is Off
Even after turning off the main breaker, check again for power. Use a voltage tester to make sure no electricity is in the panel. This tool is easy to use and gives you confidence to start.
Alert: Always do this step. Electricity can stay in some parts of the panel if there’s a problem with the wiring.
Place the tester on the wires and connections in the panel. If it shows no voltage, you’re safe to continue. If it detects power, stop and check the issue.
By following these safety steps, you can replace a circuit breaker safely and successfully.
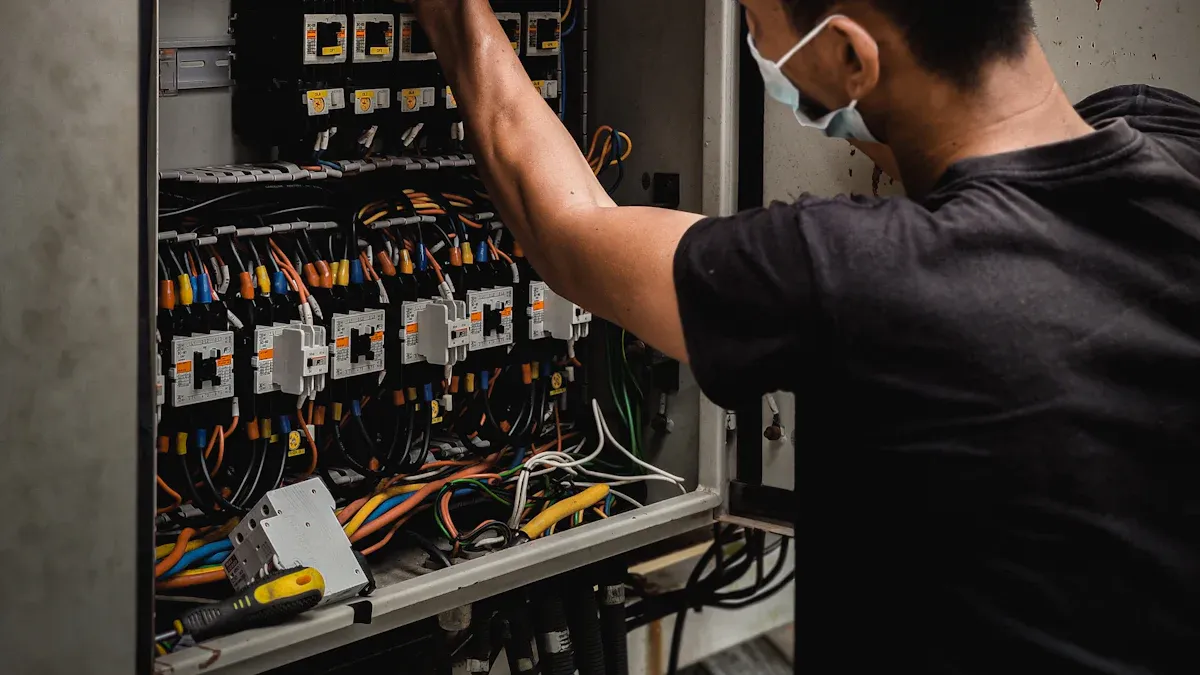
Learn About the Circuit Breaker Panel
Before changing a circuit breaker, know how the panel works. Think of it as the control center for your home’s electricity. Understanding its parts makes replacing a breaker safer and simpler.
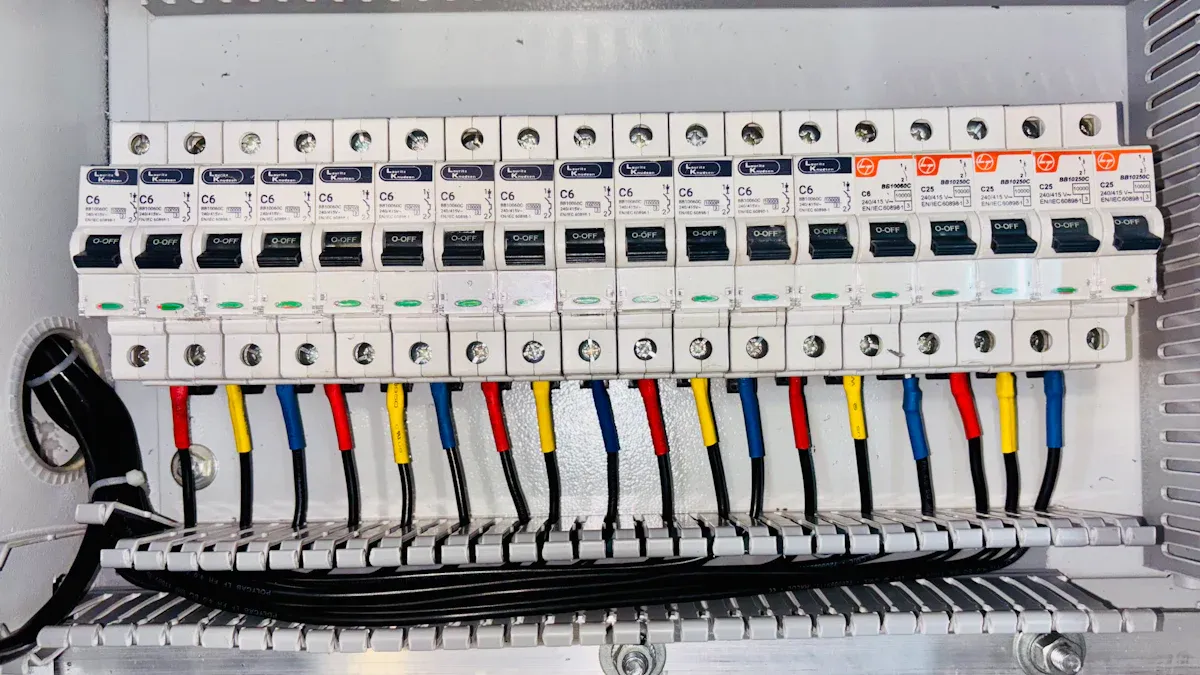
Here’s what’s inside a typical panel:
-
Main breaker: The large switch that controls all home electricity. It also stops overcurrent, which can cause fires.
-
Bus bars: Metal strips that send power to the smaller breakers. They’re the panel’s main support.
-
Circuit breakers: Small switches that protect specific circuits in your house. They can be single-pole (120 volts) or double-pole (240 volts).
-
Empty slots: Spaces for adding more circuits later. Useful for upgrades.
-
Subpanels: Extra breaker boxes for new home areas. They send power to specific spots.
-
Labels: Each breaker should have a label showing what it controls. This helps you find circuits easily.
Tip: If labels are missing, make some. Clear labels save time when fixing or upgrading circuits.
When you open the panel, you’ll see these parts arranged neatly. Don’t touch anything until you’re sure the power is off. Use a flashlight if the area is dark.
Knowing the layout helps you find the broken breaker. It also ensures you install the new one correctly. If you’re confused, check the manual or search for diagrams online. Many experts share helpful pictures to guide you.
By learning about the panel, you’ll feel ready to replace the breaker. It’s like studying a map before a trip—you’ll know where to go and what to do.
How to Identify a Faulty Circuit Breaker
Sometimes, circuit breakers stop working. Knowing the signs helps prevent bigger issues. Let’s learn how to spot a faulty breaker and decide if it needs replacing.
Common Signs of a Faulty Breaker
Broken circuit breakers often show clear problems. If you see these signs, check the breaker:
-
Breaker trips often: If it trips with normal use, it may be faulty.
-
Breaker won’t reset: Disconnect everything. If it still won’t reset, it’s likely broken.
-
Burning smell: A bad breaker can overheat and smell like something is burning.
-
Feels hot: Breakers shouldn’t be hotter than 140 °F (60 °C). Too much heat means trouble.
-
Breaker won’t turn on: If no other issues exist, the breaker might be damaged.
-
Broken spring: If the switch doesn’t move after tripping, the spring may be faulty.
|
What It Means |
|
|---|---|
|
Breaker trips often |
The breaker might be faulty if no overload exists. |
|
Breaker won’t reset |
Likely broken if it won’t reset after disconnecting loads. |
|
Burning smell |
Overheating from a defective breaker that fails to trip. |
|
Feels hot |
Too much heat signals a problem. |
|
Breaker won’t turn on |
Likely a fault if no other issues are found. |
|
Broken spring |
A damaged spring stops the switch from moving. |
Tip: Act fast if you notice these signs. Waiting can cause dangerous electrical problems.
Testing the Circuit Breaker
Testing helps confirm if a breaker is bad. Follow these steps to check it:
-
Look closely: Check for cracks or burn marks on the breaker.
-
Test with tools: Use a multimeter to measure resistance and check connections.
-
Simulate faults: Test if the breaker trips when it should.
-
Adjust settings: Make sure the breaker matches your system’s needs.
|
Steps for Testing Breakers |
Why It Helps |
|---|---|
|
Look closely: Check for physical damage. |
Prevents unseen issues from causing failures. |
|
Test with tools: Measure resistance. |
Ensures the breaker works properly. |
|
Simulate faults: Test tripping function. |
Confirms the breaker reacts to problems. |
|
Adjust settings: Match system needs. |
Keeps the system safe and efficient. |
Alert: Always wear safety gear and use insulated tools. This protects you while working with electricity.
Knowing When to Replace
Sometimes, testing shows a breaker can’t be fixed. Here’s when to replace it:
-
Old and worn out: Breakers don’t last forever. Replace old ones to stay safe.
-
Outdated technology: Older breakers may lack modern safety features. Upgrading adds protection.
-
More power needed: If your home uses more electricity, get a higher-rated breaker.
Note: Replacing a breaker isn’t just fixing it. It also keeps your home safe and updated.
By spotting issues, testing carefully, and replacing when needed, your electrical system will stay safe and reliable.
Tools and Materials for Circuit Breaker Replacement
To replace a circuit breaker safely, you need the right tools. Having proper equipment makes the job easier and keeps you safe. Let’s go over what you’ll need.
Important Tools to Have
You don’t need many tools, just a few key ones. Here’s what you should get:
-
Screwdriver: Helps secure the breaker and connect wires.
-
Wire Strippers: Removes wire insulation without causing damage.
-
Pliers: Useful for bending wires and tightening connections.
-
Voltage Tester: Confirms the power is off before starting.
-
Cable Cutter: Cuts cables to the correct length.
-
Labeling Materials: Marks circuits and wires for easy identification.
-
Flashlight: Lights up the panel in dark spaces.
Tip: Worried about power turning back on? Use a circuit breaker lockout device for extra safety.
Safety Gear You’ll Need
Wearing safety gear is very important for electrical work. It protects you from accidents. Here’s what to wear:
-
Insulated Gloves: Stops shocks when handling wires.
-
Rubber-soled Shoes: Prevents electricity from passing through your body.
-
Safety Glasses: Protects your eyes from sparks or debris.
-
Flame-resistant Clothing: Shields you from electrical arcs.
Note: Always check your safety gear before using it. Damaged gear won’t protect you properly.
Using safety gear and maintaining it well lowers accident risks. Staying safe is worth the effort.
Picking the Right Replacement Breaker
Not all breakers are the same. Choosing the correct one depends on your system. Here’s how to find the right breaker:
-
Check the Old Breaker: Look for its make, model, and part number.
-
Match the Specs: Make sure the new breaker matches the voltage, amps, and poles of the old one.
-
Think About the Location: If the panel is in a hot or damp area, pick a breaker made for those conditions.
-
Ask the Manufacturer: ONESTO provides high-quality circuit breakers of various specifications,If the old breaker is unavailable, ask for a compatible option.
Alert: Using the wrong breaker can harm your system or cause danger. Always double-check before buying.
By having the right tools, wearing safety gear, and choosing the correct breaker, you’ll make the replacement process safe and simple.
Step-by-Step Process to Replace a Circuit Breaker
Replacing a circuit breaker might seem hard, but it’s manageable. Follow these steps to do it safely.
Removing the Faulty Breaker
Start by taking out the old, broken breaker. Here’s how:
-
Turn Off the Main Power: Switch off the main breaker to stop all electricity. This keeps you safe while working.
-
Remove the Panel Cover: Unscrew the panel cover using a screwdriver. Avoid touching wires or connections inside.
-
Find the Faulty Breaker: Look for the breaker that’s damaged or won’t reset. Signs include burn marks or a loose switch.
-
Disconnect the Wires: Loosen screws holding the wires with an insulated screwdriver. Label each wire to make reconnecting easier.
-
Take Out the Breaker: Pull the breaker gently from its slot. Wiggle it slightly if it’s stuck to the bus bar.
Tip: Keep your workspace bright and dry. Use a flashlight to see inside the panel clearly.
These steps help you safely remove the old breaker and get ready for the next part.
Installing the New Breaker
Now, put in the new breaker. Follow these simple steps:
-
Pick the Right Breaker: Ensure the new breaker matches the old one’s voltage, amps, and type.
-
Check the Panel: Inspect the bus bar and nearby areas for damage or dirt. Clean them if needed.
-
Reconnect the Wires: Attach the labeled wires to the new breaker. Tighten screws firmly but not too tight.
-
Snap the Breaker In: Push the breaker into its slot until it clicks onto the bus bar.
-
Check Connections: Make sure wires are secure and the breaker is properly seated.
Alert: Confirm the power is still off before touching wires or parts.
Installing the breaker correctly keeps your system safe and working well.
Reassembling the Panel
Finish by putting the panel back together. Here’s how:
-
Put the Cover Back: Align the panel cover and tighten screws. Ensure it fits snugly.
-
Label the Breaker: Write what the new breaker controls and add it to the panel’s label.
-
Turn Power Back On: Switch on the main breaker and test the new one to ensure it works.
|
Panel Reassembly Checklist |
Key Points |
|---|---|
|
Panel Cover |
Make sure screws are tight and the cover is aligned. |
|
Breaker Labels |
Clearly mark the new breaker for easy identification. |
|
Final Inspection |
Check for loose screws or wires before restoring power. |
Note: If anything seems wrong during reassembly, stop and call an electrician.
Once the panel is reassembled, your circuit breaker replacement is done. You’ve learned how to replace it safely and easily!
Testing and Fixing Problems After Replacement
After replacing the circuit breaker, test it to ensure it works. This step is important for keeping your electrical system safe and functional.
Turning Power Back On Safely
Before switching the main breaker on, check your work. Make sure wires are tight, the new breaker is secure, and the panel cover is on. Once everything looks good, turn the main breaker back on.
Tip: Stand to the side when turning the power on. This keeps you safer if something goes wrong.
After restoring power, see if the new breaker stays on. If it trips right away, there could be a wiring issue or an overload. A tripping breaker often means something isn’t right with the circuit.
Testing the Circuit
Next, test the circuit connected to the new breaker. Turn on the devices or appliances it powers. Check if they work properly. If everything runs fine, the replacement was successful.
For a deeper check, try these methods:
|
Method |
What It Does |
|---|---|
|
Finds problems like broken connections or faults. |
|
|
Functional Testing |
Confirms the circuit works as it should. |
|
Voltage Testing |
Checks voltage levels to ensure they’re correct. |
|
Current Injection |
Finds open or short circuits and checks safety devices. |
If you notice problems like flickering lights or devices not working, look into it further. These could mean a bigger issue with the circuit.
Fixing Common Problems
Sometimes, issues happen even after replacing the breaker. Here’s how to handle common ones:
-
Breaker won’t reset: Unplug everything on the circuit. Try resetting the breaker again. If it still trips, there may be a short or overload.
-
No power: Check if the main breaker is fully on. Look for loose wires.
-
Breaker trips after working: Find out what caused the trip. Check the wiring and test with another device.
Follow these steps for harder problems:
-
If it trips during setup, check the load and breaker type.
-
If it trips later, inspect the wiring and try another breaker.
Note: If you can’t fix the problem, call a licensed electrician. They can safely find and solve the issue.
By turning power on carefully, testing circuits, and fixing problems, your system will stay safe and reliable.
When to Call a Professional for Circuit Breaker Replacement
Sometimes, replacing a circuit breaker can be hard. Knowing when to ask for help saves time and stress. Let’s see when calling an expert is the best choice.
Complicated Electrical Issues
Some problems are too tricky to fix alone. If the breaker keeps tripping, looks damaged, or makes strange noises, call an electrician. These signs often mean bigger issues that need special tools and skills.
-
A burning smell might mean overheating or an electrical arc.
-
Scorch marks or cracks show the breaker can’t protect your system.
-
Buzzing sounds could mean internal problems that may become dangerous.
Tip: Don’t ignore these signs. Electrical issues can cause fires or serious damage if left unfixed.
Big projects, like upgrading power during renovations, also need experts. Licensed electricians make sure your system is safe and handles more power.
Unsure or Inexperienced
If you don’t know how to replace a breaker, don’t try. Electrical work needs care and knowledge. Mistakes can cause shocks, damage, or injuries.
Here’s when to call an expert:
-
You don’t understand the breaker panel layout.
-
You can’t test or find a faulty breaker.
-
You feel unsure about handling wires, even with power off.
Alert: It’s okay to ask for help. Experts are trained to do this safely and correctly.
Electricians can also answer, “how much does it cost to replace a circuit breaker?” They’ll give accurate estimates based on your needs.
Rules and Permits
Electrical work isn’t just fixing wires—it must follow rules. Many places need permits for upgrades like breaker replacements. These permits ensure the work meets the National Electrical Code (NEC) and local laws.
|
Requirement Type |
Details |
|---|---|
|
Needed for panel upgrades, including inspections after work. |
|
|
NEC Compliance |
Electricians must follow NEC and local rules. |
Permit costs range from $50 to $300, depending on where you live. If you’re unsure, an electrician can help. They’ll handle permits and make sure your system passes inspection.
Note: Skipping permits or breaking rules can lead to fines or unsafe setups. Always check local laws before starting.
Calling a professional isn’t just about fixing things—it’s about safety and peace of mind. When unsure, let the experts take over.
Changing a circuit breaker safely isn’t too hard. With the right tools and clear steps, you can do it. Old panels can be dangerous and may cause fires. These fires lead to many accidents and cost a lot of money. Always wear safety gear and follow lockout/tagout rules to avoid danger. If you’re unsure or the problem is tricky, call an electrician. Staying safe and prepared makes replacing a breaker easier. It also keeps your home safe and working well.
Tip: Switching to newer breakers makes your system safer and more reliable. Many businesses save money and reduce downtime by upgrading.
FAQ
What are the signs that my circuit breaker needs replacement?
Watch for these signs:
-
It trips often without a clear reason.
-
You smell something burning near the panel.
-
The breaker feels hotter than normal.
-
It won’t reset or turn back on.
Tip: If you see these signs, test the breaker or call an expert.
Can I replace a circuit breaker without turning off the main power?
No, you can’t. Always switch off the main breaker first. This keeps you safe and avoids electrical shocks.
Alert: Working on a live panel is very dangerous. It can cause serious harm or even death.
How do I choose the right replacement breaker?
Make sure the new breaker matches the old one. Check its voltage, amps, and type (single-pole or double-pole). If unsure, read the panel’s manual or ask an electrician.
Note: Using the wrong breaker can harm your system or create dangers.
Is it safe to replace a circuit breaker myself?
Yes, if you follow safety rules and know the basics of electricity. Wear protective gear, use insulated tools, and confirm the power is off.
Tip: If you’re unsure at any point, stop and call a licensed electrician.
How long does it take to replace a circuit breaker?
It usually takes 30 minutes to an hour. This depends on how experienced you are and how complex the panel is.
Tip: Gather all tools and materials first to save time and avoid delays.
You may be interested in the following information
How much does it cost for me to replace a circuit breaker
How to Replace a Surge Protector Safely and Efficiently
What are the warning signs of surge protector failure

