Core Products: Terminal Blocks, Transfer Switches & Digital Panel Meters Supporting Electrical Categories | OEM/ODM | Project-Based Quotation
Products
Industries
Resources
Electrical Tools
Company
Start a Conversation
Share a model, BOM, product photo or application requirement for review.
SENTOP DIN-rail terminal block family with matching accessories
Terminal-block safety guide · updated August 13, 2026

How to Improve the Safety of Terminal Blocks

A safe terminal connection is a complete system: the exact block, conductor, preparation, clamp, accessories, mounting, enclosure, protection, installation method, and maintenance record must all agree. One color, one approval mark, or a larger current number cannot make a poor connection safe.

Use documented ratingsCurrent, voltage, conductor, temperature, and short-circuit conditions are model-specific.
Prepare the exact conductorWire class, size, strip length, ferrule, and count per point must be accepted.
Install the complete accessory setEnd plates, end stops, partitions, bridges, markers, and enclosure each have a role.
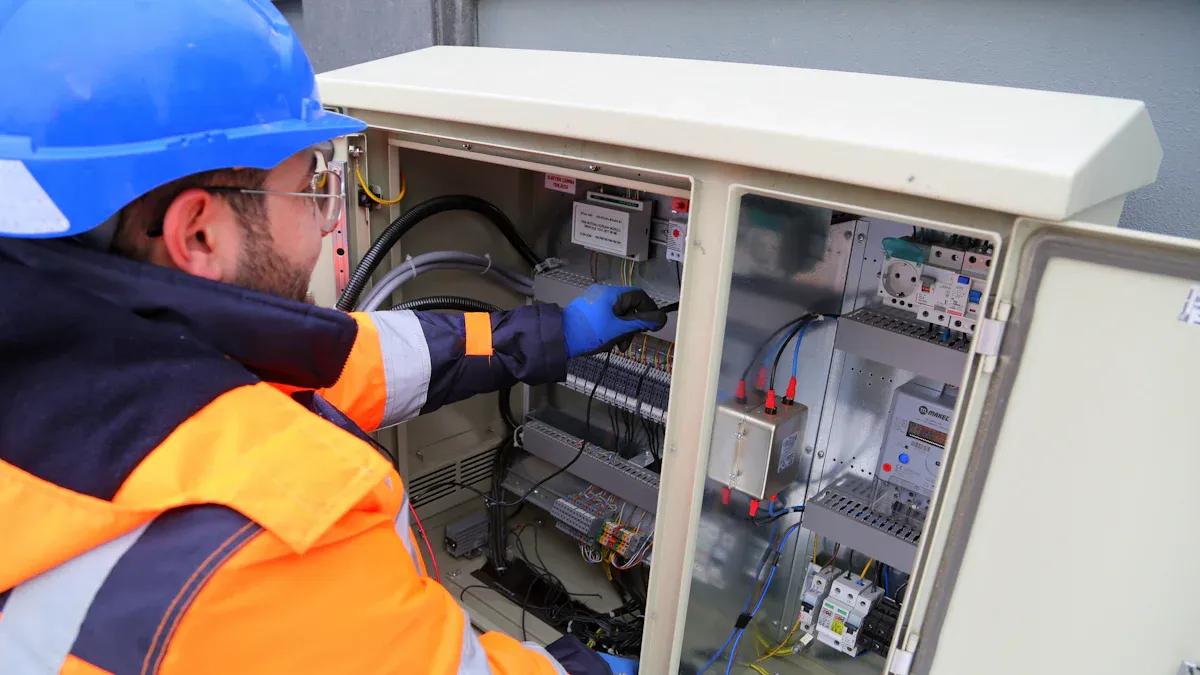
Make work electrically safeQualified personnel isolate every source, lock/tag, and verify absence of voltage.

SENTOP product-family image. Exact construction, ratings, accessories, approvals, and availability vary by catalogue number.

Quick decision

Pass six safety gates before energizing

This is the shortest useful review for a panel builder, OEM engineer, or maintenance team. If one gate has no evidence, the connection is not ready.

01 · DUTY

Define the circuit

Record the maximum current through this terminal, AC/DC voltage, duty, protection, and available fault current.

02 · WIRE

Match the conductor

Confirm material, class, AWG/mm², strip length, preparation, and conductors allowed in one clamp.

03 · PART

Verify the exact model

Use the datasheet and active certification record. A family name or physical fit is not enough.

04 · ASSEMBLY

Complete the terminal row

Install the required rail, end stops, end plates, partitions, bridges, labels, and cable support.

05 · ENVIRONMENT

Protect the installation

Coordinate heat, pollution, moisture, vibration, chemicals, altitude, spacing, and enclosure protection.

06 · PROCESS

Control the work

Qualified personnel follow isolation, LOTO, absence-of-voltage verification, inspection, and commissioning procedures.

Direct answer

Safety comes from a controlled connection chain

Improper wire preparation, insufficient contact pressure, contamination, overload, or damaged parts can increase contact resistance. Under load, resistance produces heat. Thermal cycling and oxidation may make the joint worse, and severe deterioration can lead to arcing, insulation damage, or loss of the circuit.

The practical response is not “choose 150% current and tighten often.” There is no universal 150% terminal-block rule. Select the exact terminal from its rated and derated data for the real conductor, maximum current, ambient temperature, loaded neighbors, enclosure, and installation. Then control preparation, assembly, inspection, and records.

Qualified-person work only

Work inside an electrical enclosure can expose line-side, backfed, induced, or stored energy even when a local switch is off. Before contact, identify and isolate every source, control stored energy, apply the required lockout/tagout, and have a qualified person verify absence of voltage with suitable test equipment. Apply the electrical-safety rules that govern the site.

The connection chain

Six linked controls — one installed result

Electrical design

Load, voltage, protection, short-circuit conditions, insulation coordination, and circuit role.

Product evidence

Exact catalogue number, ratings, conductor table, temperature limits, certification, and conditions.

Termination

Strip length, strand condition, ferrule or bare wire, insertion, crimp, torque, and tool status.

Assembly

Rail or panel, end stops, end plates, partitions, bridges, markers, spacing, and cable restraint.

Environment

Enclosure, heat, dust, moisture, condensation, chemicals, corrosion, vibration, and altitude.

Lifecycle

Pre-energization checks, baseline data, inspection plan, findings, repairs, and change control.

Risk map

Six common failure paths and the right control

These risks often overlap. Treat the visible symptom as a reason to investigate the complete current path, not as permission to tighten one screw and walk away.

01

High-resistance joint

Wrong strip length, damaged strands, incomplete insertion, incorrect torque or crimp, contamination, or worn hardware can increase resistance.

Control: exact preparation, full insertion, specified tool and method, recorded inspection.
02

Thermal overload

Current, loaded adjacent positions, warm enclosure air, bridges, smaller conductors, and nearby heat sources affect the installed temperature.

Control: use model-specific rating and derating data under the actual conditions.
03

Insulation or spacing failure

Inadequate clearance, creepage, partitions, end plates, or pollution control can increase leakage, flashover, or touch risk.

Control: coordinate voltage, impulse, pollution, altitude, geometry, and enclosure.
04

Wrong conductor interface

Solid, stranded, fine-stranded, copper, aluminum, bare, and ferruled conductors are not interchangeable by default.

Control: approve the exact conductor type, size, preparation, and count per clamp.
05

Mechanical movement

Missing end stops, poor cable restraint, rail movement, vibration, or conductor bend force can stress the connection.

Control: verify mounting, end brackets, cable support, vibration evidence, and service access.
06

Moisture or contamination

Condensation, conductive dust, salt, oil, or chemicals can affect insulation, contacts, markers, and the surrounding equipment.

Control: select the terminal, coating, gland, enclosure, and climate control as one system.
Selection controls

Approve the exact model with an eight-check record

Standard scopes and product-family names do not create the rating of a specific terminal. The exact datasheet, certification record, instructions, and installed conditions control the decision.

CheckWhat to verifyUnsafe shortcut to avoidEvidence to keep
1. Circuit dutyMaximum current through this terminal, duty, peaks, AC/DC voltage, frequency, phase or polarity, and circuit function.Adding every nameplate current without understanding circuit topology, or applying a universal 150% margin.One-line diagram, load calculation, and protection schedule.
2. Product ratingRated current and voltage under stated test conditions; ambient/derating data; terminal temperature range; pole loading and bridge limits.Reading one ampere value as valid for every wire, enclosure, ambient, and accessory.Exact model datasheet and manufacturer confirmation for unusual conditions.
3. ConductorCopper or approved aluminum; solid, stranded, or flexible class; AWG/mm²; insulation; strip length; ferrule rules; conductors per point.Assuming that a wire is accepted because it enters the opening.Conductor matrix, strip-length check, crimp specification, and approved tool.
4. ConnectionScrew, spring, push-in, stud, or another technology; actuation; exact torque where stated; tool access; maintenance instructions.Using a generic torque, tightening by feel, or routinely re-tightening maintenance-free terminals.Work instruction, calibrated-tool status, torque/crimp record when required.
5. InsulationWorking and impulse voltage, overvoltage category, pollution degree, material group, altitude, creepage, clearance, and barriers.Using a generic air gap or relying on ceramic/plastic material strength alone.Product data, spacing drawing, and end-equipment insulation review.
6. Fault dutyComponent SCCR or conditional short-circuit data where applicable, required protective device, conductor, bridge, and installation conditions.Assuming that a certification mark proves any fault-current level or the completed panel SCCR.Certification conditions, protection coordination, and panel/machine SCCR record.
7. AssemblyDIN rail or panel, end stops, open-side end plates, partitions, bridges, test points, markers, cable support, and cover compatibility.Mixing accessories from another family because the dimensions look similar.Approved BOM, layout drawing, and installation inspection.
8. EnvironmentEnclosure IP, heat, condensation, dust, chemicals, salt, UV, vibration, shock, altitude, fire behavior, and any special-location approval.Calling an end plate waterproof, immune to corrosion, finger-safe in every arrangement, or suitable for vibration without test evidence.Environmental specification, enclosure data, and exact approval/test record.
For general product matching, review the SENTOP terminal-block range and DIN-rail terminal-block options. Product-family pages narrow the search; the ordered catalogue number and its documents still make the final decision.
Safe installation

Use a repeatable, qualified-person work sequence

The sequence below is a control framework, not authorization for energized work. Site procedures, local law, the equipment instructions, and the risk assessment govern the job.

01 · IDENTIFY

Confirm the equipment and all energy sources

Use drawings, labels, and field checks. Include normal supply, generator, UPS, PV, control, induced, and stored energy.

Do not rely on a local OFF indication.
02 · MAKE SAFE

Isolate, lock/tag, and verify

Follow the approved shutdown and LOTO procedure. A qualified person verifies that equipment cannot restart and tests every exposed work point for absence of voltage.

Colour and non-contact indication do not prove de-energization.
03 · CHECK BOM

Match the exact parts and instructions

Confirm terminal, rail, end plates, end stops, partitions, bridges, markers, conductor, ferrules, and tools against the approved drawing.

Stop if the series or revision is uncertain.
04 · PREPARE WIRE

Strip without nicking or deforming strands

Use the specified strip length. Use a ferrule only when accepted, with matching barrel, conductor, crimp profile, and tool.

No exposed copper beyond the limit; no insulation inside the clamp.
05 · TERMINATE

Insert fully and use the published method

Keep all strands in the clamp. Apply the exact screw torque or spring actuation method. Never invent a value or tighten by feel.

Do not place multiple wires in one point unless documented.
06 · SECURE

Complete the mechanical assembly

Lock the row with compatible end stops. Add required open-side plates, partitions, strain relief, and conductor routing support.

Do not let cable bend force load the terminal.
07 · INSPECT

Check identity, geometry, and workmanship

Verify circuit numbering, PE arrangement, insertion, exposed copper, spacing, bridges, guards, tool removal, and cover restoration.

Record deviations and correct them before commissioning.
08 · COMMISSION

Use the approved test and energization plan

A qualified person performs the required pre-energization checks and commissioning tests, then restores power under the site procedure.

Testing depends on the equipment design; do not improvise live tests.
U.S. workplace reference: OSHA 29 CFR 1910.333 covers de-energization, lockout/tagout, qualified-person verification, and testing for induced or backfeed voltage. Use the requirements that govern the actual country and workplace.
Properly crimped wire ferrule on a stranded conductor
A ferrule is an approved interface, not a universal upgradeA ferrule can contain strands when the terminal manufacturer permits it. The ferrule size, collar, barrel length, crimp profile, tool, and conductor must match. Photo: Simon A. Eugster / Wikimedia Commons, CC BY-SA 3.0.
Conductor preparation

Build the joint the product was tested with

A terminal may accept different ranges for solid, stranded, and fine-stranded copper. The permitted range can change when a ferrule is used. Aluminum needs a product specifically identified for it, plus the specified preparation, compound, and torque. Do not assume that a metal name or plating makes a connection immune to corrosion.

  • Verify conductor material, class, cross-section, insulation, strip length, ferrule, and number per clamp.
  • Do not tin fine-stranded wire or add contact compound unless the exact manufacturer instruction permits it.
  • Remove no strands to force an oversized wire into the opening.
  • Do not reuse a crushed ferrule, damaged conductor end, stripped thread, or deformed clamp.
  • For screw connections, use the exact terminal torque with the specified controlled tool.
  • For spring or push-in connections, follow the actuation and conductor-preparation instructions; do not routinely re-tighten them.

Use the SENTOP terminal-block wiring guide for a broader installation workflow and the manufacturer torque guide for torque-document control.

Accessory safety

Every accessory has a job — and a clear limit

Use only parts approved for the exact terminal family and installed arrangement. A physically compatible accessory can still have the wrong spacing, current, material, or certification scope.

End plate

Close the open side

Install the matching plate when the terminal row has an open side or when required to maintain the stated insulation spacing or touch protection.

Limit: it does not make the terminal row dust-tight or watertight.
End stop / bracket

Keep the row in position

Use the approved end bracket for the rail and expected forces. Check rail seating, row movement, and cable routing during assembly.

Limit: it does not prove vibration suitability for the application.
Partition / separator

Maintain required separation

Add partitions or spacing when the instructions require separation between voltages, circuits, test points, or terminal families.

Limit: a divider cannot repair an otherwise inadequate insulation design.
Bridge / jumper

Distribute the intended potential

Confirm family, position, current, conductor path, touch protection, and protection coordination. Inspect that the bridge is fully seated.

Limit: the base terminal rating does not automatically rate every bridge.
Marker / label

Connect field wiring to the drawings

Use durable terminal, conductor, group, and panel identification that stays legible in the actual heat, chemicals, UV, and cleaning environment.

Limit: colour alone never proves circuit function or absence of voltage.
Enclosure system

Control the environment

Select the box, glands, seals, drainage or climate control, material, and mounting for dust, water, condensation, corrosion, and service access.

Limit: read both IP digits; IP does not prove chemical, UV, corrosion, or Ex suitability.
Identification

Use colour as a cue, never as proof

IEC 60445 provides identification principles, while local wiring rules, customer standards, and older installations may use different systems. The approved schematic and verified circuit state control the work.

Do not infer “safe” from colour

A blue, green, red, black, or grey conductor may be misidentified, modified, or energized. Test and isolate as the governing work procedure requires.

Terminal ID

Use a unique, drawing-linked number

Match the terminal row, terminal position, conductor ends, cable, and I/O point so a technician can trace the circuit without guessing.

Function

Identify PE, neutral, power, control, and test roles

Use the scheme required by the destination market and project. A green block is not automatically a qualified PE terminal.

PE control

Use the correct protective-conductor terminal

Verify the dedicated PE/PEN product, rail compatibility, conductor range, mechanical connection, and protective-bonding continuity.

Lifecycle

Keep identification accurate after changes

Update drawings, markers, spare status, bridge maps, inspection records, and software references during modification or repair.

For a fuller numbering workflow, see terminal-block numbering and labeling best practices. Identification supports safe work; it never replaces electrical isolation and testing.

Burnt wire ferrule with melted collar and heat-damaged insulation
Heat damage is a stop-work conditionMelted insulation, severe discoloration, pitting, or carbonization calls for isolation, root-cause investigation, and replacement of affected parts—not cosmetic cleaning or extra torque. Photo, cropped for layout: Phiarc / Wikimedia Commons, CC BY-SA 4.0. The image is an illustrative screw-terminal failure, not a SENTOP product.
Abnormal heat or damage

Do not touch the terminal to judge temperature

Abnormal heat can result from overload, phase imbalance, high contact resistance, wrong conductor preparation, incorrect torque or crimp, damaged hardware, corrosion, a loose bridge, nearby heat, or inadequate ventilation. Touching a suspected live or hot terminal is not a diagnostic method.

If there is unusual odor, repeated tripping, visible discoloration, melting, carbonization, arcing, or a monitoring alarm, follow the site procedure to remove the equipment from service when safe. Establish an electrically safe work condition before physical inspection. Qualified personnel may use thermal or electrical diagnostic methods under the site’s energized-work controls when justified.

  • Record load and ambient conditions; compare equivalent phases or similar connections and historical baselines.
  • Do not treat an infrared hot spot as proof that the screw is loose.
  • Do not tighten beyond the specified torque or add lubricant to “fix” heat.
  • Replace cracked, melted, carbonized, pitted, stripped, deformed, or repeatedly overheating parts as the manufacturer directs.
  • Inspect the conductor, clamp, bridge, adjacent insulation, protection, enclosure, and cooling—not only the visible mark.

For fault causes and corrective boundaries, use the terminal-block overheating guide.

Inspection and maintenance

Set the interval from risk and evidence

There is no single inspection interval for every terminal block. Use manufacturer instructions, the equipment maintenance program, duty, criticality, vibration, thermal cycling, contamination, environment, operating history, and previous findings.

Commissioning baseline

Record what “good” looks like

Keep the exact parts, conductor and bridge map, inspection result, torque/crimp records when required, protective tests, load, and approved changes.

Inspect after installation, rework, or a relevant fault event.
Condition review

Look without disturbing good joints

Check labels, covers, end stops, cracks, discoloration, insulation movement, contamination, corrosion, cable restraint, and monitoring history.

Do not turn a screw merely to “check” tightness.
Cleaning

Use only the approved method

After de-energization and verification, follow the OEM method. Do not spray solvents, abrade plating, or blow conductive debris through equipment without permission.

Carbonized or damaged parts need replacement and root-cause review.
Thermal monitoring

Use data as an early warning

Infrared surveys or continuous sensors can support condition-based maintenance when installation, load context, alarms, and energized-work controls are defined.

Monitoring does not make an unsafe joint acceptable.
Re-torque only when the procedure calls for it

Some screw-terminal and spring-terminal systems are documented as maintenance-free. If an exact product instruction or approved maintenance plan calls for re-torque, first de-energize and verify absence of voltage, then use the specified method and a calibrated tool. If the joint shows heat or movement, investigate the cause rather than assuming routine tightening is the repair.

Stop, replace, or escalate

Know when maintenance is not enough

A damaged connection can affect nearby conductors, insulation, bridges, and protective devices. Preserve evidence, find the cause, and use the manufacturer’s replacement boundary.

Stop and isolate

Immediate warning signs

Arcing sound, smoke, persistent odor, unexpected trip, liquid entry, monitoring alarm, severe heat, or exposed damaged insulation requires a controlled response.

Do not touch, clean, tighten, or continue loading the connection.
Replace affected parts

Damage that should not be reused

Cracks, melting or softening, carbonization, pitting, significant discoloration, damaged plating, stripped threads, weak spring action, missing strands, or insulation recession.

Include heat-affected conductor ends and accessories in the review.
Escalate the design

Repeated or unexplained heating

Review actual load, conductor, termination, bridge, protection, fault level, enclosure heat, neighboring devices, vibration, environment, and model suitability.

A larger terminal alone may not correct the system cause.
Standards and evidence

Use the right standard — then verify the exact product

A standard defines requirements and tests within a scope. Certification or recognition applies to identified products and conditions. Neither one certifies the completed panel, machine, or installation by itself.

ReferenceWhat it helps defineImportant boundary
IEC 60947-7-1:2025General industrial terminal blocks and test-disconnect terminal blocks for copper conductors within its stated low-voltage scope.Its scope limits are not the automatic rating of any SENTOP or competitor catalogue number.
IEC 60947-7-2Protective-conductor terminal blocks for PE/PEN functions, including mechanical and electrical requirements.A green block or ordinary feed-through block is not automatically a protective-conductor terminal.
UL 1059, Ed. 6A North American terminal-block component standard for products rated 1500 V or less.Its scope states that compliance does not itself assure suitability in a particular end product.
IEC 60664-1Insulation coordination using voltage, impulse, overvoltage category, pollution, materials, altitude, clearance, and creepage inputs.Do not replace the calculation with a generic spacing number.
IEC 60445:2021Principles for terminal and conductor identification.Apply the actual jurisdiction and project scheme; never use colour as proof of de-energization.
IEC 60529IP coding for protection provided by enclosures.An open terminal strip or end plate does not inherit a waterproof rating.
CE markingThe manufacturer’s declaration that applicable EU harmonisation legislation has been met.CE is not a universal third-party safety approval and does not replace product-data review.
Also check the governing end-product standard for the completed control panel, machine, low-voltage assembly, equipment, or special location. The terminal’s active certification record, ratings, Conditions of Acceptability, instructions, and the complete installed configuration remain essential.
Safety-focused RFQ

Send the complete connection requirement

A useful quote needs more than voltage and amperes. Share the circuit, conductor, environment, installation, destination market, and document needs. SENTOP can review the suitable terminal family, compatible accessories, project quantity, OEM needs, and available evidence.

01 · CircuitMaximum current through each terminal, duty, AC/DC voltage, frequency, phases/polarity, protection, and available fault current.
02 · ConductorCu/approved Al, AWG/mm², class, insulation, strip length, bare/ferrule/lug, and conductors per point.
03 · LayoutRail or panel, pole count, dimensions, cable direction, bend space, end stops, end plates, partitions, bridges, and markers.
04 · EnvironmentAmbient, enclosure, altitude, pollution, condensation, dust, chemicals, corrosion, vibration, shock, and ingress needs.
05 · ComplianceDestination market, end-equipment standard, exact certification, SCCR/conditional data, material declarations, CoC, and traceability.
06 · SupplyQuantity, annual demand, samples, delivery window, packaging, labeling, spares, alternates, and change-notification needs.
Terminal-block safety FAQ

Short answers for panel and maintenance teams

These answers define safe boundaries. Exact work still follows the product instructions, site procedure, applicable law, and end-equipment standard.

One rule covers every answer

Do not guess from colour, physical fit, product-family names, or habit. Verify the exact model, actual circuit conditions, complete assembly, and documented work method.

Should a terminal block be rated at 150% of the load?

No universal 150% terminal-block rule exists. Calculate the design current under the applicable wiring and equipment rules. Then confirm that the exact terminal’s documented rating is not exceeded for the real conductor, ambient, grouping, enclosure, bridge, and duty. Apply an additional factor only when the governing requirement or manufacturer says to do so.

What should I do if a terminal block seems hot?

Do not touch it. A qualified person may use approved thermal or electrical diagnostic methods under the site’s energized-work controls. If there is abnormal heat, odor, discoloration, melting, arcing, or repeated tripping, remove the equipment from service when safe, establish an electrically safe work condition, and investigate the load, conductor, termination, bridge, protection, and environment before re-energizing.

How often should terminal blocks be inspected?

There is no universal three-month interval. Set a documented interval from the terminal and equipment manufacturer’s instructions, the site maintenance program, duty, criticality, vibration, thermal cycling, contamination, environment, previous findings, and fault history. Inspect after commissioning, relevant rework, or abnormal events, and shorten the interval when evidence justifies it.

Should screw terminals be re-tightened during every inspection?

No. Do not turn a screw merely to check tightness. Some screw and spring systems are documented as maintenance-free. Re-torque only when the exact product instruction or approved maintenance procedure requires it, after de-energization and absence-of-voltage verification, using the specified method and a calibrated tool.

Can any wire that fits be used in a terminal block?

No. Match conductor material, solid/stranded/flexible class, AWG or mm², strip length, permitted ferrule or lug, and number of conductors per clamping point. Physical fit does not prove electrical, mechanical, thermal, or certification suitability.

Do end plates make terminal blocks waterproof?

No. A matching end plate may close an open terminal side and help maintain the specified insulation spacing or touch protection. It does not make a terminal row dust-tight or watertight. Use a tested enclosure system with the correct glands, seals, condensation control, and environmental rating.

Does a finger-safe terminal allow work while energized?

No. Touch protection applies only to the tested, correctly assembled configuration and does not remove shock, arc-flash, fault, or line-side hazards. De-energize and verify before contact unless energized work is justified and controlled under the governing electrical-safety procedure.

Primary technical sources

Standards, regulations, and manufacturer evidence

These sources support the safety boundaries in this guide. They do not replace the purchased standards, local rules, exact product documents, or a project-specific engineering review.

OSHA 29 CFR 1910.333De-energization, lockout/tagout, qualified-person verification, and electrical work practices.
OSHA 29 CFR 1910.335Hazard-based safeguards, PPE, insulated tools, and barriers for electrical work.
IEC 60947-7-1:2025Current general industrial terminal-block standard within its stated copper-conductor scope.
IEC 60947-7-2Protective-conductor terminal blocks for PE/PEN functions.
UL 1059, Edition 6Terminal-block component scope; end-product suitability still requires evaluation.
IEC 60664-1Low-voltage insulation-coordination principles, including clearance, creepage, pollution, and altitude inputs.
IEC 60445:2021Identification and marking principles for equipment terminals and conductors.
IEC 60529IP Code for protection provided by enclosures.
UL · Machinery SCCRComponent values, protective-device conditions, and completed-machine SCCR context.
European Commission · CE markingManufacturer responsibilities and the declaration-of-conformity boundary.
Eaton XB IEC terminal blocksManufacturer example of maintenance-free terminal technologies and model-level documentation.
WAGO interconnection FAQManufacturer explanation of matching end plates, touch protection, and insulation spacing.

Improve safety by controlling the complete terminal connection

Share the circuit, conductor, environment, layout, destination market, quantity, and document needs. SENTOP can help narrow the product family and compatible accessory path for your panel or equipment project.

滚动至顶部