
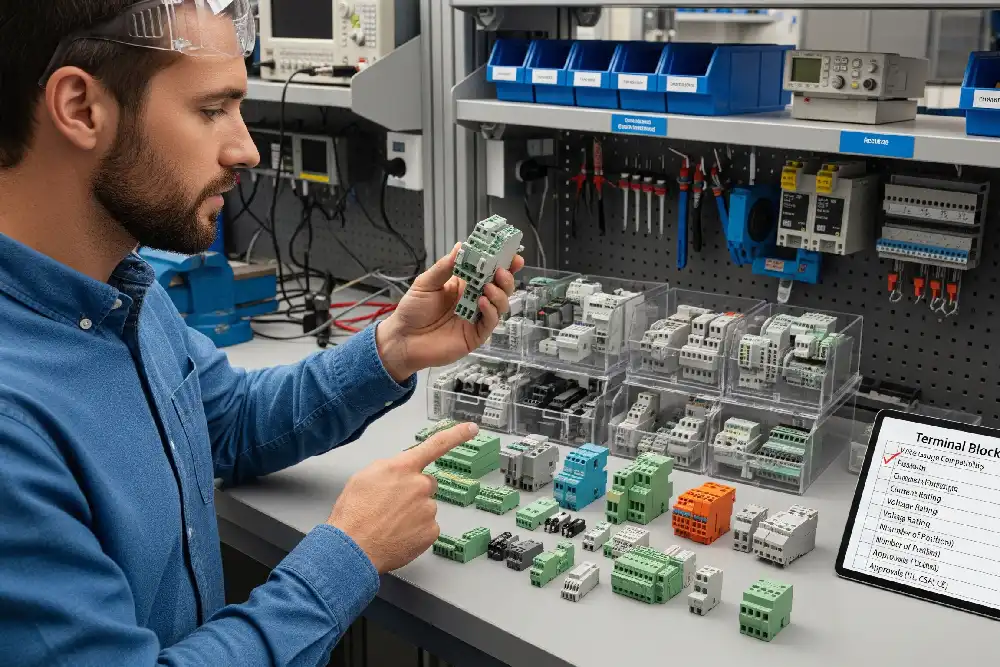
How do you choose the best terminal block for your project? You need one that fits your system and keeps it safe. Check the current and voltage ratings. Look at the wire size and connection type. Think about how the block fits in your setup. Decide if you need DIN rail or panel mounting. Engineers also look at durability and temperature ratings. They check if it is easy to use. Always pick a terminal block with a good safety margin. Make sure it works with your wires and your space.
Key Takeaways
- Pick a terminal block with higher current and voltage ratings than your system. This helps keep things safe and stops overheating.
- Make sure the wire size and type match the terminal block’s rules. This stops loose connections and keeps things working well.
- Choose the right connection type for your project. You can use screw, spring, or push-in. Think about how much vibration there is and how often you need to fix it.
- Look at the mounting style, wire entry direction, and pole count. This helps the terminal block fit your space. It also keeps wires neat and easy to fix.
- Check safety certifications, insulation materials, and IP ratings. These protect your project in different places and help it last a long time.
Terminal Block Electrical Specs
Current and Voltage
When you pick a terminal block, start by checking the current and voltage ratings. These numbers tell you how much electricity the block can handle without getting too hot or failing. If your project runs at 24 V or 120 V, make sure the terminal block’s voltage rating is higher than your system’s voltage. This helps protect your setup from voltage surges.
For current, always look for a rating that is at least 150% of your maximum expected load. For example, if your circuit draws 10 amps, choose a terminal block rated for at least 15 amps. This safety margin keeps your system safe and prevents overheating. In industrial automation, you’ll find terminal blocks with current ratings from just a few amps up to several hundred amps, and voltage ratings from 51 V to 1500 V.
Here’s a quick look at typical ratings:
| Conductor Cross-Section (mm²) | Typical Current Rating (A) |
|---|---|
| 0.2 | 4 |
| 1.5 | 16 |
| 10 | 50 |
| 35 | 121 |
| 95 | 217 |
| 240 | 415 |
Tip: Never use a terminal block below its rated current or voltage. Overloading can cause overheating, melting, and even fire.
Wire Size
Wire size matters just as much as current and voltage. You need to match your wire gauge to the terminal block’s specifications. Most terminal blocks in control panels accept wire sizes from 18 to 4 AWG, but some types fit wires from 24 to 12 AWG. If you use a wire that’s too thick or too thin, it won’t fit securely, and you risk a loose connection.
Check the wire entry hole size on the terminal block. This tells you which wire gauges will fit. For example, a screw terminal block might work with wires from 26 to 18 AWG. Stranded wires are best for screw terminals, while single-core wires fit push-in types.
Here’s a table to help you match wire size to amp rating:
| Amp Rating | Wire Size Range (AWG) |
|---|---|
| 20 A | 16 – 14 |
| 30 A | 14 – 10 |
| 50 A | 10 – 8 |
Note: Always check both the wire gauge and the entry hole size before you buy. This ensures a secure and safe connection.
Safety Margin
You want your project to run safely and reliably. That’s why experts recommend choosing a terminal block with a current rating at least 150% higher than your maximum load. This extra margin helps prevent overheating and gives you room for future upgrades. Some sources suggest a 20% margin, but 150% is the best practice for most industrial and automation projects.
If you push a terminal block past its limits, you risk insulation breakdown, fire hazards, and equipment failure. Loose connections or the wrong wire size can make things worse by increasing resistance and heat. Always plan for a safety margin, and think about the environment where you’ll install the terminal block. Hot or poorly ventilated spaces need even more caution.
Alert: Never ignore the safety margin. It’s your best defense against electrical problems and costly repairs.
Connection Types

Screw vs. Spring
You have two main choices for connecting wires: screw terminals and spring terminals. Each type has strengths and weaknesses.
- Screw terminals let you adjust the grip by tightening the screw. You need a screwdriver and must apply the right amount of torque. If you tighten too much, you can damage the wire. If you leave it too loose, the connection may fail.
- Vibration can loosen screws over time. You might need to check and retighten them, especially in machines that run for years.
- Spring terminals use a built-in spring to hold the wire. You do not need to adjust anything. The spring keeps steady pressure, so you avoid mistakes like overtightening.
- Spring terminals resist vibration better and need less maintenance. You can inspect them easily and do a quick tug test to check the connection.
Tip: If your project faces lots of vibration or you want less maintenance, spring terminals are a smart pick.
Push-In and Others
Push-in terminal blocks make wiring fast and simple. You just push the wire into the hole—no tools needed.
- Push-in types work well for solid wires and flexible wires with ferrules.
- You save time because installation is quick and tool-free.
- These blocks offer strong grip and high pull-out force, so wires stay secure.
- Spring clamp terminal blocks also install quickly and keep pressure steady, but push-in types are even faster.
Here’s a quick comparison:
| Type | Installation Time | Maintenance | Vibration Resistance |
|---|---|---|---|
| Screw | Slow | High | Low |
| Spring Clamp | Fast | Low | High |
| Push-In | Fastest | Low | High |
Wire Compatibility
You need to match your wire type to the terminal block.
- Screw terminals fit many wire sizes and types.
- Spring terminals work with solid and flexible wires.
- Push-in blocks accept solid conductors, flexible conductors, and flexible wires with ferrules.
- Most push-in blocks handle wire sizes from 0.25 mm² up to 185 mm².
Note: Always check the terminal block specs for wire size and type before you buy. This helps you avoid loose connections and keeps your project safe.
Mounting and Layout
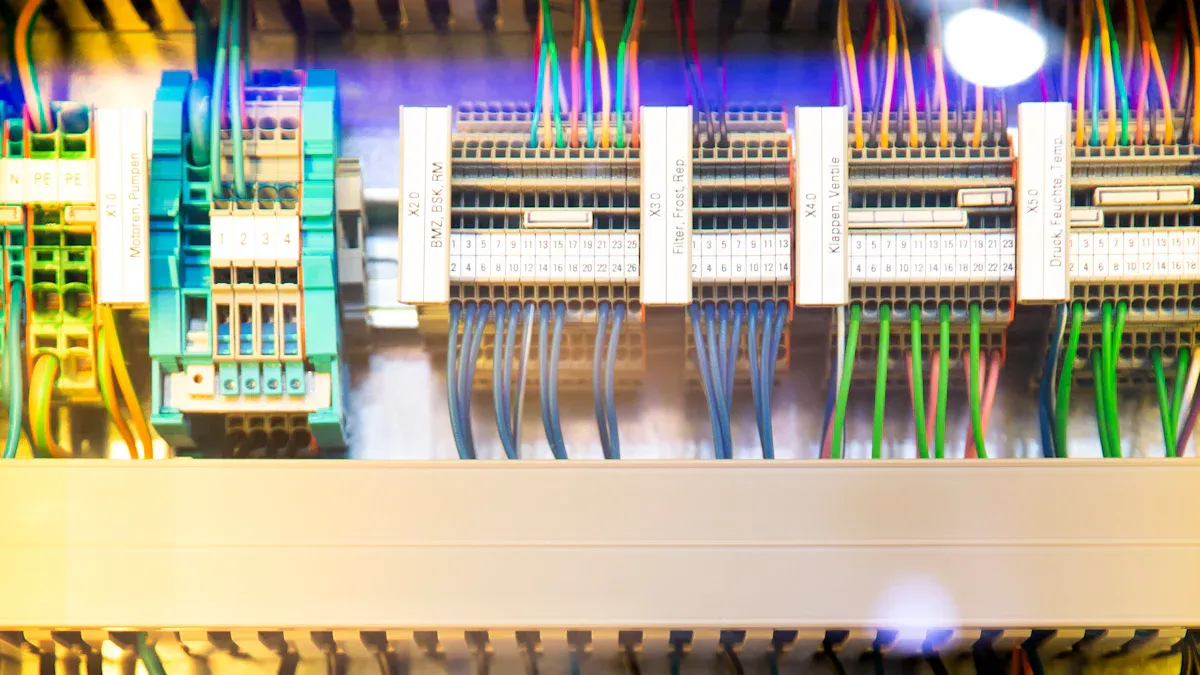
DIN Rail or PCB
You need to decide how you want to mount your terminal block. Most control panels use DIN rail mounting because it saves space and makes installation quick. You just snap the terminal block onto the rail, and you can move or replace it easily. If you work with printed circuit boards (PCBs), you might pick a terminal block designed for soldering directly onto the board. This type works well for compact devices and electronics.
When you choose a mounting style, think about your enclosure. DIN rail blocks fit well in standard electrical cabinets. PCB-mounted blocks are better for small devices or when you want everything on one board. Some enclosures have mechanical restrictions, so always check the space and layout before you buy.
Entry Orientation
Entry orientation means the direction your wires enter the terminal block. You can pick horizontal (90°), vertical (180°), or even 45° entry. The right choice depends on your panel’s design and how much room you have.
- Leaving some slack or service loops at the entry points helps you avoid wire tangling and strain.
- Good orientation and routing make future changes and maintenance easier.
- Use cable trays or conduits to keep wires neat and prevent damage.
- Run wires horizontally or vertically, not diagonally, for a tidy panel.
- Hiding slack away from devices and using the outside lane of ducts saves space and protects wires.
- The right entry orientation lowers the risk of broken connections and makes maintenance simple.
Tip: Always plan your wire entry to keep your panel organized and easy to service.
Pole Count and Pitch
Pole count is the number of connections in your terminal block. Pitch is the distance between each pole. If you need lots of connections in a small space, pick a block with a small pitch, like 3.5 mm. This lets you fit more wires in less space, which is great for crowded control cabinets. Multi-level terminal blocks can handle even more wires in the same width.
A higher pole count means a bigger block, but modular designs help you manage the size. Always balance your need for connections with the space in your enclosure. For example, a three-level block with a 3.5 mm pitch can fit up to 60 wires in just 3.5 cm.
Note: Check your enclosure and panel design before choosing pole count and pitch. This helps you avoid running out of space or making wiring too dense to manage.
Safety and Environment
Insulation and Barriers
Picking a terminal block means keeping wires safe. Insulation stops wires from touching and causing shorts. The insulation material is very important. Makers use strong plastics like polyamide, glass-fiber reinforced polyamide, and polycarbonate. Some blocks use technical ceramics or duroplasts like gemin and epoxy resin. These materials do not burn easily. They block electricity and work well in hot places.
Check this table to see how the materials are different:
| Material Type | Dielectric Strength (kV/mm) | Tracking Resistance (CTI) | Flammability (UL 94) | Max Operating Temp (°C) | Key Properties Relevant to Insulation Effectiveness |
|---|---|---|---|---|---|
| Polyamide (PA66) | 25 | 600 | V-0 | 130 | High fire resistance, halogen-free, low smoke/fumes |
| Glass-fiber reinforced PA (PAGF) | 30 | 500 | HB | 100 | Excellent dimensional stability, halogen-free flame retardant |
| Polycarbonate (PC) | >30 | >175 | V-2 / V-0 | 115-125 | High electrical insulation, halogen-free flame retardant |
| Technical Ceramics | >10 | >600 | V-0 (5 V-B) | 250 | High fire resistance, liquid-repellent, spark resistant |
| Germin KrG (Duroplast) | 10 | >600 | V-0 (5 V-A) | 130 | High dimensional stability, halogen-free, inherent flame protection |
| Epoxy Resin (EP) | 160 | >600 | V-0 | 160 | Very high temperature resistance, halogen-free, radiation resistant |
Physical barriers help keep wires apart. These dividers sit between wire connections. You get fewer shorts and better safety. Barriers help with high-voltage projects. They lower the chance of faults. They make things safer in tough places. Barrier terminal blocks are best for high-voltage systems. They keep wires apart and protected.
Ratings and Certifications
You need to check ratings before using a terminal block in hard places. Look for safety marks like ATEX and IECEx. These show the block is safe in explosive areas. You might see CCC Ex, KC, or American Ex for local rules.
Here are some things to check:
- ATEX Directive 2014/34/EU and IEC 60079 standards
- Types of protection: increased safety, intrinsic safety, equipment protection
- Labels with voltage, wire size, and certificate numbers
- IP ratings for dust and water
IP ratings matter for outdoor or factory use. IP65 blocks keep out dust and water jets. They work in rain or dusty places. IP67 blocks can handle being under water for a short time. They are good for marine or flood areas.
| Aspect | IP65 | IP67 |
|---|---|---|
| Dust Protection | Complete dust-tight protection | Complete dust-tight protection |
| Water Resistance | Protection against low-pressure water jets | Protection against temporary immersion (up to 1m for 30 minutes) |
| Environmental Suitability | Suitable for dusty environments with rain or splashes | Suitable for harsher conditions like flooding, marine, or washdown areas |
| Typical Use Cases | Outdoor lighting, factory equipment, signage | Marine applications, industrial washdown zones, flood-prone areas |
🛡️ Always check for the right ratings and certifications. This keeps your project safe in any place.
Installation and Customization
Ease of Use
You want your wiring job to go smoothly, right? Picking a terminal block that’s easy to install and maintain can save you a lot of time and headaches. Look for compact and lightweight designs. These make handling and mounting much easier, especially when you work in tight spaces. Modular blocks that snap onto DIN rails let you add or remove connections quickly. You don’t need special tools, so you can finish the job faster.
Tool-free options like spring-clamp and push-in connections really speed things up. Spring-clamp blocks let you connect wires 80% faster than screw types. Plug-in styles cut wiring mistakes by almost half. You just push the wire in, and the spring holds it tight. This means fewer loose wires and less time spent checking connections. Built-in test points and indicator LEDs help you check circuits without disconnecting anything. You can spot problems right away.
Here’s what to look for in an easy-to-use terminal block:
- Snap-on modular design for quick changes
- Tool-free wiring (spring-clamp or push-in)
- Clear access for wiring, even in crowded panels
- Built-in test points and indicators
- Durable materials for long life
🛠️ Tip: Choose blocks that match your tools and wiring style. This keeps your work simple and error-free.
Markings and Color Coding
Clear markings and color coding make your job much easier. When every terminal point has a label, you know exactly where each wire goes. Labels should show circuit numbers, voltage, or current ratings. Make sure they’re easy to read and placed where you can see them during installation and repairs. Good markings help you avoid wiring mistakes and keep your system safe.
Color-coded terminal blocks take things a step further. You can spot live, neutral, and ground circuits at a glance. This speeds up troubleshooting and helps you follow safety rules. Here’s a quick look at the benefits:
| Benefit | Explanation |
|---|---|
| Improved Safety | Colors help you avoid touching the wrong wire. |
| Reduced Wiring Errors | Visual cues prevent mix-ups and keep your system reliable. |
| Faster Troubleshooting | You find the right circuit quickly, saving time. |
| Enhanced Organization | Neat layouts make future changes simple. |
| Compliance with Standards | Color coding follows industry rules for safe wiring. |
Note: Always pick terminal blocks with permanent, easy-to-read labels and bright color coding. This keeps your wiring organized and safe.
Ready to pick the right terminal block? Here’s what you need to do:
- Define your circuit needs and choose the block structure.
- Match wire size, connection type, and mounting style.
- Check current and voltage ratings—always go for at least 150% of your max load.
- Look for safety certifications and color coding.
- Review datasheets and ask experts if you’re unsure.
Stay safe and keep your project reliable by following these steps. Make smart choices and your wiring will last!
FAQ
What is the best way to check if a terminal block fits my wire?
You should look at the wire gauge and the entry hole size. Match your wire to the terminal block specs. If you are unsure, try a test fit before installation.
Can I use the same terminal block for solid and stranded wires?
Most terminal blocks work with both types. Spring-clamp and push-in blocks handle solid and stranded wires well. Always check the manufacturer’s guide for wire compatibility.
How do I know if my terminal block is safe for outdoor use?
Check the IP rating on the datasheet. IP65 blocks resist dust and rain. IP67 blocks handle short-term water immersion. Look for these ratings before you install outside.
What should I do if my project needs more connections later?
Pick modular terminal blocks. You can add more poles or blocks as your project grows. This saves you time and keeps your wiring neat.
Do I need special tools to install terminal blocks?
Most spring-clamp and push-in blocks need no tools. Screw terminals require a screwdriver. Always read the instructions before you start wiring. 🛠️
See also
How many types of wiring terminals are there?
Features and Functions of DIN Rail Mount Terminal Blocks Explained
What Is a Terminal Block and How Does It Work
What You Should Know About Terminal Blocks and Their Other Names
How many wires can be connected to one terminal block

