
You will learn how to install wiring terminals and terminal blocks safely. It is important to feel confident and secure when you install wiring terminals. Making mistakes can be very dangerous. Some common problems include:
- Not enough insulation can expose wires and increase the risk of shocks.
- Wires can get damaged or the insulation can crack.
- Extension cords used improperly can overheat.
- Electrical parts or boxes left open can create safety hazards.
Always double-check your work. Being careful helps prevent shocks, burns, and fires.
Key Takeaways
- Always turn off the power before you start. This keeps you safe from shocks and burns.
- Use the right tools and materials for the job. Wire strippers and ferrules help make strong and safe connections.
- Pick the correct terminal block type for your wire size and task. This helps stop wires from getting loose or damaged.
- Secure wires by tightening screws to the right amount. Use ferrules to keep wires from fraying.
- Check each connection carefully and test with a multimeter. This makes sure your wiring is safe and works well.
Tools and Materials

You need to get the right tools and materials before you start. The correct equipment helps you make safe connections. It also keeps your work area neat and helps you avoid mistakes.
Tools List
You need a few tools to put in a terminal block. Here is a list to help you get ready:
- Screwdrivers (pick the right size and type for the screws)
- Wire strippers (these take off the insulation from wires)
- Crimping pliers (these are for ferrules and crimp connectors)
- Bridge cutting pliers (use these to cut wires and connectors)
- Multimeter (use this to test the terminal block connections)
- VE crimping pliers (these help with careful crimping)
Tip: Read the installation manual for your terminal block before you start. This will help you know what your project needs.
Materials List
Pick good materials for your terminal block job. Good materials help your connections work well and stay strong.
- Terminal block (choose one that is not broken and has good insulation)
- Copper connectors (these help electricity flow well)
- Ferrules or crimp connectors (make sure they fit your wire size)
- Insulating parts (these should not catch fire easily)
- Moisture-resistant terminals (use these if it is damp)
- Marking labels (these help you tell which terminal block is which)
- Wires (make sure they fit and match the voltage you need)
| Material | Purpose |
|---|---|
| Terminal block | Connects and keeps wires in order |
| Copper connectors | Makes a strong electrical connection |
| Ferrules/crimp connectors | Holds stranded wire in the terminal block |
| Insulating parts | Stops electrical shorts |
| Marking labels | Shows which terminal block is which |
Safety Gear
You must stay safe when working with a terminal block. Protect yourself from getting hurt by electricity.
- Insulated gloves 🧤
- Safety glasses 👓
- Flame-resistant clothes
- Shoes that do not slip
Note: Always turn off the power before you touch any terminal block or wire. Make sure your work area is clean and safe.
Preparation Steps
Power Off
You must turn off all power before you start. This keeps you safe from electric shock. It also protects your equipment from damage. Here are steps to disconnect power safely:
- Find the terminal that connects to metal or ground. In most cars, this is the negative terminal.
- Take off the grounded terminal first. This lowers the chance of sparks or injury.
- If your battery has two leads, disconnect either one to stop the circuit. It is safer to remove the grounded terminal first.
- For high voltage or earthed power, take off all power leads. This makes sure no electricity can flow.
- When you put wires back, connect the grounded terminal last.
- Do not take off the ungrounded terminal first. This can make metal parts live and cause short circuits.
- These steps help stop big sparks, burns, or damage to electronics when you install wiring.
⚠️ Always check again that the power is off before you touch any wires.
Inspect Wires
Check all wires before you install wiring terminals or terminal blocks. Wires that are damaged or rusty can make bad connections and cause safety problems. Use this table to help you check wires:
| Inspection Procedure | What to Look For | Recommended Action |
|---|---|---|
| Look at wires | Rust, cuts, dents, flat spots, burned insulation, loose wires | Tell someone about problems; do not touch bad wires |
| Use a tester | Flashing lights, popping or cracking sounds | Tell someone about big problems; call an electrician |
| Check connectors and splices | Open splices, only tape used, wrong color wire nuts | Tell someone about problems; use the right connectors |
| Look at cable markings | “Al” or “Aluminum” on covers | Check if wires are aluminum |
| Check panel wiring | Two wires in one spot, hot spots, melted insulation | Tell someone about problems; call an electrician |
| Check for grease or paste | Is there grease or paste or not? | Write down if it is there or not |
| Smell or see burning plastic | Danger right now | Stop working; tell someone right away |
Workspace Setup
A safe and neat workspace helps you install wiring terminals and terminal blocks the right way. You should:
- Put all tools and materials close so you do not have to move a lot.
- Keep cables and harnesses neat so they do not get tangled or trip you.
- Use connectors with ribs to stop wires from getting caught or breaking.
- Pick tools that fit your connectors and make crimping easy.
- Stay away from sharp edges in your workspace.
- Use connectors with colors and position features to help you make fewer mistakes.
- Learn or teach others the right way to do wiring and stay safe.
A good workspace helps you make fewer mistakes and keeps you safe when you install wiring.
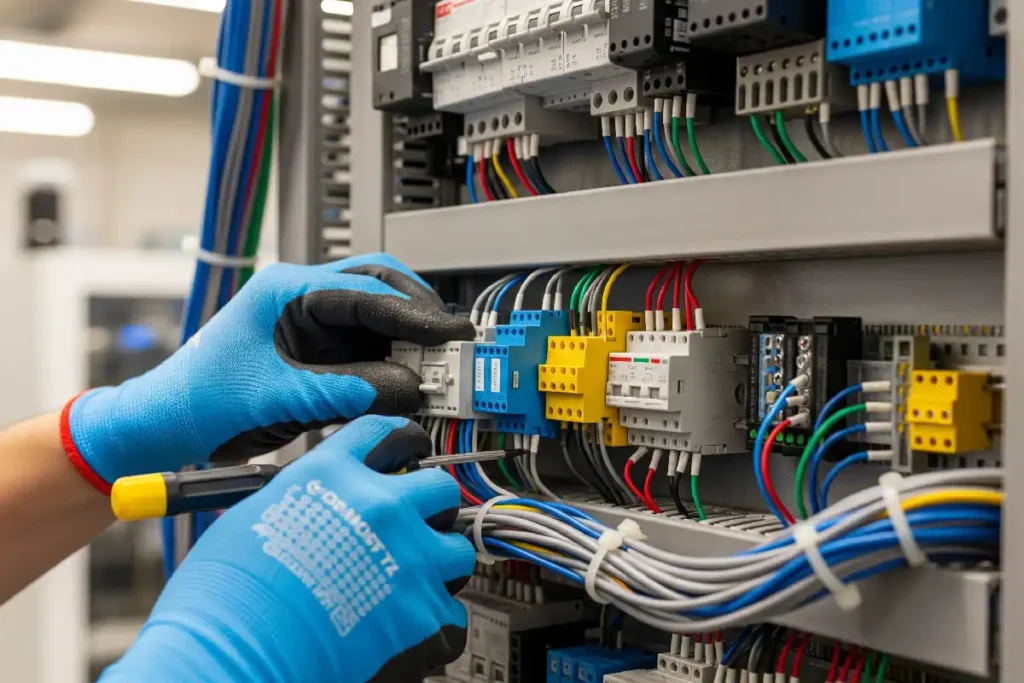
How to Install Wiring Terminals
Strip the Wire
First, get your wires ready for connecting. Use a wire stripper to take off the insulation at the end of each wire. Hold the wire tight and put it in the right spot on the tool. Squeeze the handles and pull off the plastic cover. Be careful not to cut or damage the metal part. For solid wire, take off about 1/4 to 1/2 inch. For stranded wire, keep all the strands together. Try not to let them spread out. If you see dirt or rust, wipe the metal with a clean cloth.
Tip: Always turn off the power before you strip wires. This keeps you safe and protects your equipment.
Choose Terminal Type
Pick the right terminal block for your job. The kind of wire you use matters. Solid and stranded wires need different terminal blocks. Here is how to choose:
- Decide if you want a screw-type or spring-type terminal block. Screw-type is good for big wires and lots of power. Spring-type is better for small wires and quick work.
- Check the size of your wire and how much power it needs. Make sure the terminal block fits your needs.
- Add things like labels or covers if you need them.
- Measure the rail if you need to put on many terminal blocks.
| Wire Type | Best Terminal Block Type | Reason |
|---|---|---|
| Solid | Screw-type | Holds tight, good for big jobs |
| Stranded | Spring-type or ferrule | Stops fraying, easy to use |
Note: The kind of wire matters. Stranded wire needs extra care so the strands stay together.
Insert and Secure Wire
Now put the wire into the terminal block. How you do this depends on the type of terminal block.
Screw-Type Terminal Block
- Put the stripped wire into the hole in the terminal block.
- Use a screwdriver to turn the screw and make it tight.
- Do not make it too tight. If you have a torque screwdriver, use it. The right tightness keeps the wire safe.
| Connection Type | Recommended Torque Value |
|---|---|
| Slotted setscrew | Not more than 50 inch-pounds |
| Main lugs and neutral lugs (200A) | 250 inch-pounds (about 21 ft-lbs) |
Always use the torque values from the maker. If it is too loose, the wire can get hot. If it is too tight, you can break the block.
Spring-Type Terminal Block
- Use a small tool to open the spring clamp.
- Put the stripped wire into the slot.
- Take out the tool. The spring will hold the wire tight.
- Spring-type blocks are fast and do not need screws.
- Screw-type blocks need you to tighten them by hand.
- Spring-type blocks use a spring to hold the wire.
- Spring-type is easier for small wires and quick jobs.
- Screw-type is better for big wires and more power.
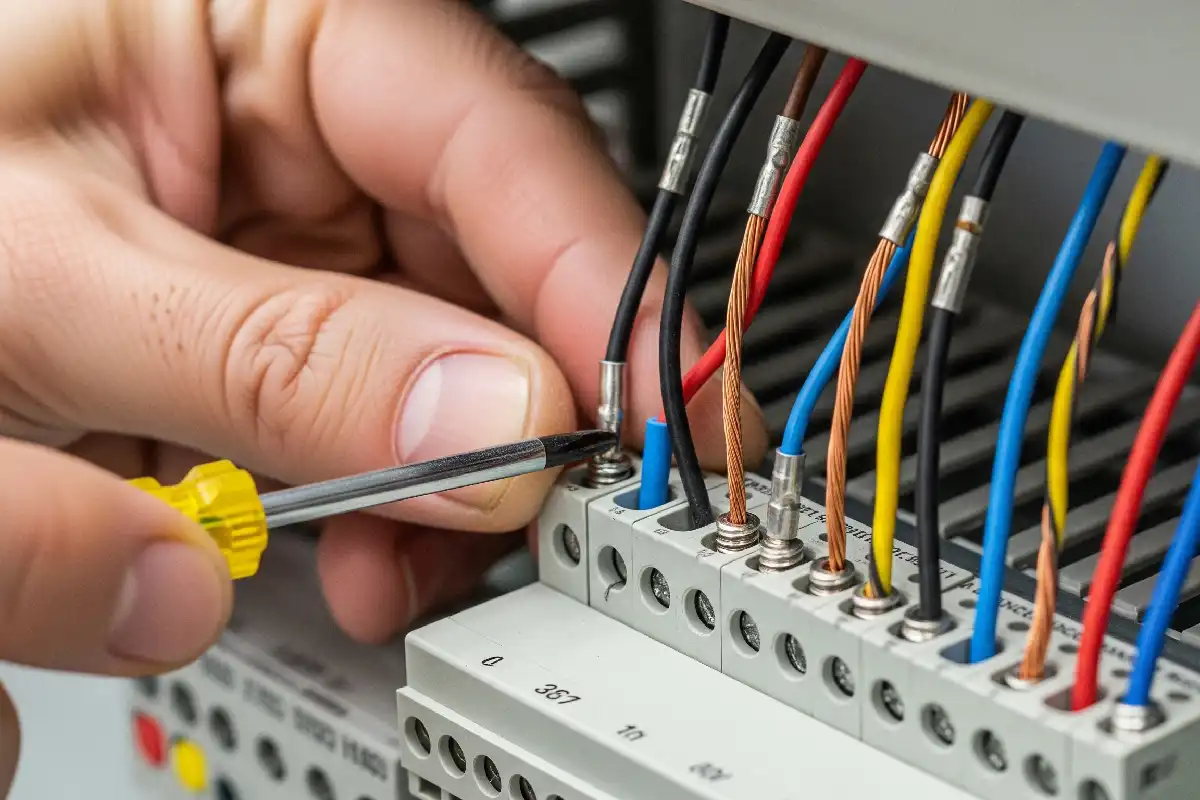
Use Ferrules or Crimp Connectors
If you use stranded wire, use ferrules or crimp connectors. Ferrules keep the strands together and stop them from spreading. Crimp connectors make the connection stronger.
- Slide the ferrule onto the end of the stripped wire.
- Use crimping pliers to squeeze the ferrule tight.
- Put the ferrule into the terminal block.
Ferrules stop the wire from spreading out. They make the connection even and safer. You can use one ferrule for more than one wire if it is allowed. Ferrules keep the strands together, lower resistance, and make your wiring last longer.
Ferrules and crimp connectors help your wiring last and need less fixing later.
Mount Terminal Blocks
Put the terminal block on a DIN rail or panel. Make sure it is straight and does not move. Use the right screws or clips for your setup. After you put it on, check for dirt or dust.
- Turn off all power before you look at or clean the terminal block.
- Look for cracks, color changes, or broken insulation.
- Use a soft brush or cloth to clean off dust.
- Clean the pins with alcohol if they are dirty.
- Use a torque wrench to check that screws are tight.
- If you see rust, rub it gently with fine sandpaper. Use special paste if it is really bad.
Safety Reminder: Always turn off the power before you mount or clean terminal blocks. Do not turn it back on until everything is dry and clean.
If you want to wire a terminal block, do these steps for each wire and connector. Check every connection before you turn the power back on. A clean and tight setup helps stop problems and keeps your wiring safe.
Check and Test Connections
After you finish the connection process, you need to check and test every terminal block. This step helps you catch mistakes and keeps your wiring safe.
Tightness Check
You must make sure each terminal block holds the wire tightly. Loose connections can cause overheating or even fire. Use these steps to check tightness:
- Tug gently on each wire to see if it stays in place.
- Use a torque screwdriver to confirm the screw is tight but not over-tightened.
- Check that the terminal block does not move or shift on the DIN rail.
- If you want to test like professionals, you can use methods such as the Tumbling Barrel Test, Tight Fit Test, Conductor Pull-Out Test, Shock Testing, and Vibration Test. These tests help you know if the terminal block will stay secure during use.
Tip: Always follow the manufacturer’s torque values. Too much force can crack the terminal block. Too little can make the wire loose.
Visual Inspection
Look closely at every terminal block and wire. You want to see a proper terminal block connection. Use this checklist:
- Wires should be straight and not frayed.
- Terminals must be aligned and tightened.
- Crimping should look smooth and even.
- Strain relief should protect wires from pulling.
- Fasten each terminal block to the mounting point.
- Clear shrink tubing lets you see the connection.
- If you use solder, check that the red flux is gone.
- Color-coded actuators help you spot correct wiring.
- Built-in test ports make it easy to check voltage and current.
- Ferrules improve the quality of the connection.
Note: Under-torquing can cause arcing and overheating. Over-torquing can damage the terminal block.
Power On and Test
When you finish your visual and tightness checks, you can power on the terminal block. Follow these steps for safety:
- Mount the terminal block on a DIN rail.
- Use wires with the right cross-section for your current.
- Perform a voltage drop test. Apply a small current and measure the voltage drop across the terminal block. The voltage drop should not exceed safe limits.
- Run a temperature rise test. Load the terminal block with current and check that the temperature does not rise too much.
- Apply impulse voltage tests to make sure there is no breakdown.
- Test short-time withstand current to see if the terminal block can handle a short circuit.
- Perform dielectric tests to check insulation.
- Verify clearance and creepage distances for safety.
If all tests pass, your terminal block is ready for use. You have completed a safe and reliable connection process.
Troubleshooting Tips
Loose or Poor Connections
Loose or bad connections in a terminal block can cause trouble. You might notice lights flicker or things get too hot. Sometimes, this can even start a fire. Here are some reasons why this happens:
- Wires are not stripped right or screws are not tight enough
- The wire is the wrong size for the terminal block
- Screws are too tight and hurt the wire or terminal
- Wires get loose from shaking or moving over time
- Dust, water, or rust mess up the connection
To fix these problems, strip wires with care and use the right size. Tighten screws just as the maker says. Pick a terminal block that does not loosen if things shake. Check your connections often to see if they are loose or broken.
Tip: Look at your terminal block every few months. This is extra important if things shake a lot or get hot and cold.
Wire Fraying
Wire fraying is when wire strands spread out or break. This makes the connection weak and can be unsafe. You can stop fraying by doing these things:
- Put ferrules on stranded wires before you put them in the terminal block
- Use the right tool to crimp ring or fork terminals
- Twist the wire strands together before you connect them
- Leave a little insulation at the end to help hold the strands
- Do not make screws too tight or you might break the wires
Ferrules and crimp-on terminals help make your connections strong and safe. Never squash wires flat or use too much force when you tighten.
Wrong Terminal Type
If you use the wrong terminal block for your wire, you can have big problems. If the terminal is too big or too small, wires can get loose or too hot. This can even cause a fire. Other problems are:
- The wire does not fit well and makes too much resistance
- The wire or its cover gets damaged
- Rust or shaking can make the wire come loose
Always pick a terminal block that matches your wire size and job. Choose the right material and design for where you work. If it is wet or shakes a lot, use a terminal block that protects against these things.
Over-tightening
If you make screws too tight in a terminal block, you can crush the wire or break the terminal. This makes the connection weak and can make it fail. To stop this from happening:
- Use a torque screwdriver and follow what the maker says
- Do not force the screw past the right tightness
- Check your connections after one or two days and when you do regular checks
Note: Screws that are too loose or too tight both cause problems. Always try to get the tightness just right.
You can install wiring terminals and terminal blocks safely by following these steps:
- Choose the right terminal block and wire for your project.
- Prepare and strip wires to the correct length.
- Mount the terminal block securely.
- Insert and secure wires using the proper tools.
- Test each connection for tightness and safety.
Always disconnect power before you start, and double-check every connection to prevent hazards.
Take your time and use the right tools for reliable results. If you feel unsure or work with high-voltage systems, ask a professional for help.
FAQ
How do you know if a terminal block is safe to use?
Check for cracks, burns, or loose parts. Make sure the insulation is not damaged. If you see rust or dirt, clean it first. Always test with a multimeter before turning on the power.
Can you reuse wiring terminals and terminal blocks?
You can reuse them if they are not damaged or corroded. Always inspect for wear. If you see any sign of damage, replace the part. Using damaged terminals can cause unsafe connections.
What size wire fits in a terminal block?
Terminal blocks have size markings. You should match your wire to the size shown. If you use the wrong size, the connection may be loose or too tight. Check the product label or manual for the correct range.
Do you need special tools for spring-type terminal blocks?
You often need a small flat tool or screwdriver to open the spring clamp. Some blocks let you use your fingers. Always check the instructions for your terminal block.
See also
How to Safely Attach Wiring Terminals to Terminal Blocks in 2025
What Is a Terminal Block and How Does It Work
What You Should Know About Terminal Blocks and Their Other Names
How many types of wiring terminals are there?
How to Install a Three-Phase Surge Protection Device Step by Step

