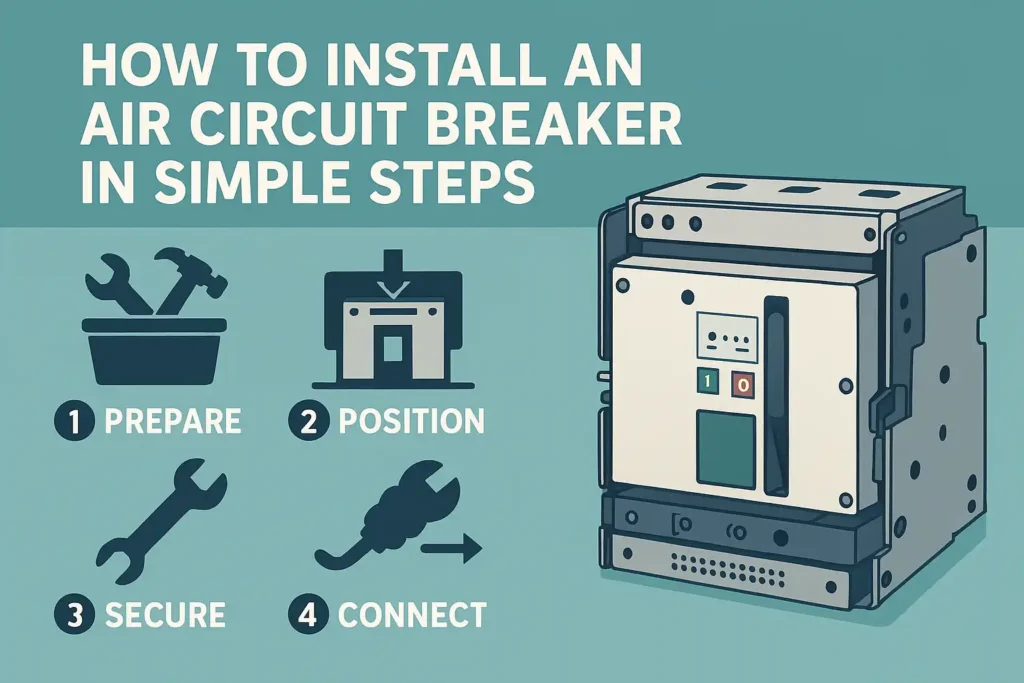
To install an air circuit breaker safely, first turn off all power sources. Safety is crucial when you install air circuit breaker equipment. Skipping steps during the installation process can lead to serious dangers such as electrical hazards, insulation problems, and overheating.
Always wear personal protective equipment (PPE) and ensure your work area is clean and dry before you install air circuit breaker components.
| Risk Type | Impact on Installation Without Safety Precautions |
|---|---|
| Electrical Hazards | You could receive a severe electric shock or injury. |
| Overheating | Components may fail, making the breaker unsafe. |
| Insulation Degradation | This can cause shorts and other hazardous issues. |
With careful planning and attention to safety, you can successfully install an air circuit breaker without risk.
Key Takeaways
- Always turn off all power before you start. Wear the right safety gear to stay safe from electrical dangers.
- Get all the insulated tools and materials you need. Check the place where you will install for safety. Make sure it follows local rules.
- Put the breaker in a clean, dry spot. Use the manufacturer’s instructions to mount it tightly. This helps it work well and stay in place.
- Connect the wires with care. Follow the right polarity and torque settings. This stops wires from getting too hot or causing problems.
- Test the breaker well after you finish. Check the settings and trip functions. Look at everything to make sure it works safely and correctly.
Tools and Preparation
Tools Needed
Get all your tools ready before you start. The right tools help you stay safe and work faster. Here are some tools you should have:
- Insulated screwdrivers and nut drivers
- Torque wrench for tightening bolts to the correct value
- Wire strippers and cutters
- Crimping tool for cable lugs
- Multimeter for voltage and continuity checks
- Drill and bits (if mounting holes are needed)
- Level and measuring tape
- Fuse pullers and insulated hand tools
Tip: Use insulated tools when working with electrical equipment. This helps lower your chance of getting shocked.
Materials and Safety Gear
You need the right materials and personal protective equipment (PPE) to stay safe. The 2024 NFPA 70E standard says you must wear arc-rated PPE if there is a risk of arc flash. Only trained people should work on or near live circuits.
Common materials for mounting and wiring:
- Steel bolts and washers (M8 or M10, depending on breaker size)
- Armored Cable (AC) or Metal-Clad Cable (MC) for wiring
- Rigid Metal Conduit (RMC) or Intermediate Metal Conduit (IMC)
- Cable assemblies with insulated conductors
Essential safety gear:
| PPE Item | Purpose |
|---|---|
| Electrical-rated hard hat | Head protection from electrical hazards |
| Rubber insulated gloves (Class 0) | Hand protection, tested regularly |
| EH-rated boots | Foot protection from electrical shock |
| Arc-rated clothing | Body protection from arc flash |
| Safety glasses or face shield | Eye and face protection |
Note: Test your rubber gloves every time before you use them. Replace them if you see any damage.
Site Assessment
Look at the place where you will install the breaker. Make sure it is safe and follows all rules. Check these things:
- Make sure the electrical load is right and think about future needs.
- See if there is enough space for the breaker and safe access.
- Check for very hot or cold temperatures, dust, water, or things that can cause rust.
- Make sure the area keeps equipment safe from floods, fire, and damage.
- Use enclosures with the correct IP rating if the breaker is outside.
- Follow local codes like NEC and standards such as IEC 61439 for safe installation.
Ask the authority having jurisdiction (AHJ) if you are not sure about local rules. A good site check helps you avoid problems and keeps your work safe and strong.
Install Air Circuit Breaker
Power Isolation
Before you install air circuit breaker equipment, turn off all power. This keeps you safe from electric shock and stops accidents. Follow these steps to isolate power the right way:
- Find every power source, like backup generators and UPS systems.
- Make sure your voltage tester works before you use it.
- Turn off the main circuit or device you will work on. Do not think the power is off just because you flipped a switch.
- Use your voltage tester to check that there is no voltage at the isolation point.
- Test your voltage tester again with a proving unit to make sure it still works.
- If needed, ground and short-circuit the wires and protect yourself from live parts nearby.
- Put a lockout device on the isolation point. This stops anyone from turning the power back on by mistake.
- Place warning labels or tags on the wires you disconnected to warn others.
Always follow lockout/tagout rules. OSHA says you must isolate all energy sources, put on lockout devices, and check that the equipment cannot be turned on. Write the date, time, and your name on the tag. Only start to install air circuit breaker units after you finish these steps.
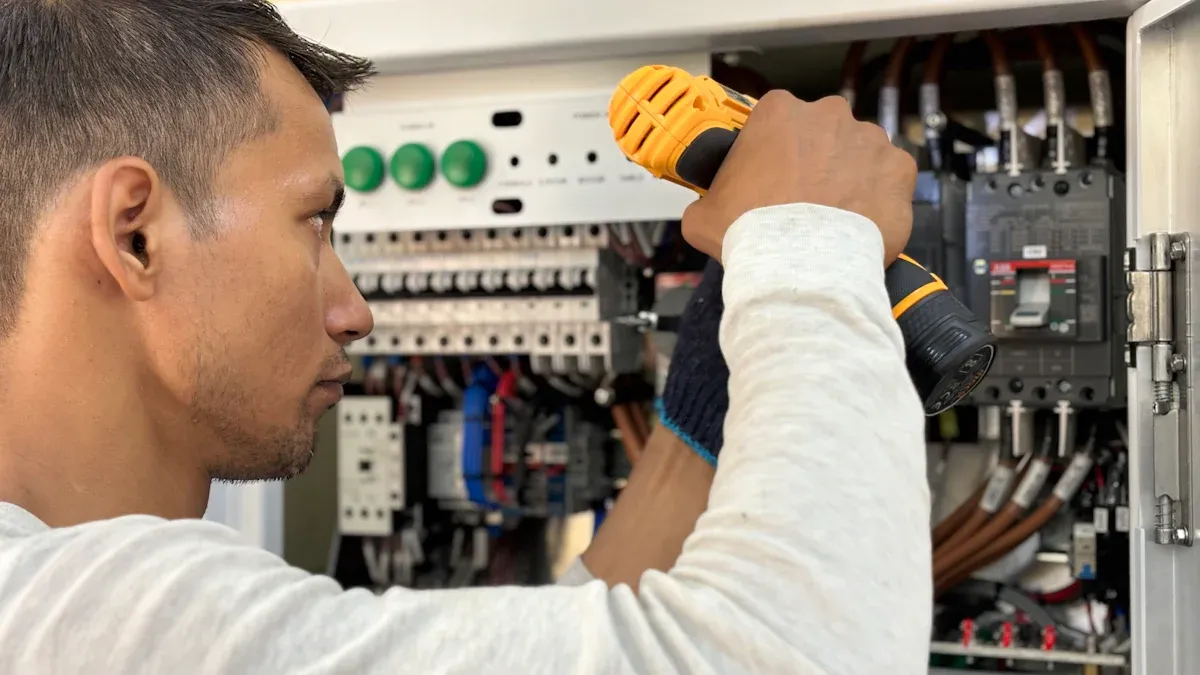
Mounting the Breaker
Pick a clean, dry, and steady place for your air circuit breaker. Make sure there is enough space for safe use and repairs. The breaker should be in the open (OFF) position when you install it.
- Use the mounting holes or brackets that come from the manufacturer.
- Fasten the breaker with steel bolts and washers. Tighten them evenly so the breaker sits flat and does not move.
- Use a level to check if the breaker is straight.
- If you need to drill holes, measure first so you do not damage the panel or enclosure.
Tip: Always follow the mounting steps in the manufacturer’s manual. If you mount it wrong, it can shake, have loose connections, or even fail.
Wiring Connections
When you install air circuit breaker wiring, you must follow strict safety rules. Use wires that match the breaker’s rating and system type. Here are some important things to remember:
- Use only wires that are clearly marked for grounding or phase.
- Keep polarity correct. Never connect a grounded wire in a way that reverses polarity.
- Connect grounding wires only to grounding terminals.
- Mark each ungrounded wire by phase and system.
- Use grounding-type outlets and connect them to the equipment ground.
Industrial air circuit breakers must meet IEC 60947-1 and IEC 60947-2 standards. These rules cover how they are made and used in low-voltage systems. For big breakers (630 A to 6300 A), always check your wiring meets these rules.
When you tighten terminal connections:
- Use a torque wrench or screwdriver that is set right.
- Check the manufacturer’s label or manual for the correct torque value. Some terminals need up to 250 inch-pounds, while smaller ones need less.
- Never guess the torque. If you tighten too much, you can break the breaker. If you do not tighten enough, it can cause arcing or overheating.
- Put torque seal (a special paint) after tightening to show the connection is secure.
Note: If you cannot find the torque value, use the default from the NEC Handbook only if you have to. Always use the manufacturer’s instructions first.
Adjusting Settings
After you install air circuit breaker wiring, you must set the breaker’s settings for your system. These settings protect your equipment and keep your electrical system safe. The main settings are:
| Setting Name | Purpose | Adjustment Method and Range |
|---|---|---|
| Continuous Amps (Ir) | Protects against long overloads | Set as a percent (20-100%) of the normal rating (In) |
| Long-Time Delay | Lets motors start without tripping | Adjustable delay from 2.2 to 27 seconds at 6x Ir |
| Short-Time Pickup | Trips for short circuits | Adjustable from 1.5 to 10 times Ir; can be turned OFF |
| Short-Time Delay | Time delay for short-time pickup | Fixed time (0.05-0.5 s) or I2T ramp (0.18-0.45 s) |
| Instantaneous Pickup | Trips right away for very high fault currents | Set as a multiple of In (usually 2x to 10x) |
| Ground Fault Pickup | Trips on ground faults | Sensitivity set for what your system needs |
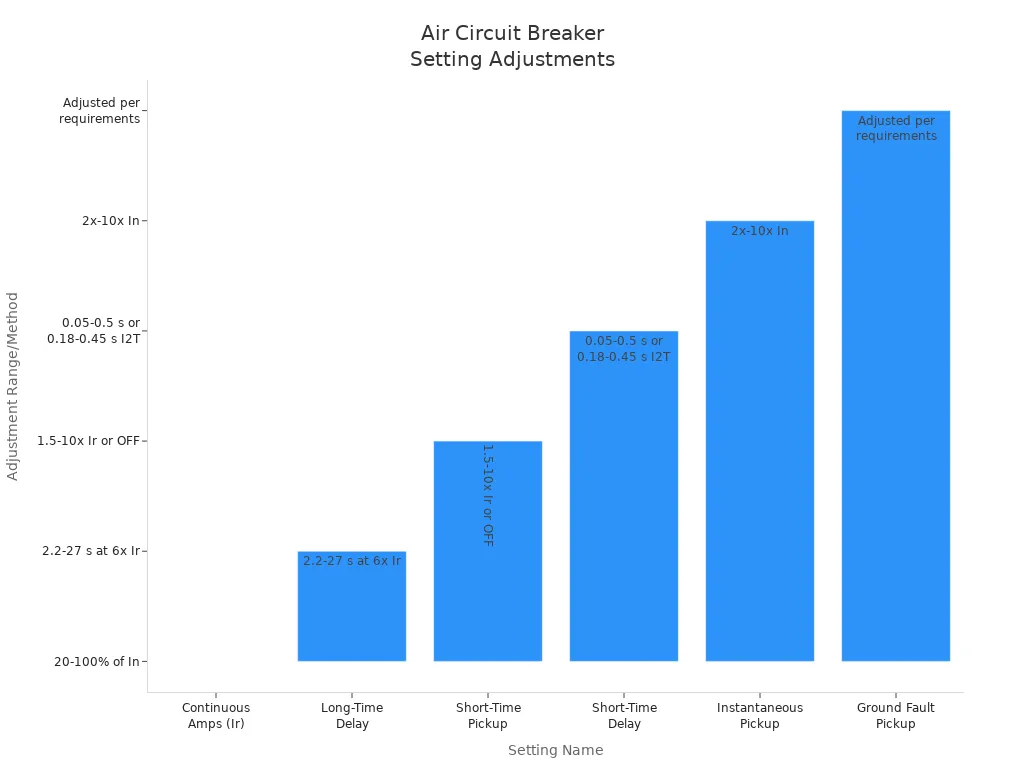
Set each value for your load type and system needs. For example, set the continuous amps (Ir) to match your equipment’s full load current. Set the long-time delay so motors can start without tripping the breaker. Use short-time and instantaneous pickups to protect against short circuits and high fault currents. Set ground fault settings for extra safety.
Wrong settings can cause the breaker to trip too much or not protect your system. Always check your settings with a short circuit and coordination study. If you cannot match the study, write down the problem and ask an engineer for help.
Visual Inspection
Before you finish, look over your work carefully. A good check helps you find mistakes and stop problems later. Follow these steps:
- Make sure the breaker model and ratings are right for your job.
- Check that the breaker is straight and tight.
- Move the breaker handle (with power off) to see if it moves smoothly.
- Look at all connections. Make sure wires are tight and in the right place.
- Make sure no wires touch the enclosure or other phases.
- Check that the breaker sits flat with the panel face.
- Look for signs of overheating, like melted plastic or black marks.
- Check for colored terminals or strange smells, which can mean electrical problems.
- Look for loose parts, rust, or corrosion.
- Use a multimeter to check connections and voltages again.
Regular visual checks help you find wear, overheating, or dirt early. These checks keep your air circuit breaker safe and help stop costly downtime.
Testing and Compliance
Functional Testing
After you install air circuit breaker equipment, you must test it before turning on power. First, check all the settings. Make sure each setting fits your project and keeps things safe. Use this checklist to help with testing:
- Check that all breaker settings match your project needs.
- Test insulation resistance between live parts and ground. This helps you find insulation problems.
- Use a continuity test to see if all wires are connected right.
- Trip the breaker by hand to see if it stops the circuit.
- If your breaker has ground fault protection, use a tester to check it.
- Put on a small load and slowly make it bigger. Watch if the breaker trips at the right current.
- Measure voltage at the terminals to make sure it is correct.
- Write down all test results in a digital logbook.
Tip: Digital tools like EcoStruxure Power Commission can help you test faster and safer.
Trip Unit Test
You need to check the trip unit to see if it works right. There are two main ways to do this:
- Primary current injection: Put real current through the breaker. This checks the whole path, including sensors and wires. Use this for important breakers or when starting up.
- Secondary current injection: Put fake current into the trip unit. This only checks the trip logic and parts. It is good for solid-state trip units and is quicker.
You should also:
- Look at the trip unit for damage or loose parts.
- Test the trip by charging, closing, and tripping the breaker a few times.
- Watch for problems like tripping too soon, stuck contacts, or bad relays.
If the trip unit does not pass, replace it before turning on the system.
Final Checks
Before you turn on the system, do these last checks:
- Compare the breaker’s nameplate with your job plans. Make sure the size, amp rating, and extras are right.
- Check the breaker for dirt, straightness, and smooth movement.
- Use a low-resistance ohmmeter to check all bolted connections. Look for odd resistance that could cause overheating.
- Test all extra features, like shunt trips and interlocks.
- Reset all trip logs and indicators after testing.
- Go over your paperwork. Keep records of all tests, safety lists, and lockout/tagout steps.
Good records show you followed safety rules when you install air circuit breaker equipment. Keep these records for future checks and repairs.
To put in air circuit breaker equipment safely, you should follow some easy steps. First, get your tools ready and look at the area to make sure it is safe. Next, put the breaker in place and make sure it is straight and tight. Then, connect all the wires and test if everything works right. Last, check your work before you turn the power back on.
Always use safety rules, wear the right PPE, and make sure your work follows standards like the NEC. If you are not sure what to do, ask someone who knows more and read the manufacturer’s instructions.
FAQ
What should you do if the air circuit breaker does not fit in the panel?
Check the panel size and mounting holes. Use the correct mounting kit from the manufacturer. If the breaker still does not fit, contact a licensed electrician for help.
Can you install an air circuit breaker without turning off the main power?
Never install a breaker with the power on.
You must turn off all power sources before you start. This keeps you safe from electric shock and serious injury.
How often should you test your air circuit breaker after installation?
Test your air circuit breaker at least once a year. You should also check it after any major electrical work or if you notice unusual sounds or smells.
What do you do if the breaker trips right after installation?
- Check all wiring connections for tightness.
- Make sure you set the trip settings correctly.
- Look for short circuits or overloads.
- If you cannot find the problem, call a professional.
Do you need special training to install an air circuit breaker?
You do not need a license for basic installation, but you should have electrical safety training. For complex systems or high voltages, always hire a certified electrician.
The following information may be of interest to you
What You Need to Know About How Molded Case Circuit Breakers Work
Key factors to consider when choosing a molded case circuit breaker
MCB and MCCB Compared Which Circuit Breaker Is Right for You
The difference between MCCB and MCB
What Situations Call for the Use of a Molded Case Circuit Breaker

