
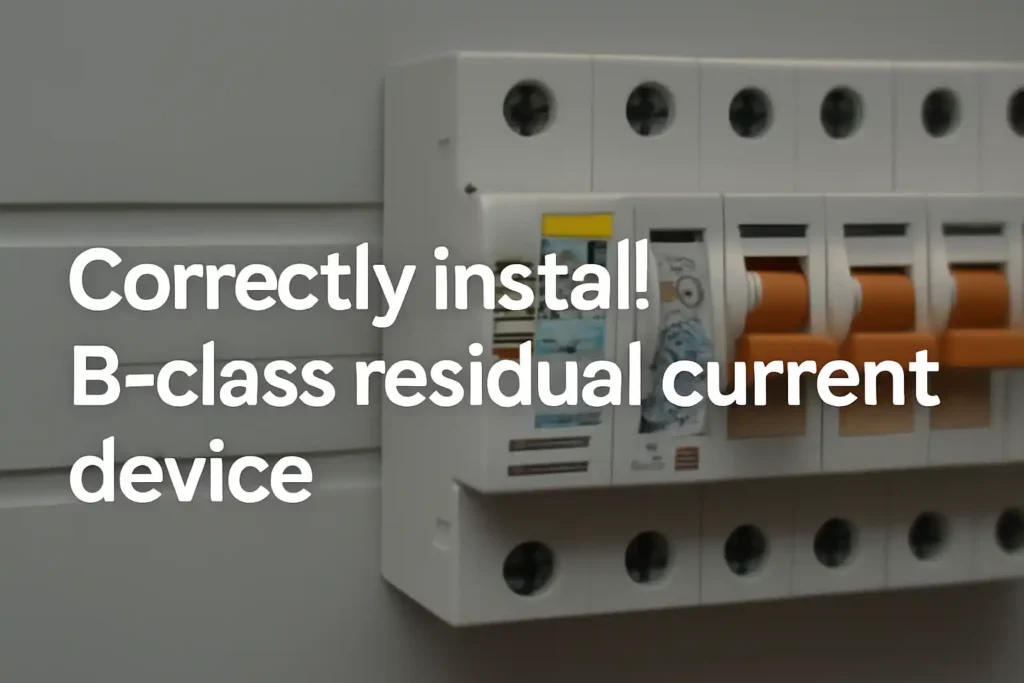
Installing devices like B-level current protectors requires care and precision. To ensure safety and prevent hazards such as shocks or fires, it’s essential to install a B-level residual current protection device correctly. When properly set up, the device detects minor leaks and swiftly disconnects power, safeguarding both individuals and equipment. Always follow a step-by-step approach, use the appropriate tools, and understand the wiring plan thoroughly. Adhering to the correct procedures ensures a safe and reliable installation.
Key Takeaways
- Always switch off the power before starting. This stops shocks and keeps you safe.
- Use the correct tools and supplies for the job. Tools like screwdrivers and testers make the work safe and accurate.
- Read and follow the maker’s instructions carefully. This helps you follow safety rules and avoid errors.
- Test the device once it’s installed. Push the test button to check if it works and protects from problems.
- Check and maintain your setup often. This keeps your system safe and working properly for a long time.
Tools and Materials for Installing B-Level Residual Current Protection Device
Essential Tools for Installation
To set up B-level residual current protection devices, you need special tools for electrical tasks. These tools help make the process safe and accurate. Below is a list of key tools:
- Screwdrivers: Insulated ones keep you safe when tightening screws.
- Wire Strippers: They remove wire coverings without harming the inside.
- Multimeter: This checks voltage, current, and resistance for proper wiring.
- Drill and Drill Bits: Use these to attach the device to walls or panels.
- Torque Wrench: It ensures screws are tightened as the maker recommends.
The tools must match the device’s needs. For example:
| Specification | Details |
|---|---|
| Rated Currents | 16A up to 100A |
| Rated I∆n Sensitivity | 10mA, 30mA, 100mA, 300mA, 500mA, 1A |
| Rated Voltage | 480Y/277 (up to 100 A) |
| Certifications and Standards | UL 1053, IEC/EN 61008-1, IEC/EN 61008-2-1 |
| Applications | EV chargers, control panels, medical devices |
Required Materials and Components
Having the right materials is as important as using the right tools. You’ll need:
- Residual Current Device (RCD): Pick a B-level RCD that fits your system.
- Wires and Cables: Make sure they handle your system’s current and voltage.
- Circuit Breakers: These add extra safety alongside the RCD.
- Mounting Hardware: Includes screws and brackets to secure the device.
Choose materials that meet global safety rules. For example:
| Standard Code | Description |
|---|---|
| IEC 61247 | Magnetic oxide PM-cores and related parts – Dimensions |
| IEC 61508 | Safety of electrical/electronic systems with programmable parts |
Optional Tools for Enhanced Efficiency
Some tools aren’t required but can make installation easier:
- Cable Labeling Machine: Labels wires for quick identification later.
- Voltage Tester Pen: Checks live wires faster than a multimeter.
- Cable Management Clips: Keeps wires tidy and reduces mess.
- Thermal Imaging Camera: Spots hot areas in connections after setup.
These tools save time and improve installation quality. For instance, labeled wires make future repairs simpler.
Safety Precautions for Installing B-Level Residual Current Protection Device
Turning Off the Power Supply
Always turn off the power before starting work. This step stops electrical shocks and keeps you safe. Find the main circuit breaker in your building. Turn off the breaker for the circuit where you’ll install the B-level residual current protection device. If unsure which breaker to switch off, shut down the entire building’s power. Use a voltage tester to check that no electricity is flowing. Never skip this step, as live wires can cause serious harm or even death.
Using Personal Protective Equipment (PPE)
Wearing proper safety gear is very important. Use insulated gloves to protect your hands from live wires. Wear safety goggles to keep sparks or debris out of your eyes. Non-conductive shoes stop electricity from traveling through your body. If working in tight spaces, wear a helmet to protect your head. Always check your safety gear for damage before using it. Broken gear won’t protect you properly.
Inspecting the Electrical System Before Installation
Check the electrical system carefully before starting. Look for damaged wires, loose parts, or burnt areas. These problems can make the residual current device work poorly and be unsafe. Use a multimeter to test voltage and ensure it matches the device’s needs. Fix any problems you find before continuing. A good electrical system helps the device work well and stay safe.
Tip: Write down any problems you find during the check. This list helps track repairs and follow safety rules.
Step-by-Step Guide to Install B-Level Residual Current Protection Device
Preparing the Installation Area
Before starting, make sure the area is clean and dry. A tidy workspace helps avoid accidents and makes work easier. Follow these steps to get ready:
- Clear the Workspace: Move tools, trash, or items away from the area. This keeps the space safe and focused for work.
- Inspect the Mounting Surface: Check the wall or panel for strength. It must hold the residual current device securely.
- Measure and Mark: Use a tape measure to find the right spot. Mark screw or bracket locations with a pencil for accuracy.
- Gather Tools and Materials: Place all tools and parts nearby. Include the device, screws, brackets, and a drill.
Tip: Keeping your workspace neat saves time and prevents mistakes.
Identifying the Correct Wiring Connections
Good wiring is key for the device to work well. Wrong connections can cause problems or danger. Follow these steps to ensure proper wiring:
- Refer to the Wiring Diagram: Most devices include a diagram. Study it to learn where live, neutral, and ground wires go.
- Check Wiring Standards: Make sure the wiring follows safety rules. For example, the National Electrical Code (NEC) has guidelines for wires and circuits. See the table below for details:
Chapter Description 1-4 Rules for wiring, circuits, and general equipment. 5-7 Special cases like unique equipment or conditions. 8 Extra rules for communication systems. 9 Tables for wire and cable properties. Annexes Extra standards and calculations. - Label the Wires: Use a labeling tool to mark each wire. This helps during setup and future repairs.
- Test the Wires: Use a multimeter to check voltage. Confirm which wires are live or neutral.
Note: Always double-check connections to avoid safety risks.
Mounting the Residual Current Device
After preparing the area and checking wires, mount the device. Follow these steps for a secure setup:
- Position the Device: Line up the device with your pencil marks. Make sure it’s upright and easy to access.
- Drill Holes: Drill holes where you marked earlier. Ensure the holes fit the screws or brackets.
- Attach the Device: Use screws and brackets to secure the device. Tighten screws with a torque wrench to avoid damage.
- Check Stability: Gently shake the device to confirm it’s firmly in place. A stable setup prevents loose connections later.
Callout: Just like careful checks improve data accuracy, following these steps ensures your device works reliably.
By following these instructions, you can safely install a B-level residual current protection device. This ensures it works properly and keeps everyone safe.
Connecting the Wires to the Device
Wiring the device correctly helps it work properly. Follow these steps:
- Find the Terminals: Look for the live, neutral, and ground terminals. They are marked as L (live), N (neutral), and ⏚ (ground). Check the wiring diagram for extra help.
- Prepare the Wires: Use a wire stripper to remove 1/2 inch of insulation. Make sure the copper is clean and undamaged.
- Attach the Wires:
- Connect the live wire to the L terminal.
- Secure the neutral wire to the N terminal.
- Attach the ground wire to the ⏚ terminal.
Tighten each wire with a screwdriver. Do not over-tighten.
- Test the Connections: Set a multimeter to resistance mode. Check each wire for continuity. A good connection shows nearly zero ohms. If “O.L.” appears, fix the connection.
Tip: Double-check all wires to avoid safety problems.
Testing the Device for Proper Functionality
After wiring, test the device to ensure it works. Follow these steps:
- Prepare the Multimeter: Set the multimeter to resistance or continuity mode.
- Check Continuity: Place the probes on the live and neutral terminals. Low resistance means the connection is good. “O.L.” means it needs fixing.
- Simulate a Fault: Press the test button on the device. This creates a small current imbalance. The device should trip and cut power.
- Reset the Device: Flip the switch back to reset the device after testing.
Callout: If the device fails, check the wires and connections again.
Performing Final Checks and Powering On
Inspect everything before turning on the power. Follow these steps:
- Inspect the Setup: Make sure the device is mounted securely. Check that wires are connected properly and none are loose.
- Follow Safety Rules: Confirm the installation meets safety standards. Check the wiring and signs match the manufacturer’s instructions and local codes.
- Get an Inspection: If needed, ask a professional to inspect the setup. This is important for systems like solar panels that need permits and inspections.
- Turn On the Power: Once checks are done, switch on the main power. Watch the device to ensure it works without problems.
Note: If the system doesn’t work or trips, recheck the wiring and tests.
By following these steps, you can install a B-level residual current protection device. This keeps your system safe and working well.
Common Mistakes to Avoid During Installation
Incorrect Wiring Connections
Wiring errors happen often when installing B-level residual current protection devices. Wrong connections can stop the device from working or cause dangers. Always check the wiring diagram that comes with the device. Make sure live, neutral, and ground wires go to the right terminals. Even one misplaced wire can make the device trip wrongly or miss faults.
Use a multimeter to check each wire’s voltage and continuity before connecting. Labeling wires first can prevent mix-ups during setup. If you’re unsure about wiring, ask a professional electrician for help to stay safe.
Tip: Don’t trust wire colors to show their purpose. Always test to be sure.
Skipping the Testing Phase
Not testing the device after installation is a big mistake. It can risk safety and proper function. After setup, always test the device to confirm it works. Press the test button to create a fault. The device should trip and cut power right away. If it doesn’t, check the wiring and connections again.
Testing also finds loose wires or broken parts early. Skipping this step leaves your system open to electrical problems, defeating the device’s purpose.
Callout: Testing is not optional. It proves the device is protecting your system.
Ignoring Manufacturer Instructions
Skipping the manufacturer’s instructions can cause bad installation and device failure. These instructions are made to help the device work correctly. They include steps for wiring, mounting, and testing, along with safety tips.
Reasons to follow these instructions:
- Ensures the device works its best.
- Meets safety rules and legal standards.
- Keeps a record of the installation for later use.
Read the manual carefully before starting. Keep it nearby during setup to answer questions. Following these steps ensures success and helps the device last longer.
Note: Manufacturers spend time making these guides. Ignoring them can cancel warranties and lead to expensive fixes.
Overlooking Safety Precautions
Skipping safety steps during installation can cause serious harm. Electrical systems are dangerous, and small mistakes may lead to accidents. Always focus on safety to protect yourself and others.
Why Safety Precautions Matter
Electrical dangers cause many workplace injuries. In construction, 52% of electrical deaths happen due to unsafe actions. Electrocution is a common risk caused by poor insulation, faulty breakers, or wrong use of cords. The table below shows these issues:
| Incident Type | Description |
|---|---|
| Electrical fatalities in construction | Construction sites account for 52% of electrical deaths in the US. |
| Common hazards | Electrocution is a major risk, showing why safety is vital. |
| Causes of electrical hazards | Poor insulation, breaker problems, and bad cord use are main causes. |
These facts show why safety rules are so important. Ignoring them can cause injuries, damage, or even death.
How to Avoid Overlooking Safety
- Make a Safety List: Write down safety steps before starting. Include turning off power, wearing gear, and checking the system.
- Stay Focused: Watch for dangers like bare wires or wet areas.
- Follow Rules: Use the manufacturer’s guide and local codes. These keep you safe.
- Ask for Help: If unsure, call a licensed electrician. They can stop mistakes.
Tip: Treat every job as risky. Being careful keeps you safe and avoids problems.
By following these steps, you reduce risks and ensure a safe installation. Safety isn’t optional—it’s a must.
Benefits of Properly Installing B-Level Residual Current Protection Device
Improved Electrical Safety
Installing a B-level residual current protection device the right way makes your system safer. These devices find leaking currents and cut power before problems happen. This lowers the chances of shocks or fires. Even small leaks, like a few milliamps, can grow into big dangers if ignored. The device works like a shield, keeping your electrical system safe and steady.
Tip: Check your system often after setup to keep it safe.
Protection Against Electrical Faults
Electrical faults can cause big problems, like damaged equipment or fires. A well-installed B-level residual current protection device helps stop these risks. Studies show fault currents over 300 mA raise fire risks, especially in wet or dusty places. These devices break the current flow before it becomes harmful. Pairing them with good grounding, as per IEC 60364-4 rules, makes them work even better.
- Main benefits of fault protection:
- Stops circuits from overheating.
- Lowers fire risks from leaking currents.
- Shields delicate equipment from harm.
Compliance with Electrical Standards
Adding a B-level residual current protection device ensures your system follows global safety rules. These devices meet strict standards like IEC 60364-4. Installing them properly keeps your system within these rules, avoiding risks and ensuring safe use. It also makes inspections and approvals easier for systems needing permits.
Callout: Following setup rules keeps you safe and avoids fines for breaking codes.
By knowing these benefits, you’ll see why proper installation matters. It keeps your system safe, meets standards, and prevents problems.
Increased Longevity of Electrical Systems
Installing a B-level residual current device (RCD) properly helps your electrical system last longer. It doesn’t just improve safety—it also protects parts from damage caused by electrical faults. This keeps your system running smoothly for many years.
Heat can harm electrical parts and shorten their lifespan. Managing heat is important for durability. Here are key facts about heat and electrical systems:
- Temperatures over 104°-122°F can damage electrical parts faster.
- Every 18°F rise in heat can cut part reliability by half.
- Cooling enclosures can make systems last longer and work better.
Proper installation helps avoid overheating problems. A securely placed RCD with good wire connections lowers heat risks. The device also finds and stops faults quickly, keeping damaging currents away.
Tip: Use enclosures with cooling or add vents to control heat. This simple step can prevent expensive repairs later.
Correct installation also reduces wear on your system. Faults like short circuits or leaking currents can harm wires and breakers. An RCD stops power before these problems grow worse. This saves your equipment and lowers repair costs over time.
By installing the RCD correctly, you make your system safer and longer-lasting. A well-kept electrical setup is a smart investment in safety and efficiency.
Setting up a B-level residual current protection device needs careful steps. First, gather the tools and materials you’ll need. Next, follow the process step-by-step, starting with preparing the area and ending with testing the device. Always stay safe by turning off power, wearing safety gear, and checking the system before starting. Installing the device correctly keeps your system safe and makes it last longer. If you’re unsure about any part, ask a licensed electrician for help.
Tip: Getting a professional inspection can prevent mistakes and ensure safety rules are followed.
FAQ
What is a B-Class Residual Current Device (RCD)?
A B-Class RCD finds and stops DC and AC current leaks. It works well for systems like EV chargers and solar panels. This device gives strong protection from electrical problems, keeping complex setups safe.
Can I install a B-Class RCD without professional help?
Yes, you can if you know basic electrical work and follow the maker’s guide. But hiring a licensed electrician ensures safety rules are followed and lowers mistakes.
Tip: If you’re unsure about wiring or testing, ask an expert.
How often should I test my B-Class RCD?
Test your RCD every six months by pressing its test button. Regular checks make sure it works right and keeps protecting against electrical issues.
What happens if the RCD trips frequently?
Frequent tripping means something is wrong, like bad wiring, too much load, or a broken device. Check for problems or call an electrician to fix it.
Is a B-Class RCD mandatory for all electrical systems?
No, it’s not needed for every system. It’s required for things like EV chargers, medical tools, and renewable energy setups. Check local rules to see if your system needs one.
Note: Following rules keeps you safe and avoids fines.
The following information may be of interest to you
The difference between type A and AC RCD
KRC3 B-type residual current circuit breaker
How to Replace a Surge Protector Safely and Efficiently
How to Maintain Molded Case Circuit Breakers Effectively

