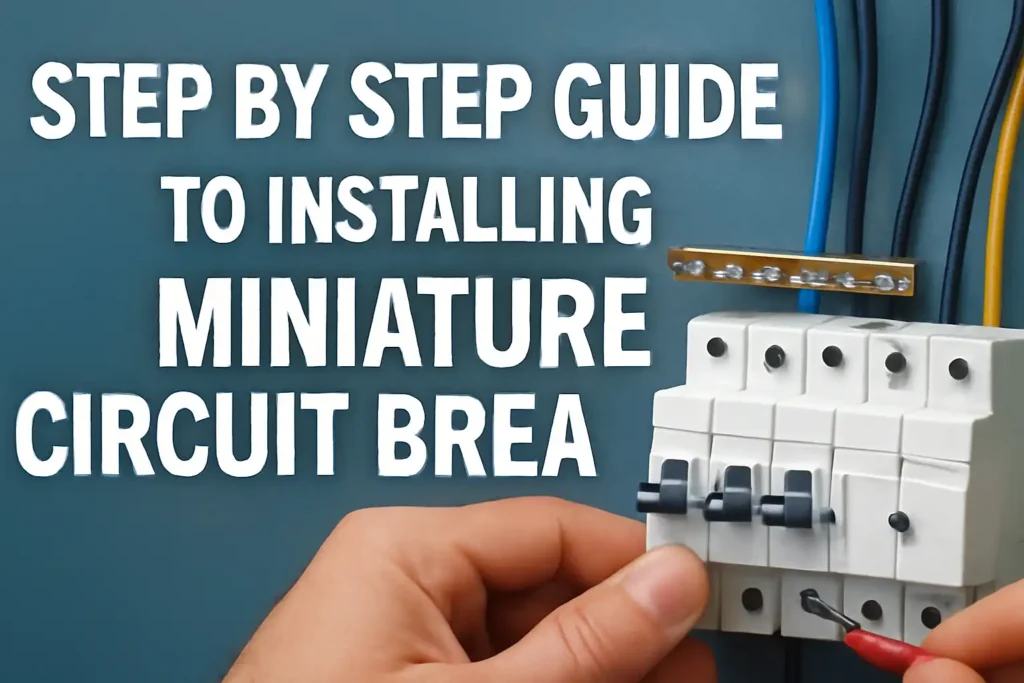
You install miniature circuit breakers by following a clear, step-by-step process that keeps you safe and ensures your electrical system works well. Always turn off the main power before you start. Wear safety gear and check that your panel and breakers meet National Electrical Code standards. Miniature circuit breakers fit easily in panels, save space, and protect your circuits by stopping the flow of electricity when a problem occurs. If you feel unsure at any point, ask a licensed electrician for help.
Key Takeaways
- Always turn off the main power and use a voltage tester before starting any work to stay safe.
- Wear proper safety gear like insulated gloves and goggles to protect yourself from electrical hazards.
- Choose the right breaker that matches your panel’s voltage, current, and load needs for reliable protection.
- Mount breakers securely on the DIN rail and connect wires carefully to prevent loose connections and fires.
- After installation, inspect all connections, replace the panel cover, restore power safely, and test each breaker.
Preparation
Before you install miniature circuit breakers, you need to prepare carefully. Good preparation helps you work safely and finish the job correctly.
Gather Tools
Start by collecting all the tools you will need. Having the right tools makes the job easier and safer. Most electrical professionals recommend the following:
- Flathead and Phillips screwdrivers
- Wire strippers or cable cutters
- Pliers or wrenches
- Voltage tester or multimeter
- Flashlight
- Electrical tape
- Breaker lock (if required)
- Panel labels
Tip: Always use insulated tools when working with electrical panels.
Choose the Right Breaker
You must select a breaker that matches your electrical system. Look at the panel’s voltage, phase, and load type. Calculate the load for both present and future needs. Make sure the breaker’s rated current fits your system and the environment. For example, a breaker may need a higher rating if the panel is in a hot area. Check that the breaker meets National Electrical Code (NEC) and UL standards. Pick a reliable brand and consider features like remote monitoring if needed. If you are unsure, ask a professional for advice.
Turn Off Power
Turning off the main power supply is the most important safety step. Find the main breaker at the top of your panel and switch it off. Use a voltage tester to confirm that the power is off before you touch any wires. Never skip this step, even for small jobs. This prevents electrical shock, injury, or fire.
Note: Always double-check that the power is off by testing outlets or lights nearby.
Safety Gear
Wear the right safety gear every time you work with electricity. Use insulated gloves, safety goggles, and rubber-soled shoes. A hard hat adds extra protection. These items protect you from shocks and injuries. Electrical injuries can be serious or even fatal. Using proper safety gear and following safety rules greatly lowers your risk.
Statistics show that wearing the correct safety gear and following procedures can cut electrical injuries by more than half.
By following these steps, you set yourself up to install miniature circuit breakers safely and correctly.
Remove Old Breaker
Removing an old breaker is a careful process. You must follow each step to keep yourself and your home safe. Old circuit breakers can hide dangers, so always stay alert.
Open Panel
Start by making sure the main power is off. Use a voltage tester to check that no electricity flows in the panel. Only open the panel if you have the right training and safety gear. Many experts warn that even with the main breaker off, the utility cables inside the panel stay live. Touching these cables can cause serious injury or death. Keep others at least six feet away from the panel while you work.
Tip: Never insert fingers or metal tools into the panel. This can cause short circuits or electric shock.
Remove Cover
Use a screwdriver with an insulated handle to remove the panel cover. Always use the correct screws. Pointed or long screws can damage insulation and cause shorts. Hold the cover firmly and set it aside in a safe place. Do not leave the panel open if untrained people are nearby. If you see tape over any breaker switches, remove it. Tape is unsafe and can hide problems.
- Always turn off the main breaker before removing the cover.
- Never move wires or push conductors aside to see labels.
Disconnect Wires
Find the wires connected to the old breaker. Use a screwdriver to loosen the terminal screws. Pull the wires out gently. Do not tug or twist them. Old breakers may not trip during overloads, which can lead to overheating or fire. Removing the breaker lets you check for damage or signs of overheating.
- Only qualified people should disconnect wires in a panel.
- Do not touch any other parts inside the panel.
Take Out Breaker
Grip the old breaker and carefully pull it out of its slot. Some breakers snap onto a rail, while others slide out. Check for signs of burning or wear. If the panel is over 50 years old, replacement is safer than repair. Insurance companies often refuse coverage for homes with outdated panels because of fire risks.
Note: If you feel unsure at any step, stop and call a licensed electrician. Removing a breaker exposes live parts that carry deadly current.
By following these steps, you prepare the panel for the next stage to install miniature circuit breakers safely.
Install Miniature Circuit Breakers
You have removed the old breaker and prepared your panel. Now you are ready to install miniature circuit breakers. This step is important for safety and reliable power. Follow each part carefully to make sure your installation works well and meets all standards.
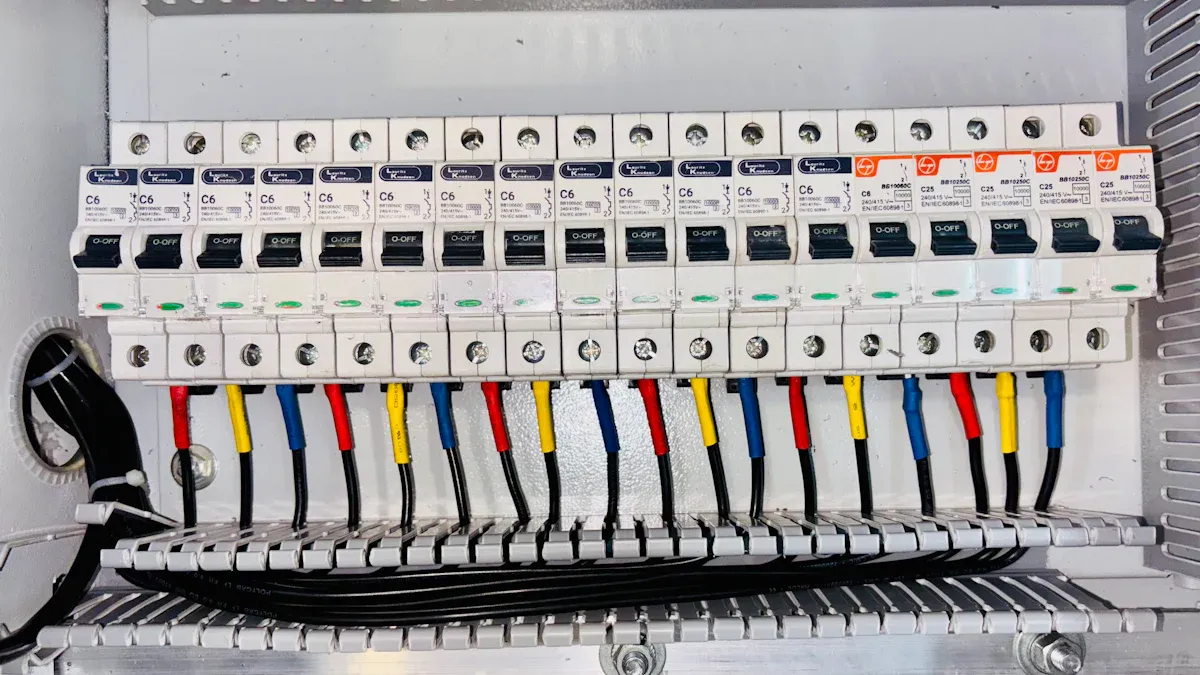
Mount on DIN Rail
Start by mounting the new breaker on the DIN rail. The DIN rail is a metal strip inside the panel that holds breakers and other devices. You need to follow these steps for a safe and stable installation:
- Choose the correct DIN rail type and size for your panel.
- Make sure the mounting surface is clean, flat, and level.
- Fix the DIN rail tightly with screws or clips. The rail should not wobble or move.
- Check the manufacturer’s load capacity for the rail. Do not overload it.
- Think about the environment. High temperatures can affect the rail and the breaker.
- Use support brackets if needed. These help keep the rail steady.
- After mounting the rail, snap the miniature circuit breaker onto it. You should hear a click when it locks in place.
- Clean the rail with a dry cloth and check for cracks or damage before you finish.
Tip: A secure DIN rail keeps your breakers safe and organized. It also makes future maintenance easier.
DIN rails help you arrange breakers neatly. They allow you to add or move breakers without trouble. Secure mounting prevents loose connections, which can cause electrical failures or hazards. The compact design of miniature circuit breakers fits well on standard 35 mm DIN rails, saving space and improving airflow.
Connect Wires
Next, connect the wires to your new breaker. Always follow the correct wiring orientation. The “line” side brings power in, and the “load” side sends power out to your circuits. Check the labels on the breaker and panel.
- Use the right wire size and type for your circuit. Wire size depends on the voltage and current your circuit needs. Standards like American Wire Gauge (AWG) and IEC 60228 help you choose.
- Make sure wires are rated for the voltage and temperature in your panel. Wet or hot areas may need special insulation.
- Strip the wire ends cleanly. Do not leave extra copper exposed.
- Insert the wire into the terminal and tighten the screw firmly. Loose connections can cause overheating or fires.
- Do not force too many wires into one terminal. Use crimped ferrules if needed for a secure fit.
- Keep wires neat and label them clearly. Use color codes for safety—red for positive, black for ground, green for safety ground.
- Route grounding wires separately from power wires. Connect all grounds to a dedicated busbar.
Note: The National Electrical Code (NEC) and IEC standards give detailed rules for wire size, insulation, and grounding. Following these rules keeps your installation safe and legal.
Proper wiring is critical when you install miniature circuit breakers. Secure and well-insulated connections prevent voltage drops and hazards. Organized wiring also makes troubleshooting easier later.
Secure Breaker
After wiring, make sure the breaker is secure in its slot. A loose breaker can cause problems or even fail during use. Here is how you do it:
- Press the breaker firmly onto the DIN rail until it snaps into place.
- Tighten all terminal screws. Check that the wires do not move when you tug them gently.
- Inspect the breaker handle. It should move smoothly and feel solid.
- Look for any signs of damage, like cracks or burn marks.
- Test the breaker by switching it ON and OFF. It should click clearly and stay in position.
Properly secured breakers prevent overloads and hazards. Regular inspection and testing help you catch problems early.
A well-mounted and secure breaker keeps your electrical system safe. The organized layout on the DIN rail improves airflow and makes future checks easier. If you notice any issues, such as a mushy handle or trouble resetting the breaker, replace it right away.
By following these steps, you install miniature circuit breakers safely and correctly. Always use the right breaker type and rating for your load. Tight connections and secure mounting protect your home and equipment from electrical risks.
Final Checks
After you install miniature circuit breakers, you need to make sure everything works safely. This last step helps you avoid problems like overheating or electrical failure. Follow these steps to finish your project with confidence.
Inspect Connections
Look at every wire and terminal inside the panel. Tug each wire gently to check if it stays in place. Loose wires can cause sparks or heat. Use a flashlight to see all corners of the panel. Make sure you do not see any exposed copper or damaged insulation. If you find a loose screw, tighten it with an insulated screwdriver. Double-check that each breaker sits firmly on the DIN rail.
Tip: Secure connections help prevent fires and keep your system safe.
Replace Cover
Place the panel cover back over the breakers. Use the correct screws and tighten them evenly. The cover should fit snugly without gaps. A secure cover protects you and others from accidental contact with live parts. Label each breaker if you have not done so already. Clear labels make future repairs easier.
- Never leave the panel open after you finish your work.
- Keep children and pets away from the panel area.
Restore Power
Stand to the side of the panel. Turn the main breaker back on. Listen for any unusual sounds like buzzing or crackling. If you hear anything strange, turn the power off right away and check your work. Use a voltage tester to confirm that power has returned to the circuits.
Test Breaker
Switch each new breaker ON and OFF. The handle should move smoothly and click into place. Plug in a small device or lamp to test the circuit. If the breaker trips or does not reset, check your wiring. Sometimes, you may need to troubleshoot or call a professional.
Testing your breakers after you install miniature circuit breakers ensures your system works as it should.
By following these final checks, you help protect your home and keep your electrical system reliable.
You have learned the key steps to safely install miniature circuit breakers. Always focus on safety by turning off the main power, using the right tools, and wearing protective gear. Choose breakers that match your system and follow all instructions closely. Regularly check your panel for loose wires or signs of damage. Use checklists for self-inspections, but remember that only a qualified electrician can spot hidden problems and ensure your system meets all safety codes. Professional inspections help prevent hazards and keep your home safe.
FAQ
How do you know which miniature circuit breaker to use?
You should check your panel’s voltage and current needs. Look at the load you want to protect. Always match the breaker’s rating to your circuit. If you feel unsure, ask a licensed electrician for help.
Can you install a miniature circuit breaker without turning off the main power?
No, you must turn off the main power before you start. This step keeps you safe from electric shock. Always use a voltage tester to confirm the power is off.
What tools do you need to install a miniature circuit breaker?
You need insulated screwdrivers, wire strippers, pliers, a voltage tester, and a flashlight. Some jobs may need electrical tape or panel labels. Using the right tools helps you work safely and quickly.
Why does my new breaker keep tripping?
Your breaker trips when it senses too much current. This can happen if you have a short circuit, a ground fault, or too many devices on one circuit. Check your wiring and reduce the load.
How often should you check your circuit breakers?
You should inspect your breakers at least once a year. Look for loose wires, burn marks, or signs of wear. Regular checks help you catch problems early and keep your system safe.
The following information may be of interest to you
How to Safely Add a 220V Circuit Breaker to Your Panel
How to safely remove circuit breakers from distribution boxes
8 Big Benefits of Upgrading to Miniature Circuit Breakers

